Final
0.Package Design Update
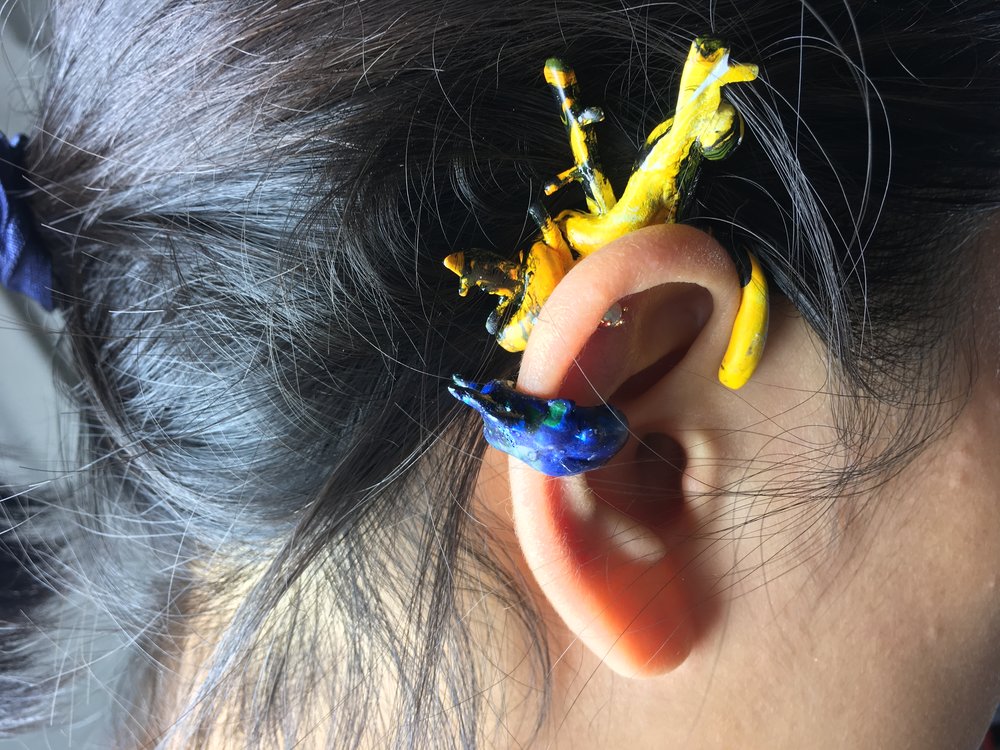
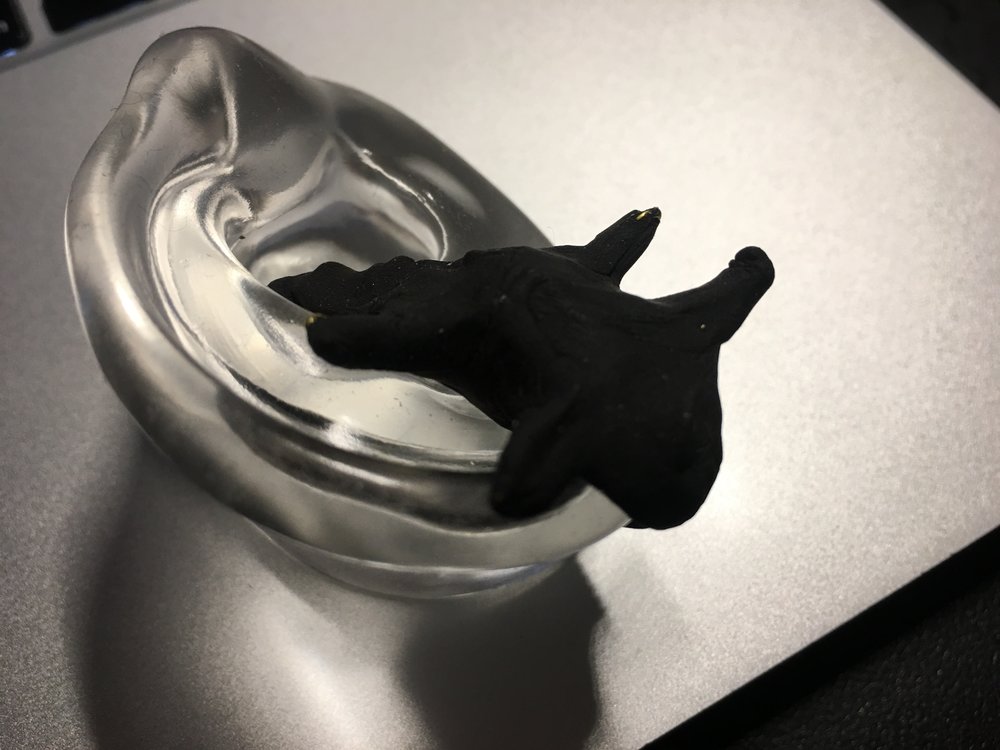
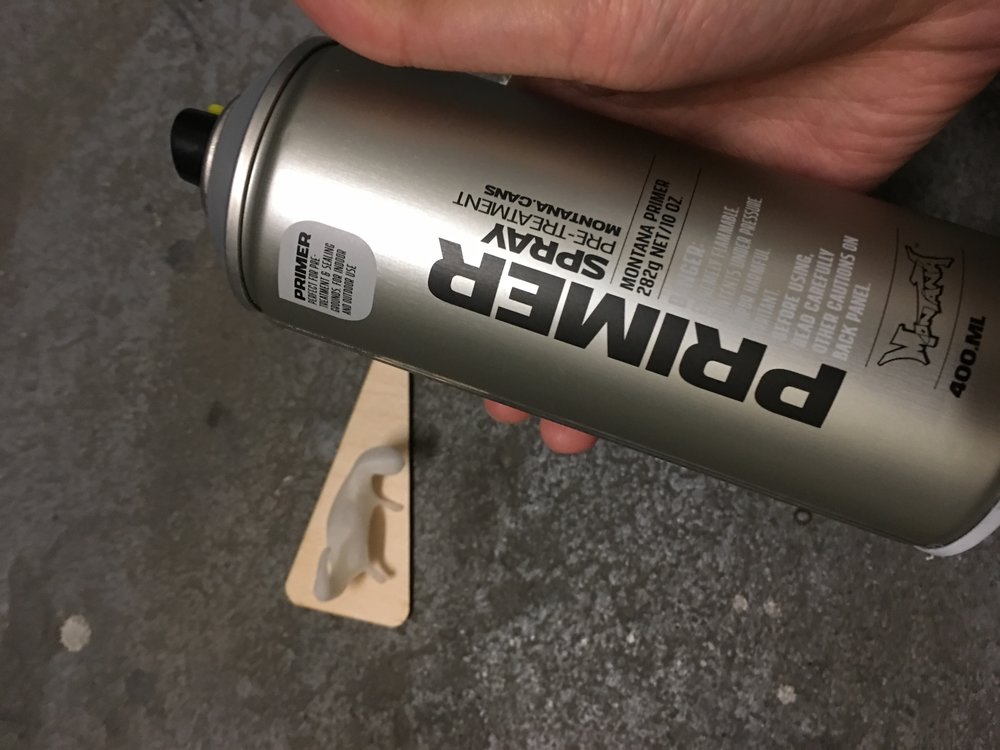
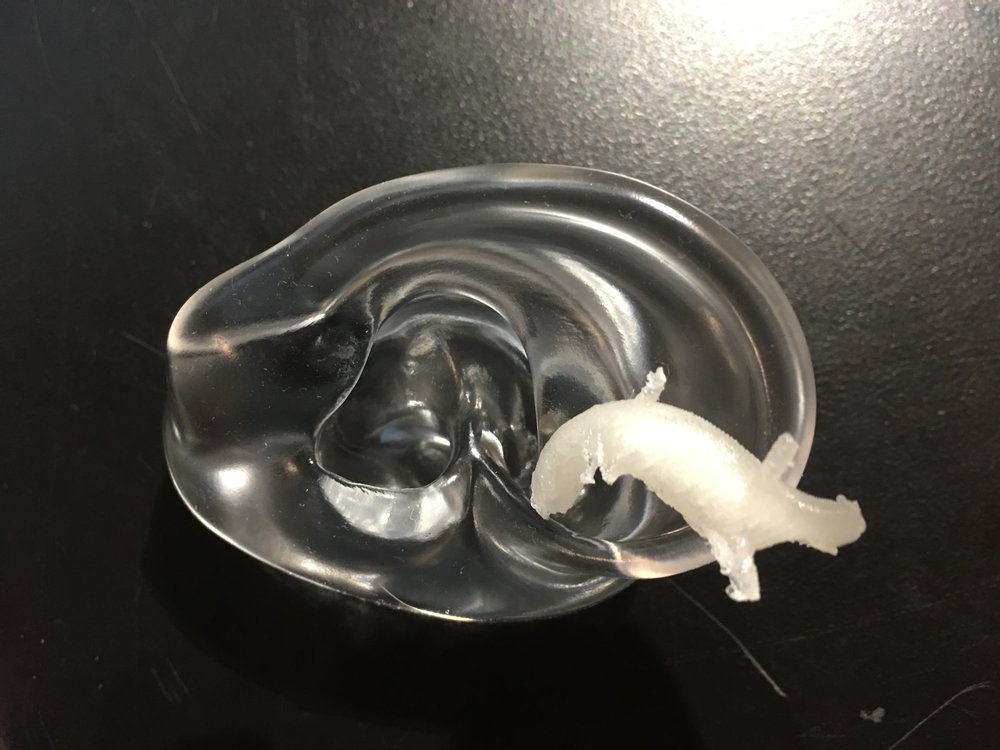
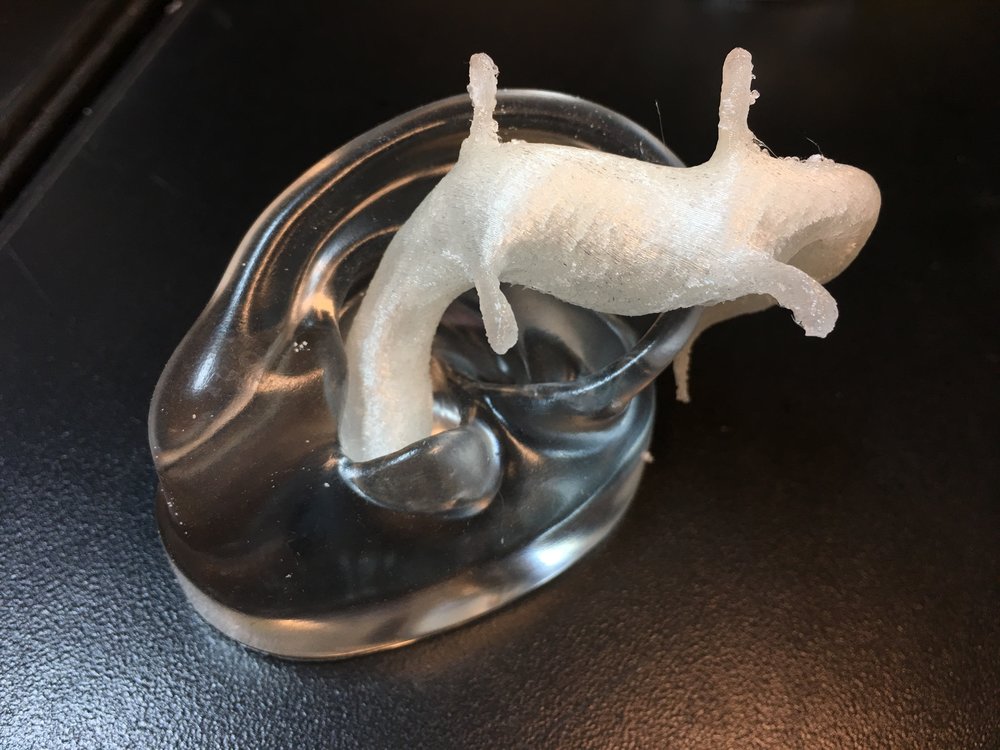
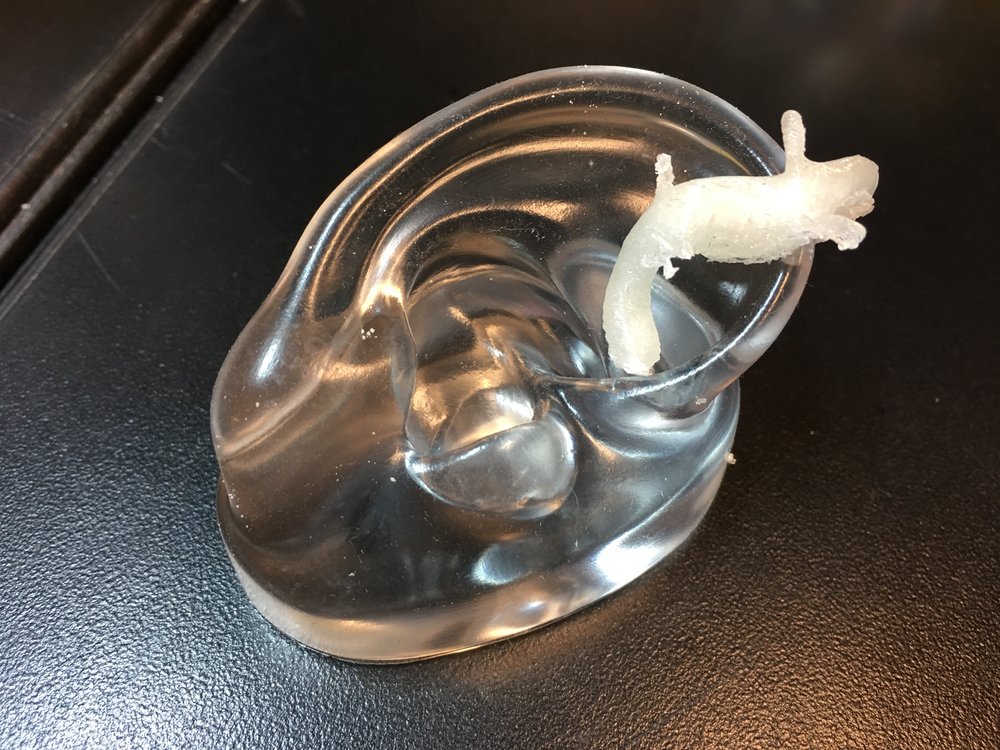
Printed out the illustrations of the creatures, and laser-cut ear template for display. Meanwhile, wax polished resin stone, so it is more smooth and shiny.


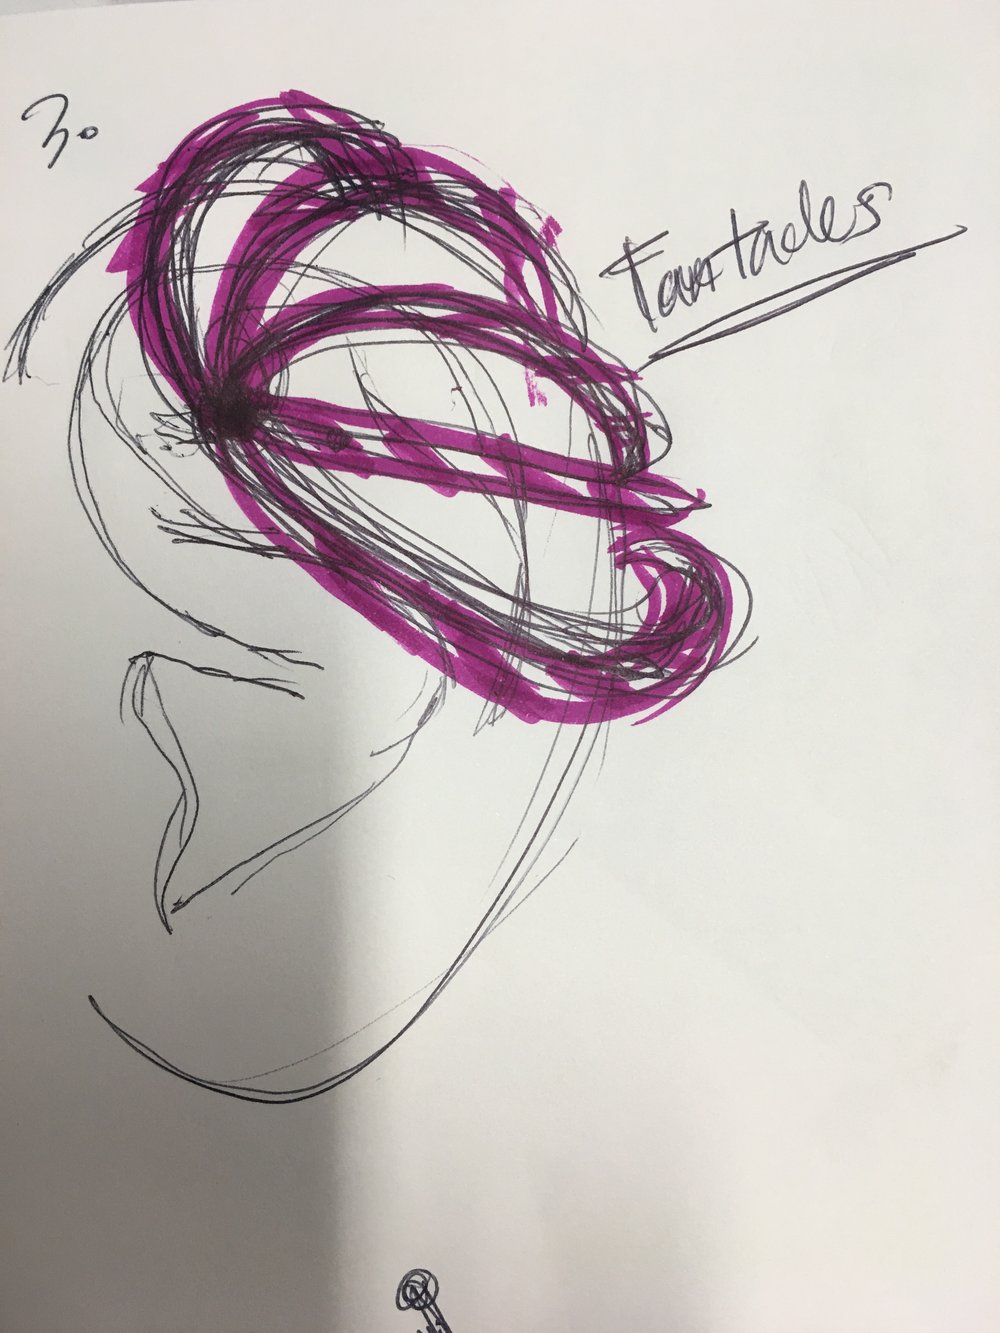
1. New creatures


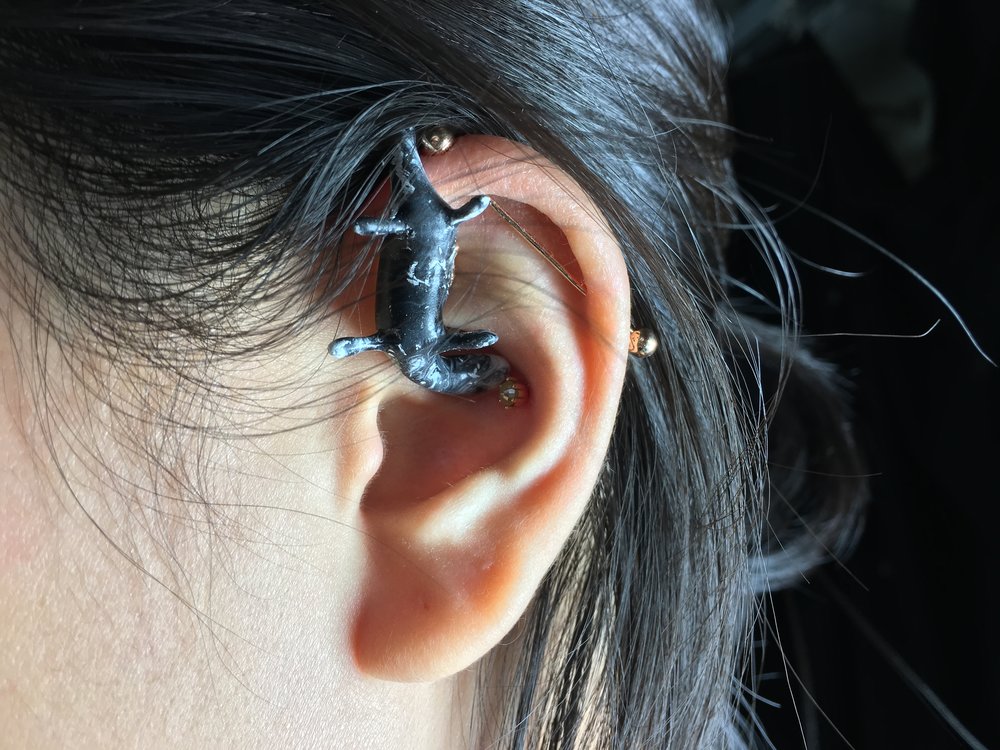
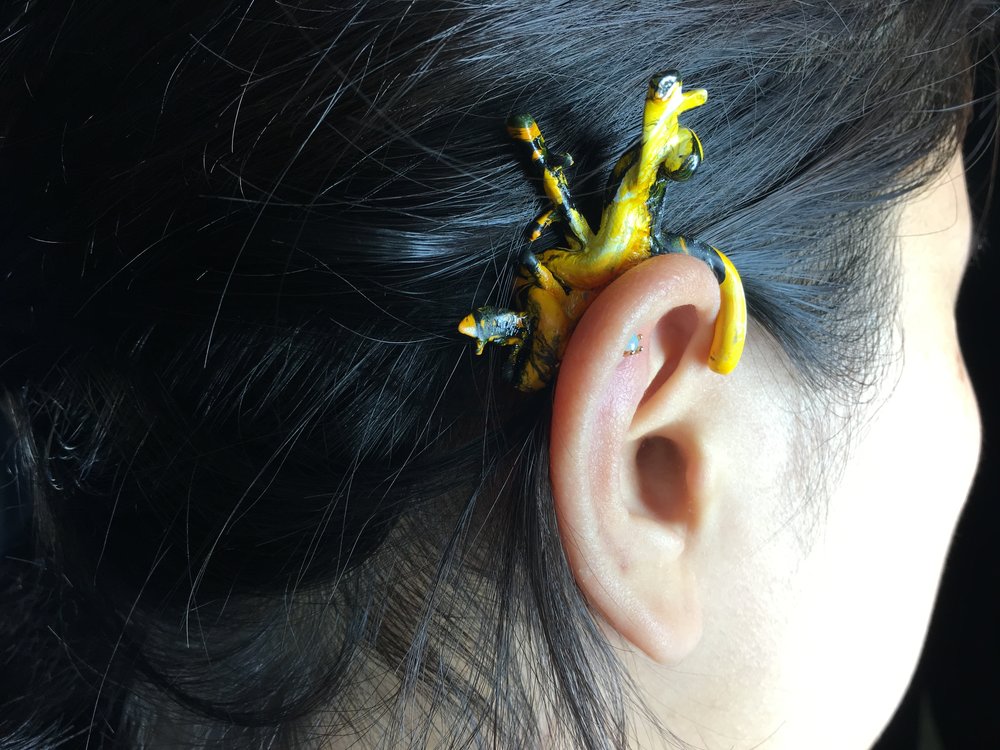
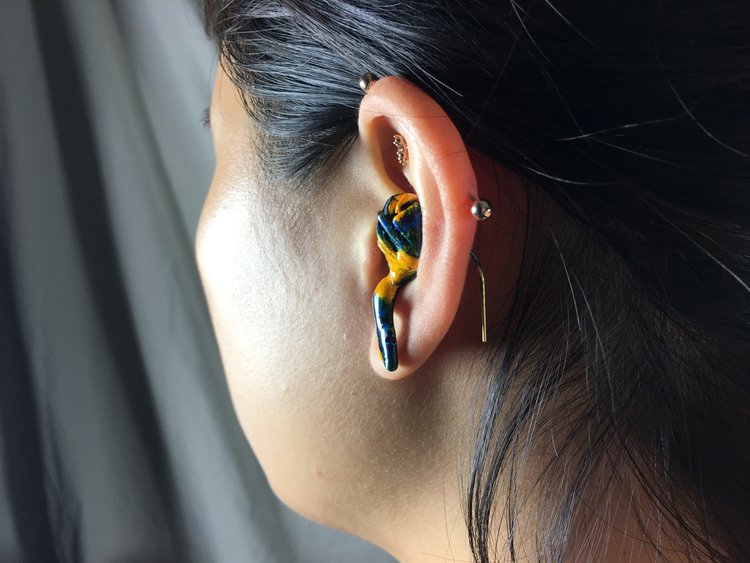
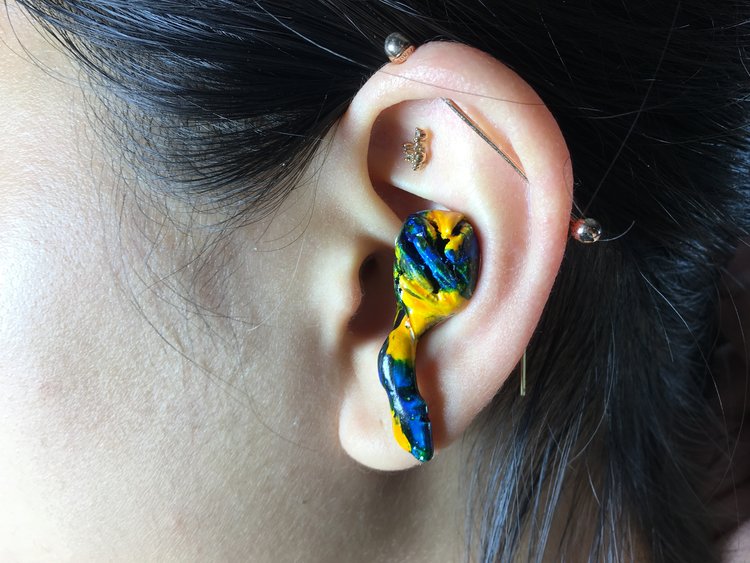
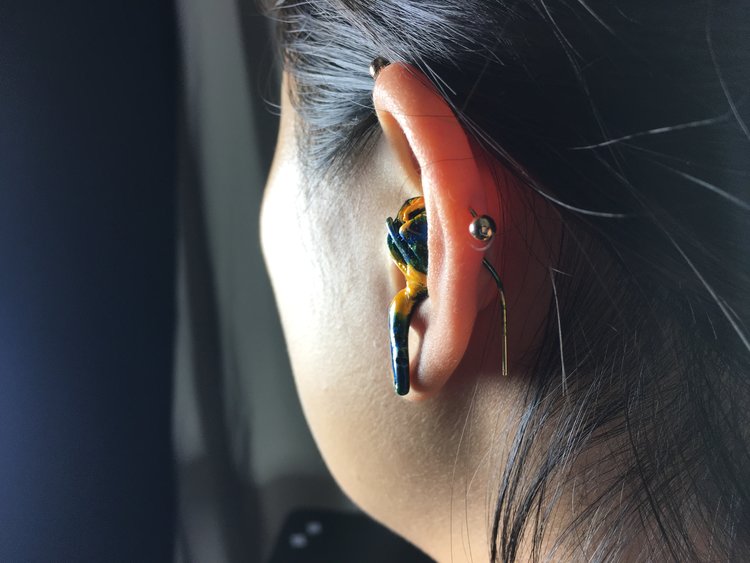
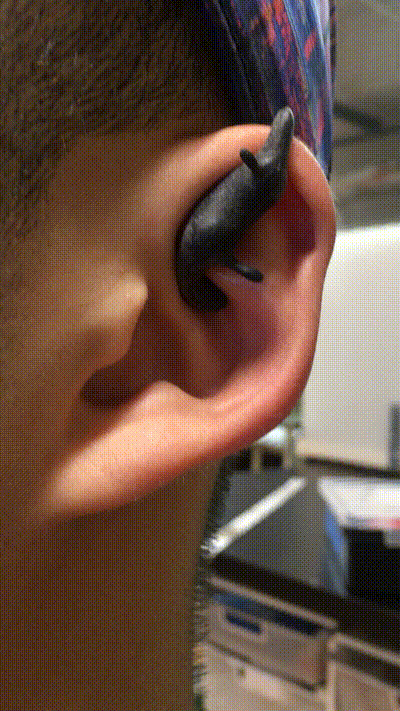
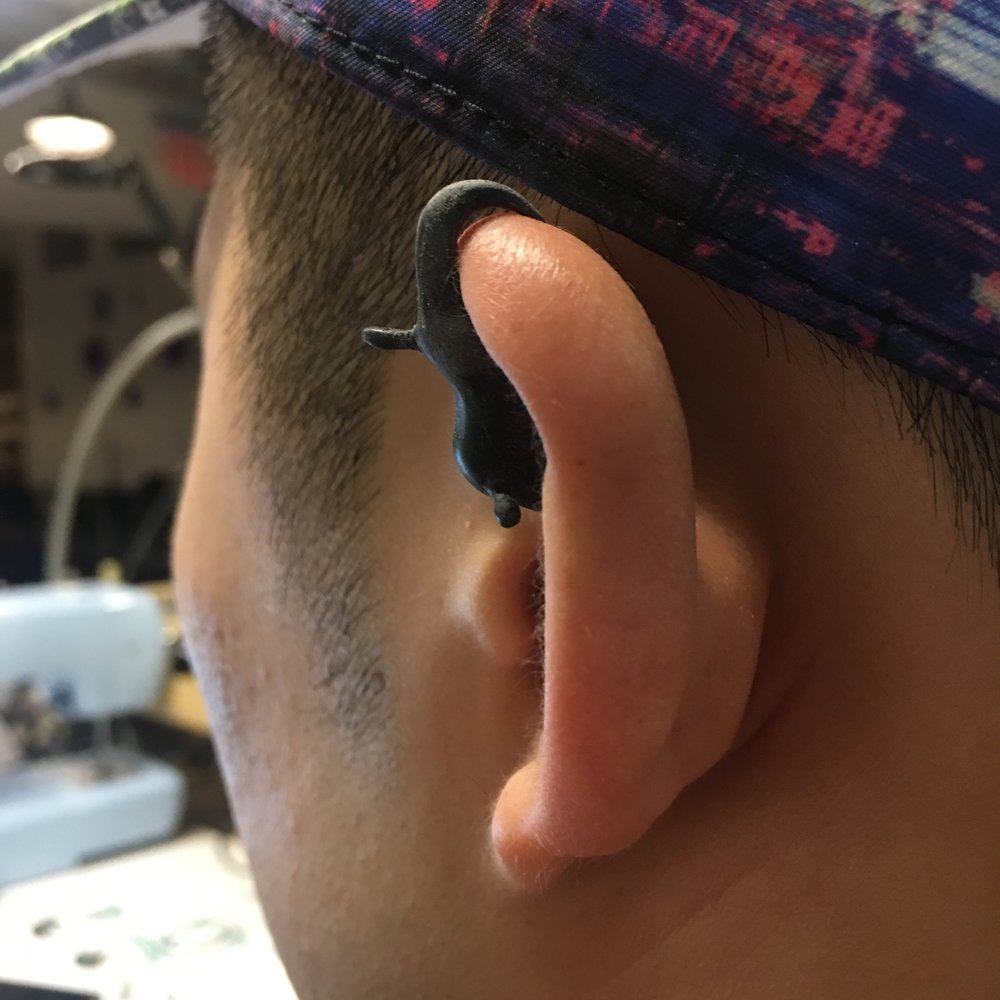
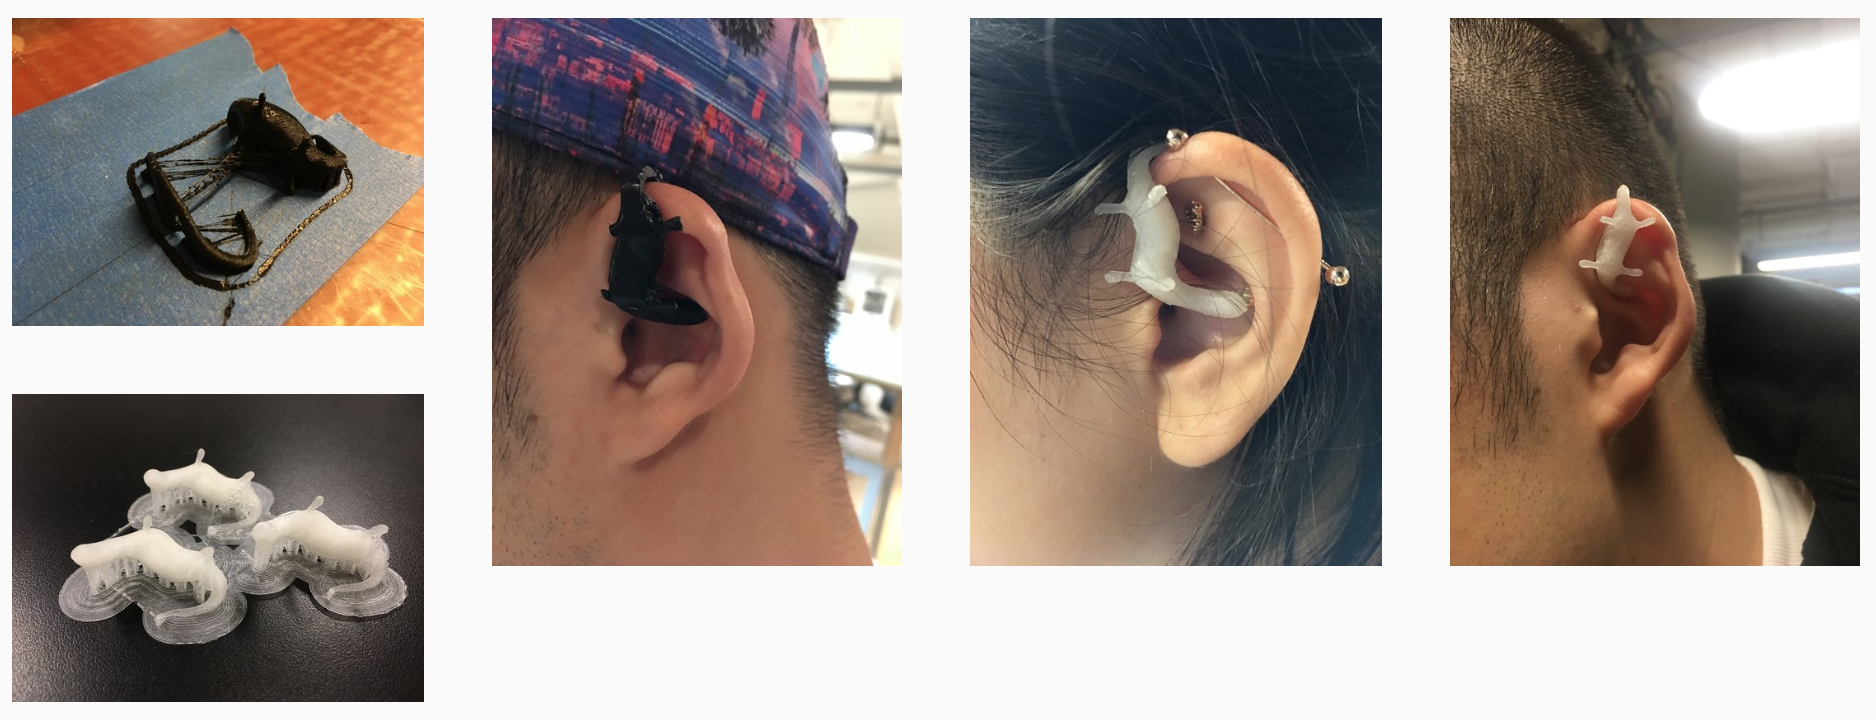
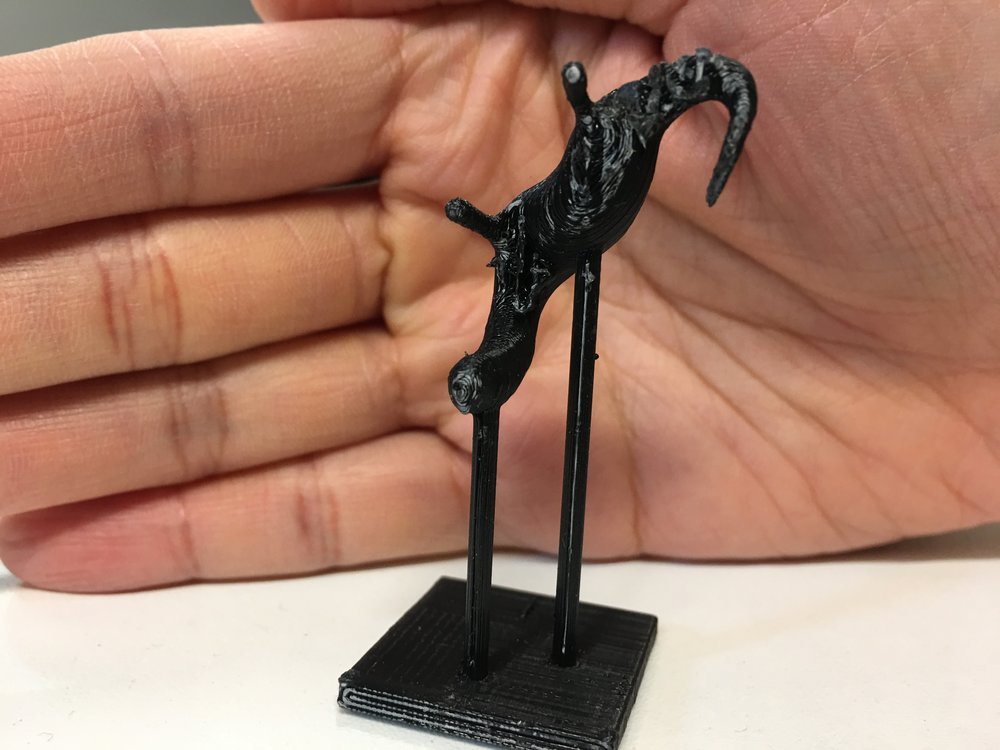
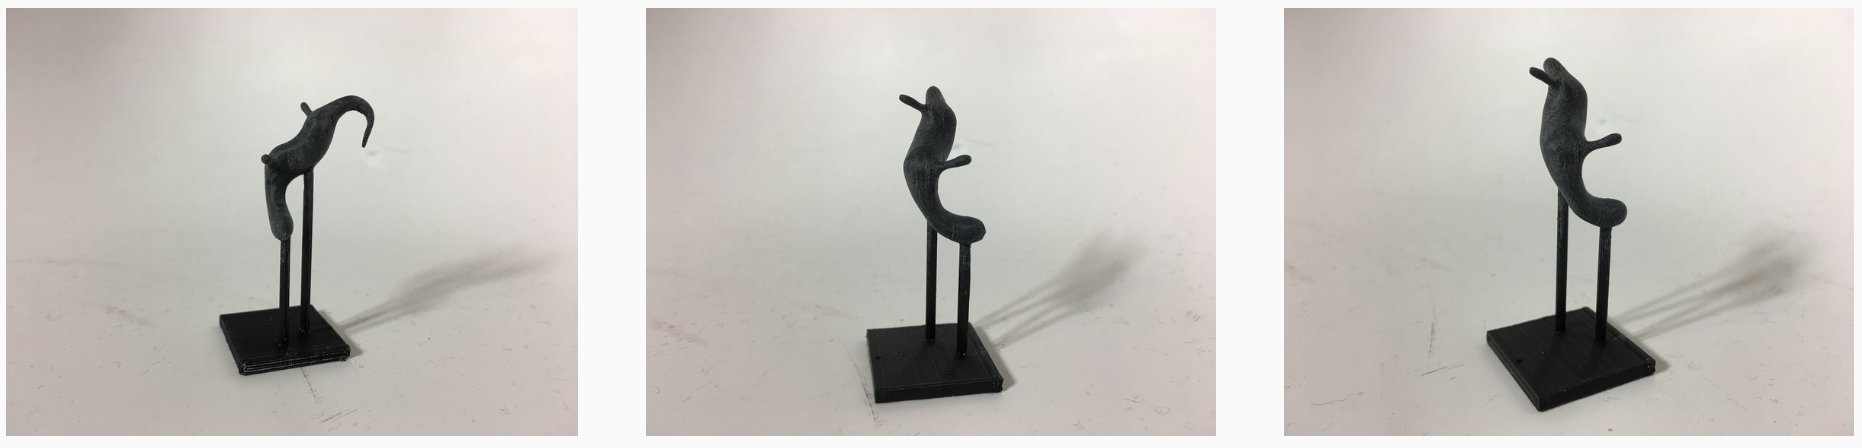
Made 3 more shapes in Oculus Medium, tried to make more general fitting earrings that everyone can wear. Inspired by ear hugger, ear jacket shapes. and put pin to a piercing so person just can wear like piercings. Printing pin with a toy didn’t go well since it was too fragile, I broke all of them while sanding. I switched to drill a hole and put a brass tube into the hole.
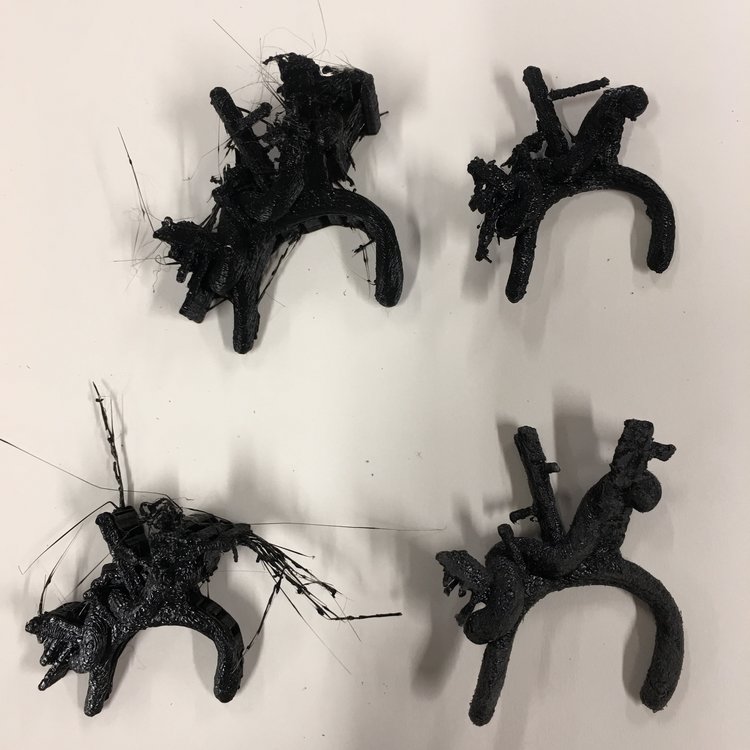

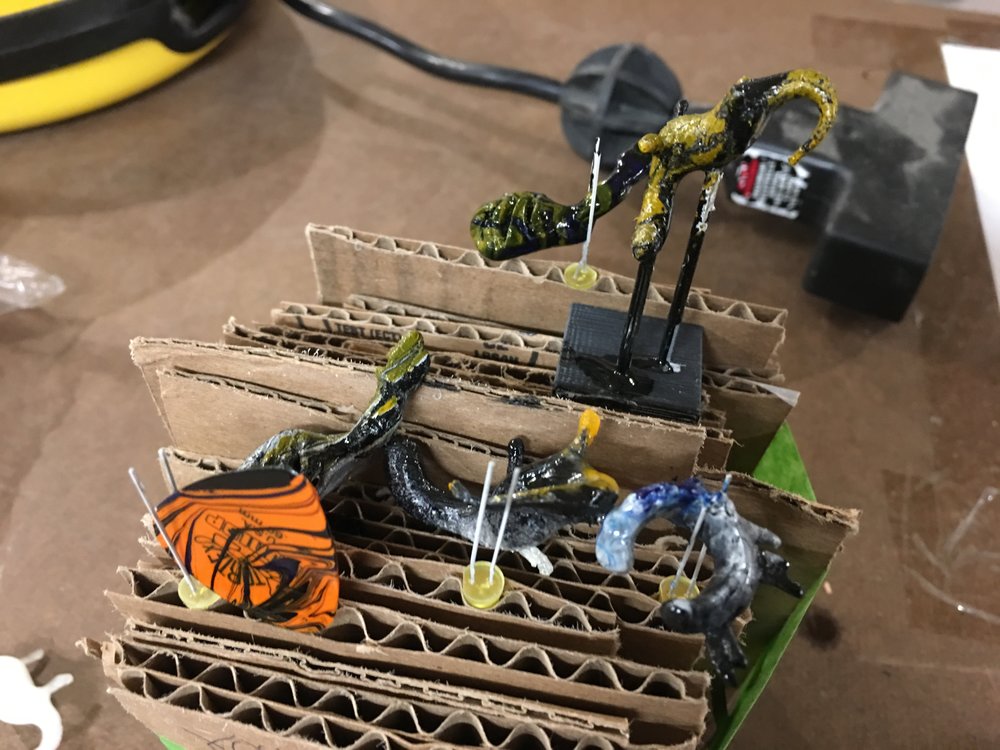
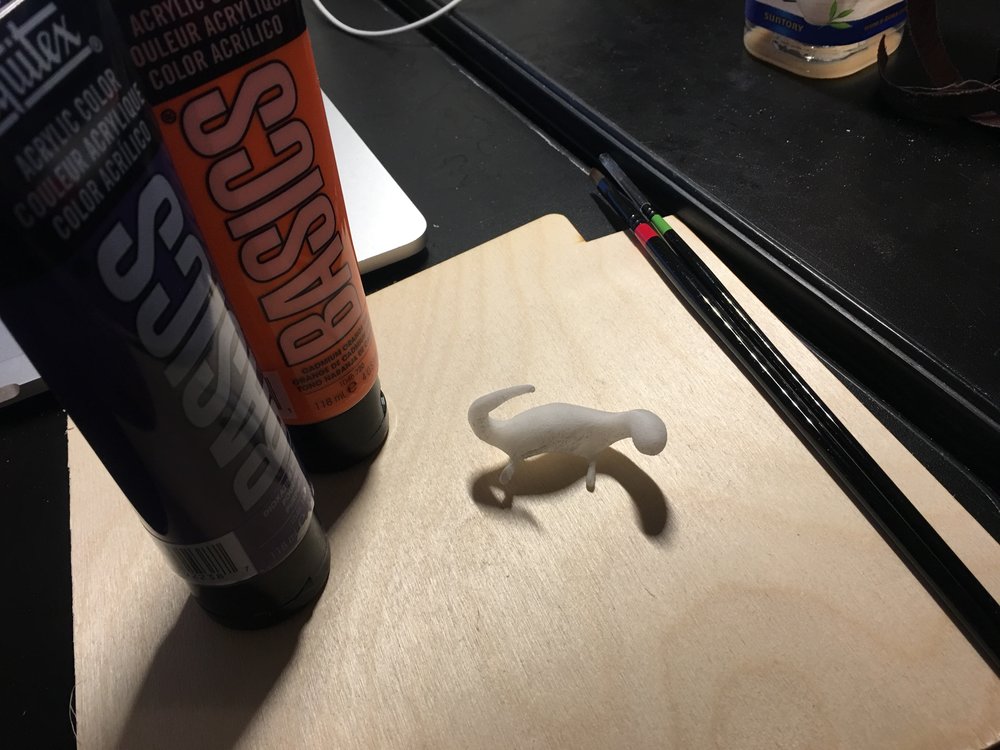
Printed them, sanded them, and put transparent plastic primer for coloring. I tested water marbling, but the paints are also translucent, turned out too dark.
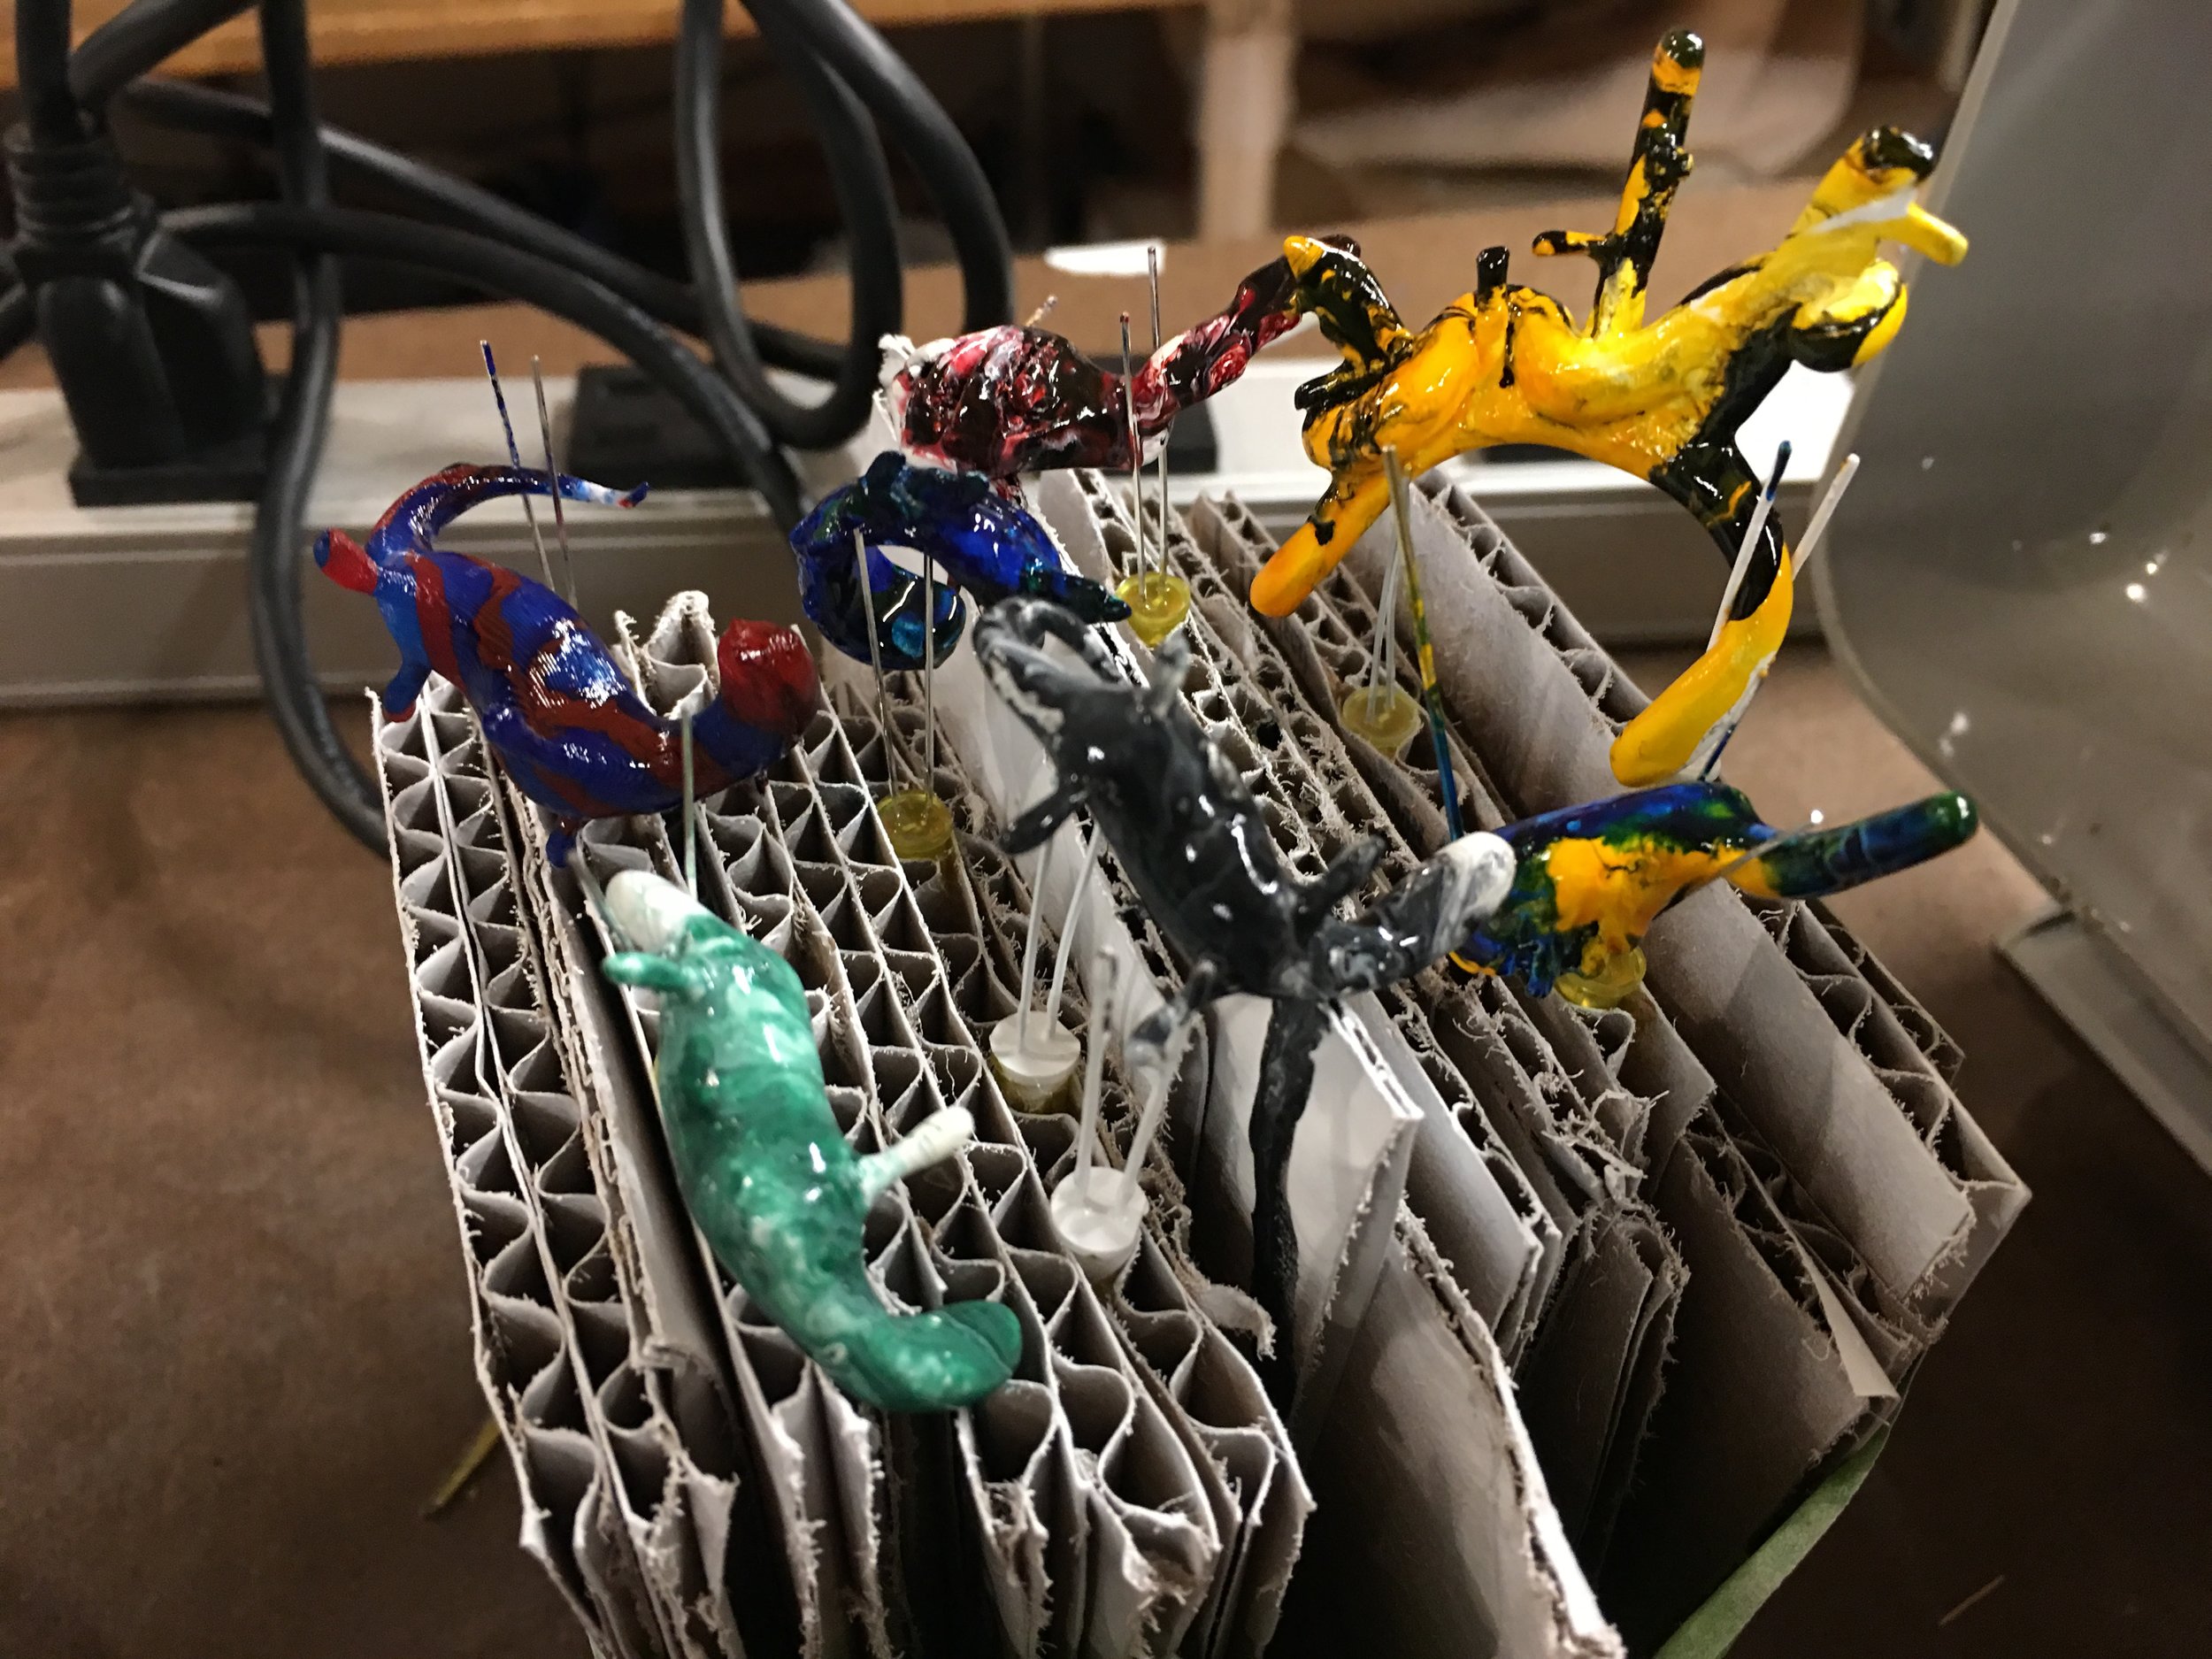
So, sprayed white primer 2-3 times, sanded the surface, water marbled again. The coloring was pretty satisfying / okay to me, but I didn’t have time to put vanish on them. I heard the coloring was too dirty during the critique and be recommended to use solid color so people can focus on the shape, rather than the color. I guess I can try to polish them after coloring, it might make people feel better than this sticky feeling, also I definitely try solid colorings. (If I have more time in the future.) Also, the ear film was moving inside of the package, I might try to use vacuum foam of the silicone ear and put them in the box to make it more stable. (Ben + Pedro feedbacks)

October 20, 2018
Package Design
0. Amber making - continued from last week
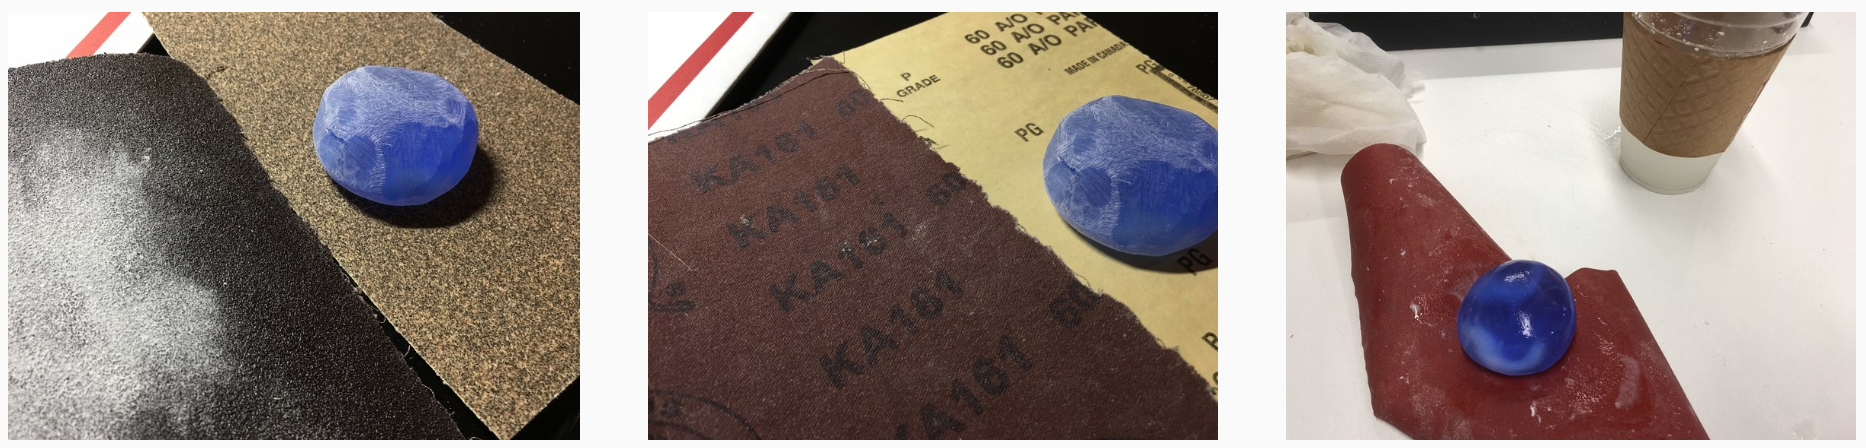
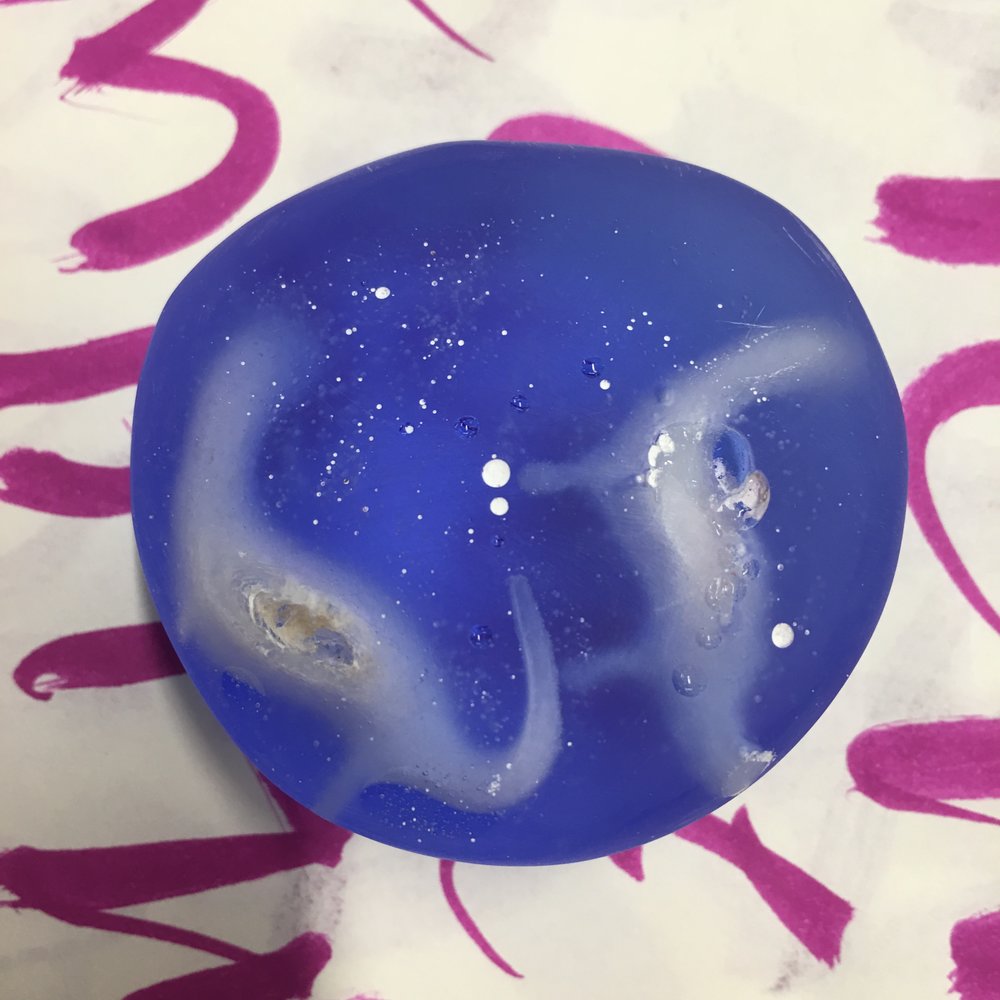
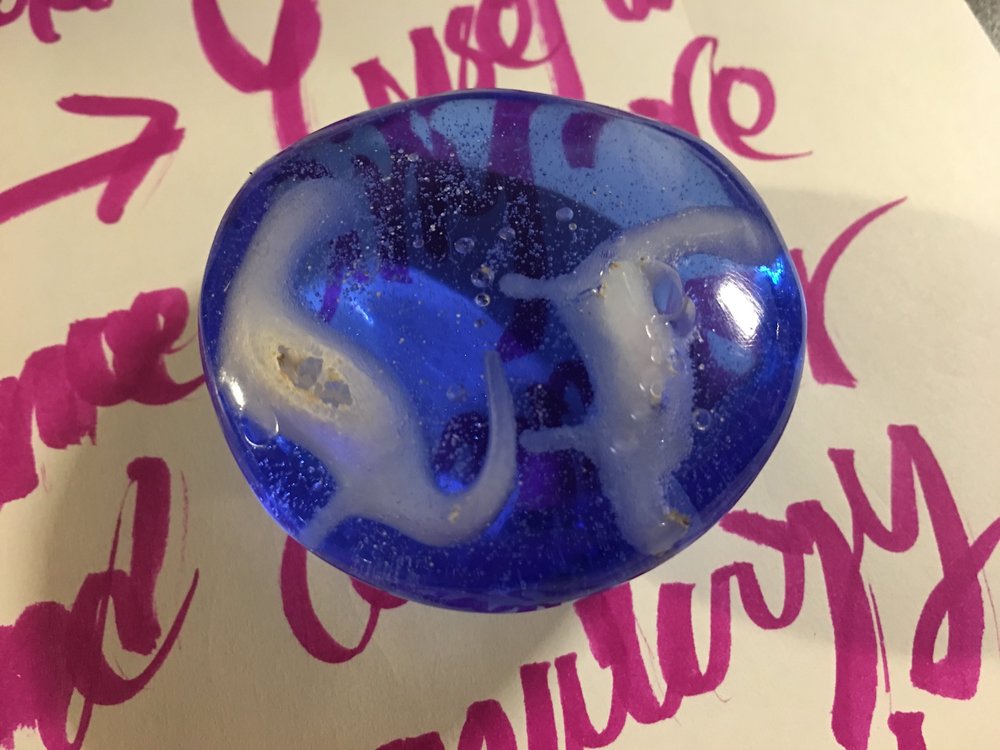
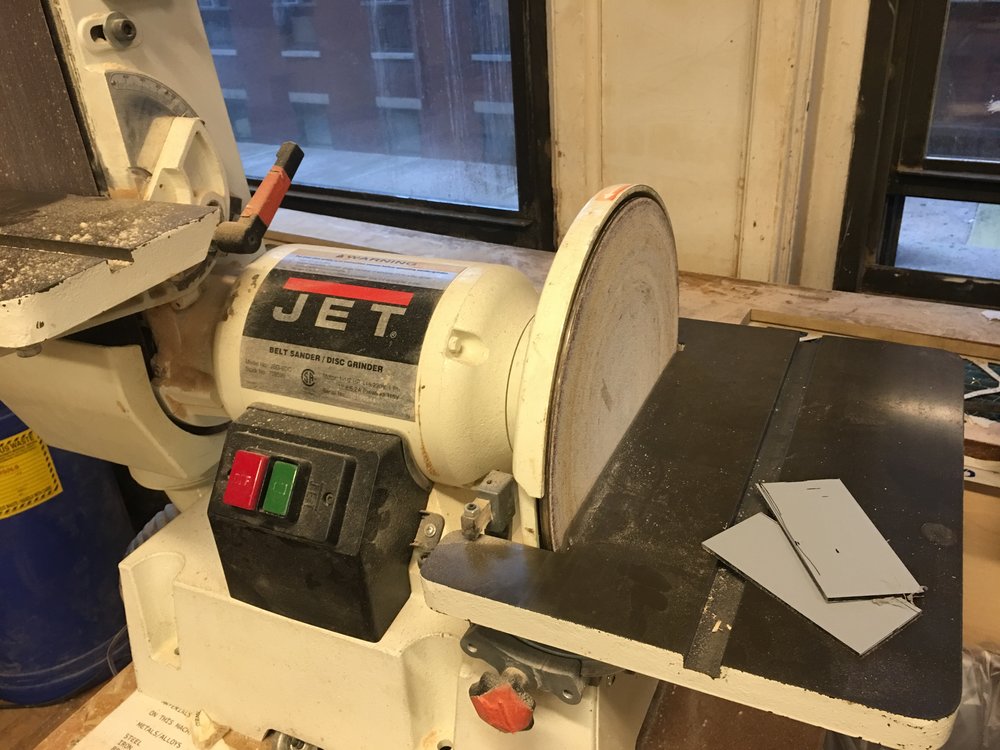
Last week I ended up with putting resin in a cup with two Nesi’s. They are totally cured, so I cut them with bandsaw, and sanded. (KA161 ->60 A/0 something ->P320 PB1) As we watched last time, I water sanded with the last sand paper. I still need to wax polish them. Anyway, I feels so satisfying like touching a pebble.
- New sketches (including packaging idea)
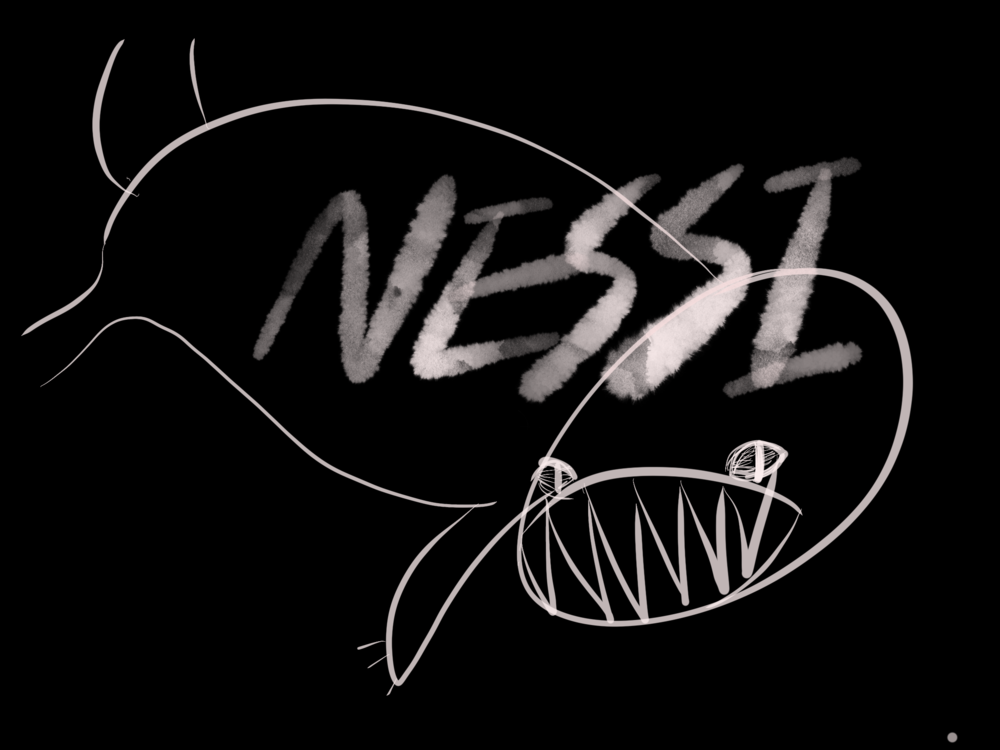
I struggled a lot with Nesi’s curve and scaling, so I changed the approach to benchmark the structure of ear piercings. There are a lot of attractive jewelry structure while keeping a simple structure and one size for everyone. Since I already have Nesi, I will choose three of them.
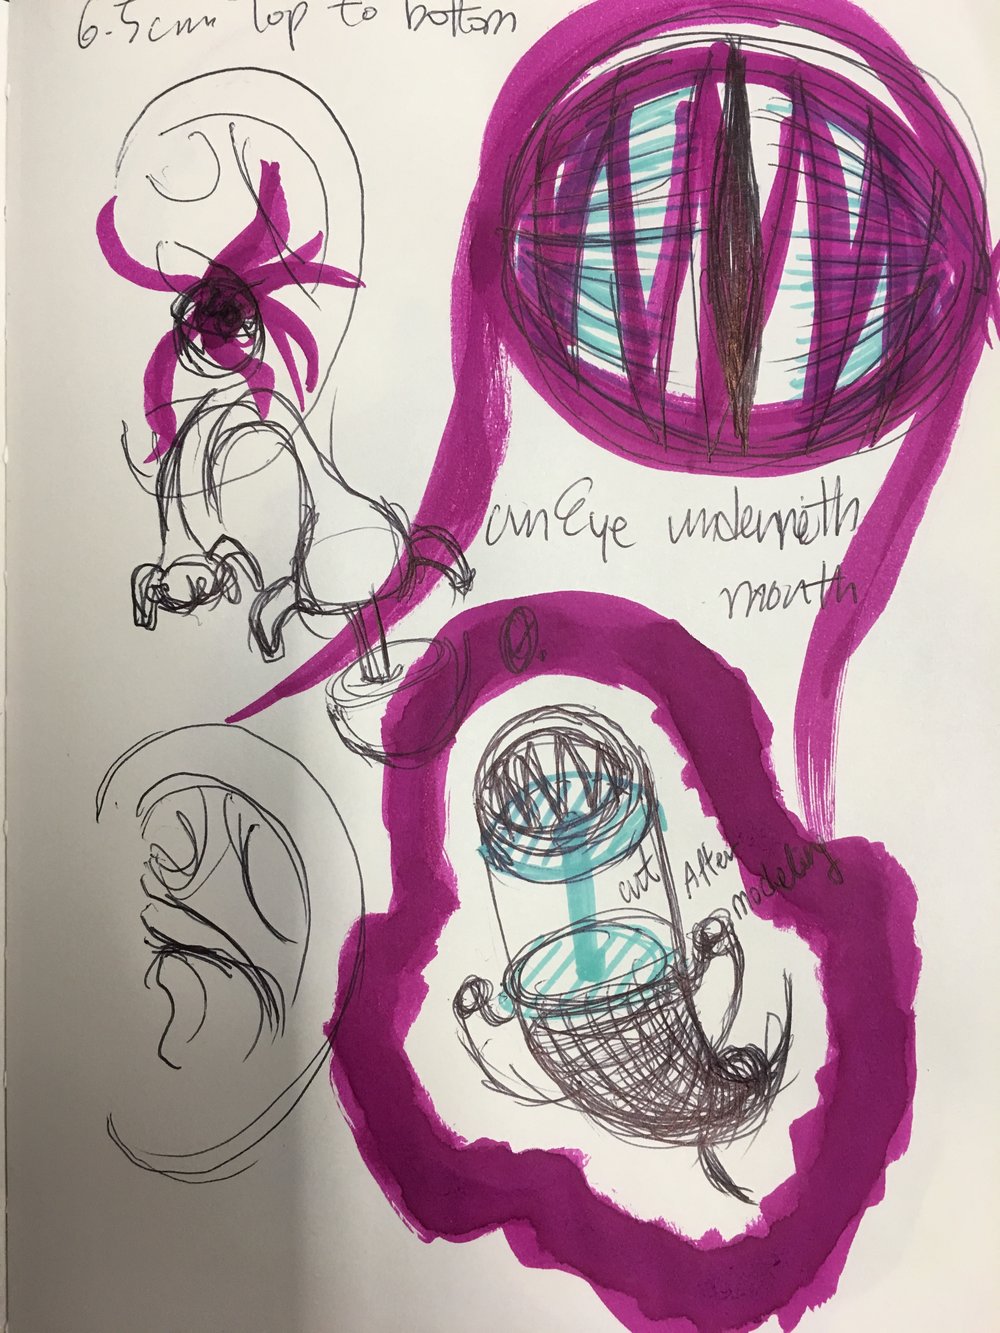

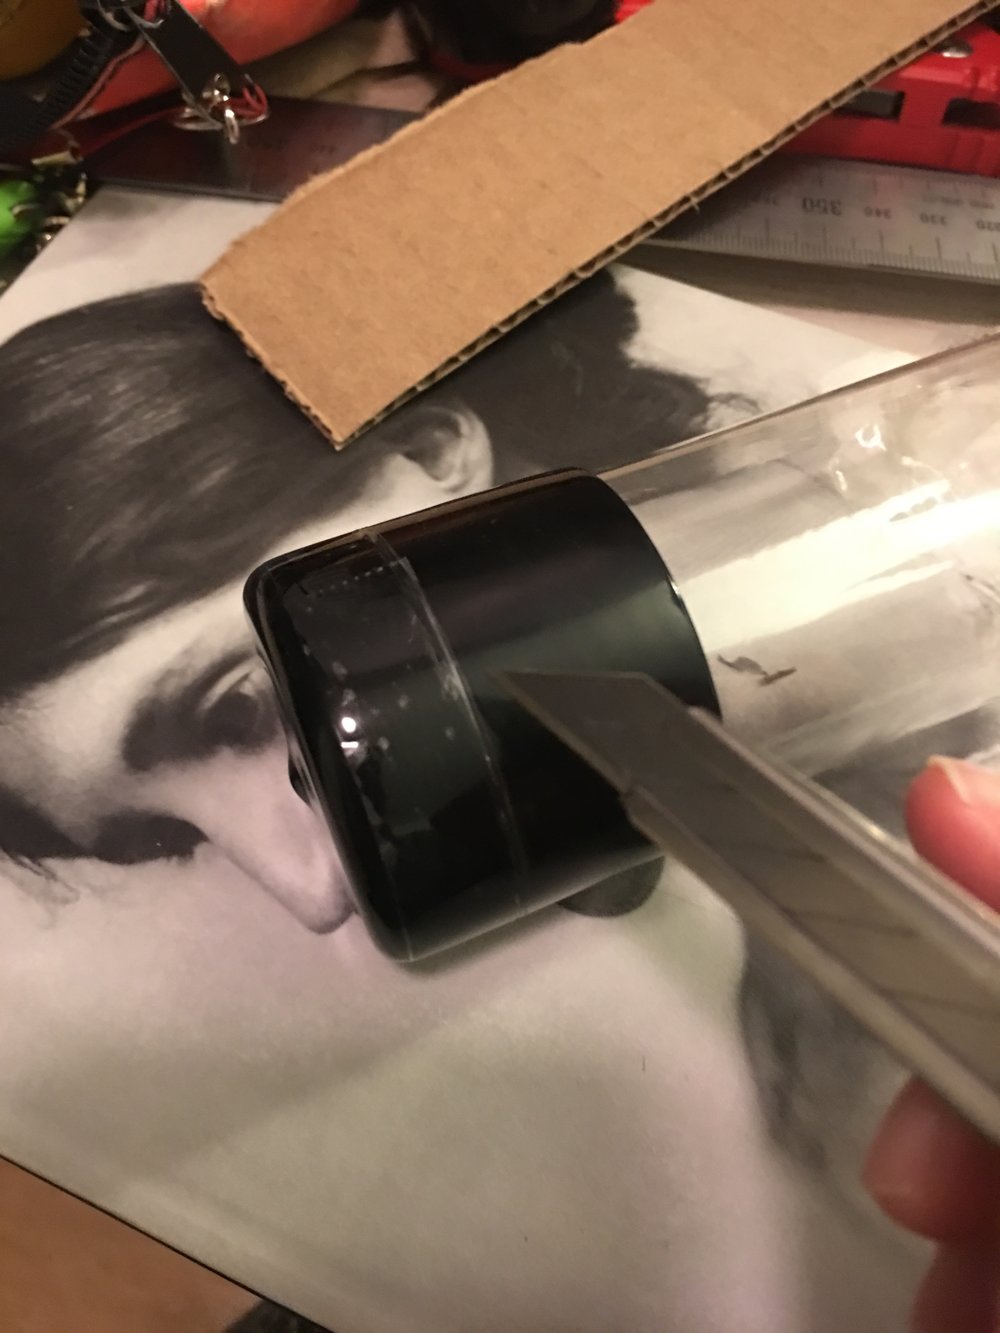
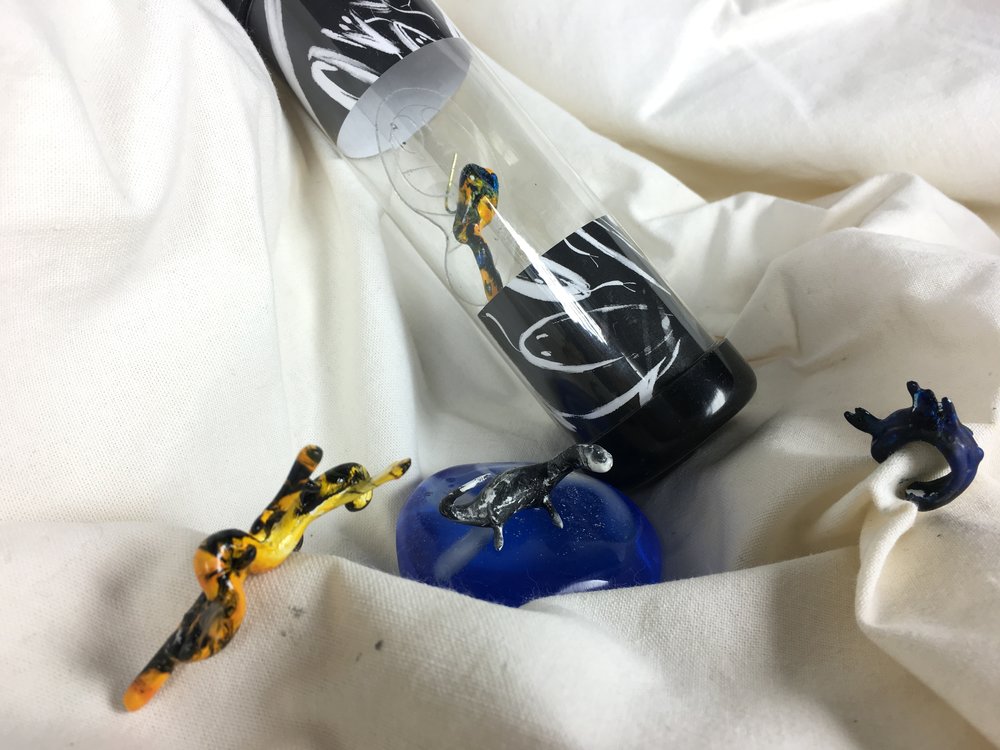
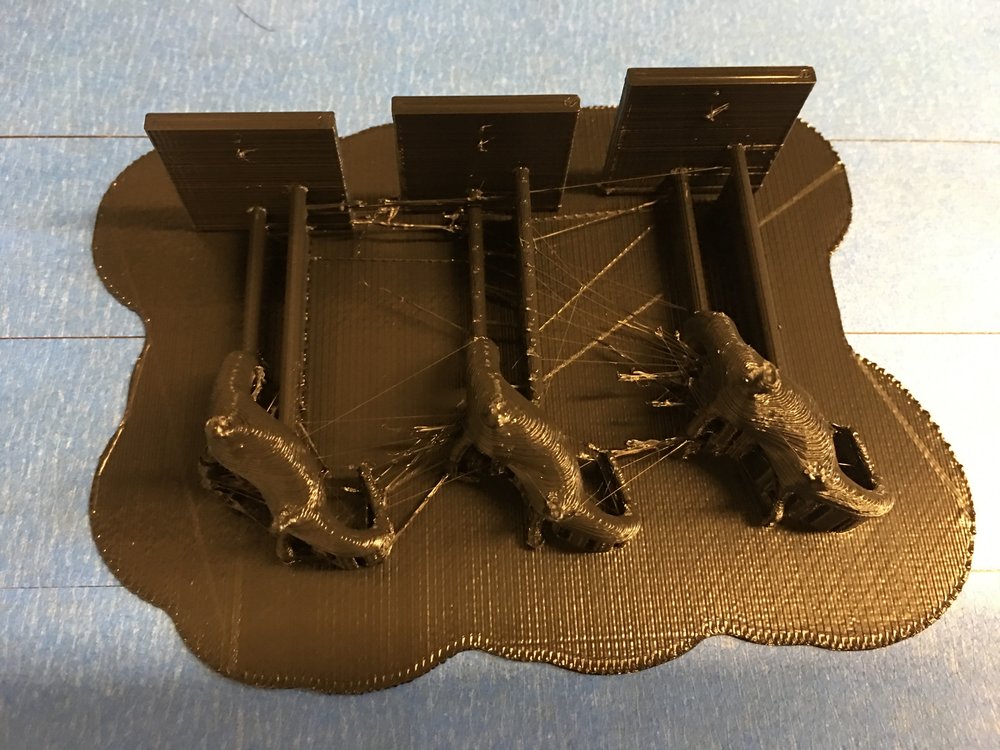
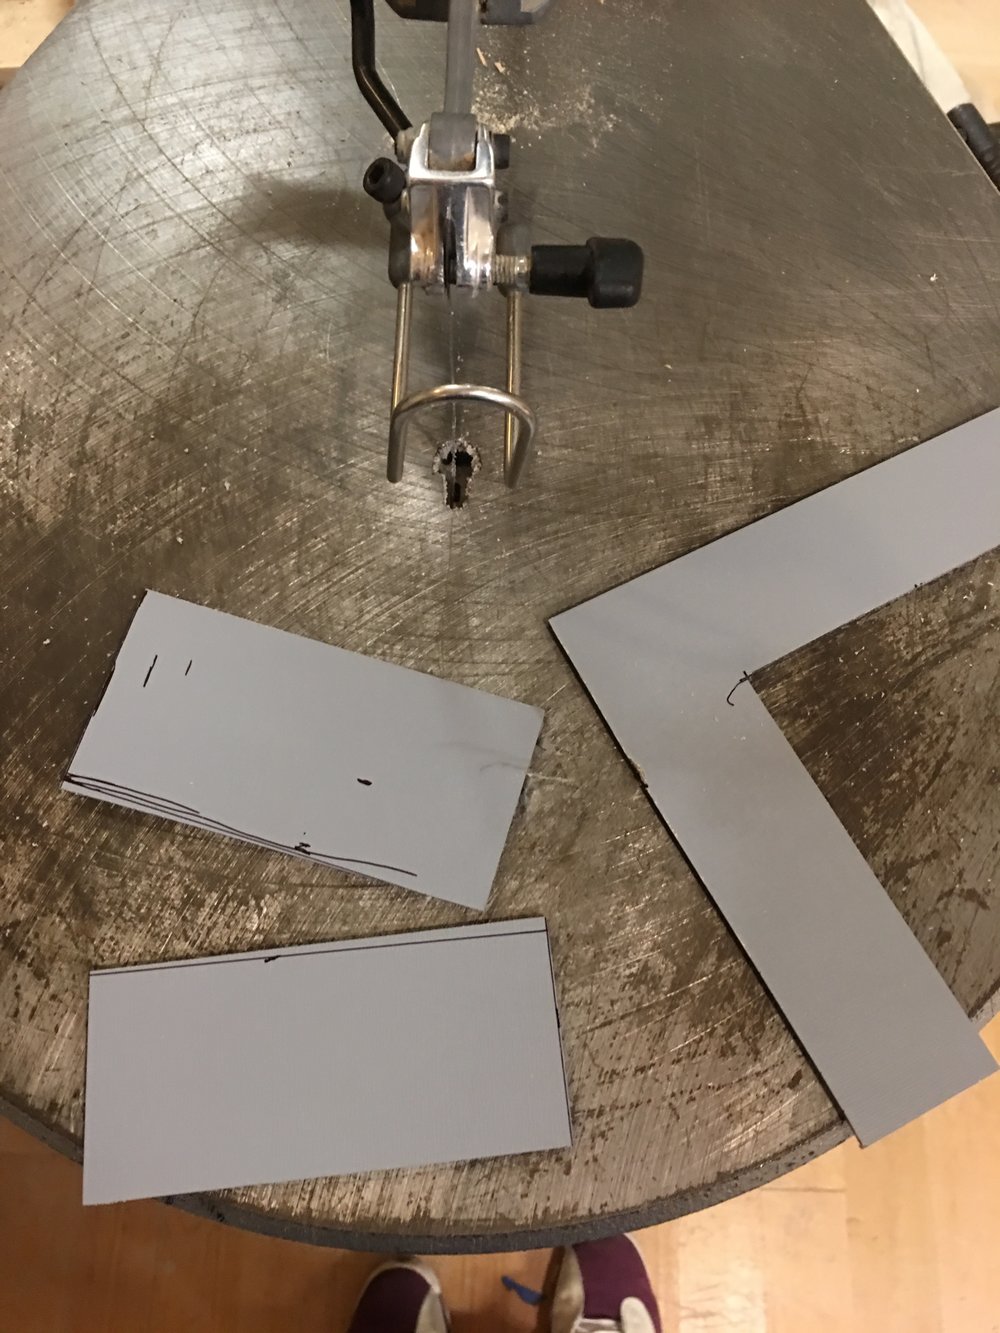
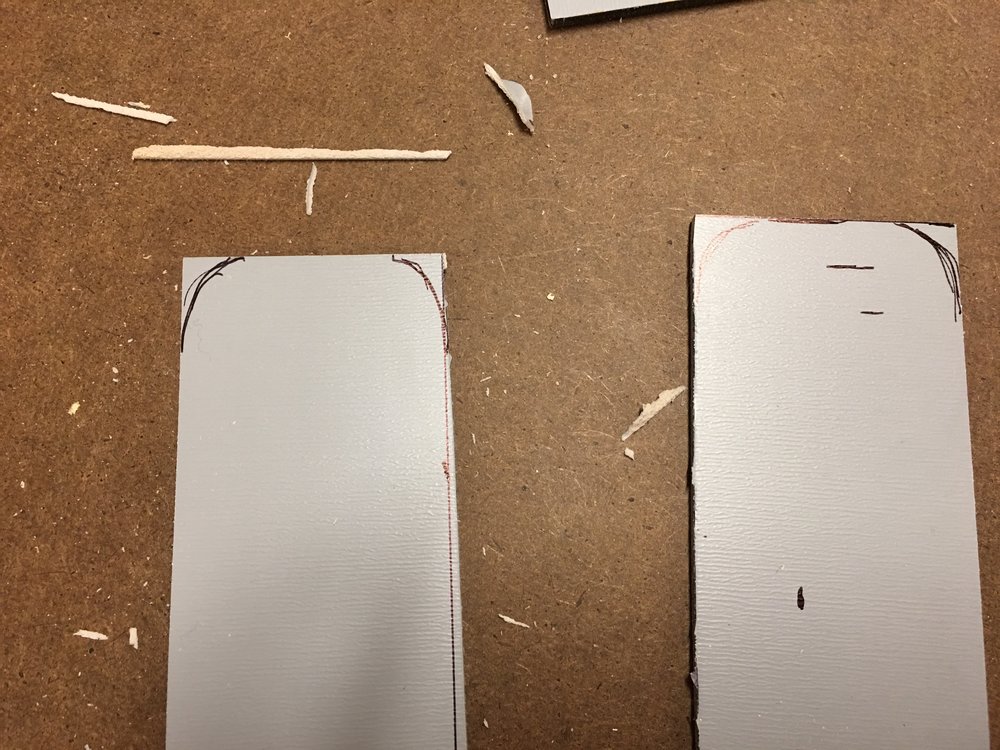
For package design, I was inspired by vacuum tubes. I ordered plastic tube and caps from Uline (I don’t need 25 sets of them though…). What I need to do is laser cut cardboards to ear shape and pin my jewelry toy on the cardboard, and hang them tight in the cylinder. So I can display them in the package and give audience a sense of how to wear them. I wish I can draw some art-toy like label.

cut the rods from Nesi.
Finish
I learned a lot this week, means epic failed again and again.Since Saturday I 3d printed lots of time, and even silicone molded with the model.
- The size: 32-35mm is fitting for general ear sizes. But I cannot sell these as earrings online since all ears are so different, unless I find a magical way to measure people’s ear remotely. When I use Cura, it was around 35% scale of the original 3d object file.

Watch tutorial before use the material..!!!! I didn’t and learned by experience, which was totally preventable. I used Smooth on Dragon Skin and Crystal Clear 202 and they have terrific video tutorial for “Resin mold for 3d printed model”….Anyways, what I learned were
- I need TWO tunnel for resin mold if I want to pour resin through the silicone cast. That was the main reason I 3d printed the model again.
- It’s hard to glue rod on PLA printed model… It’s much better to print all of them from beginning.
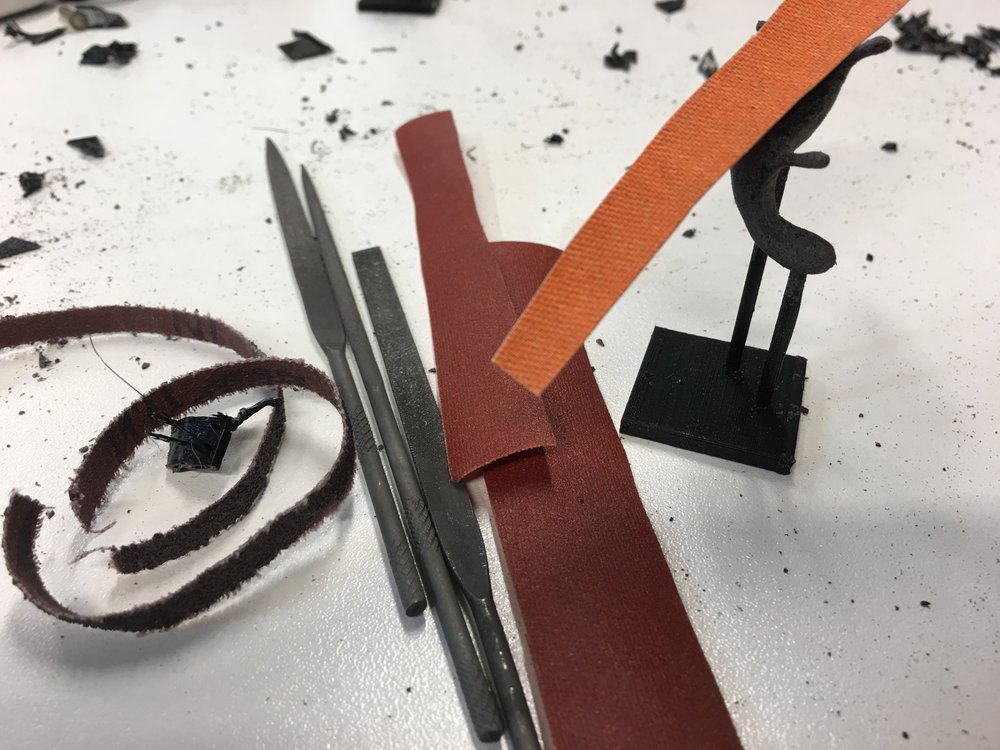
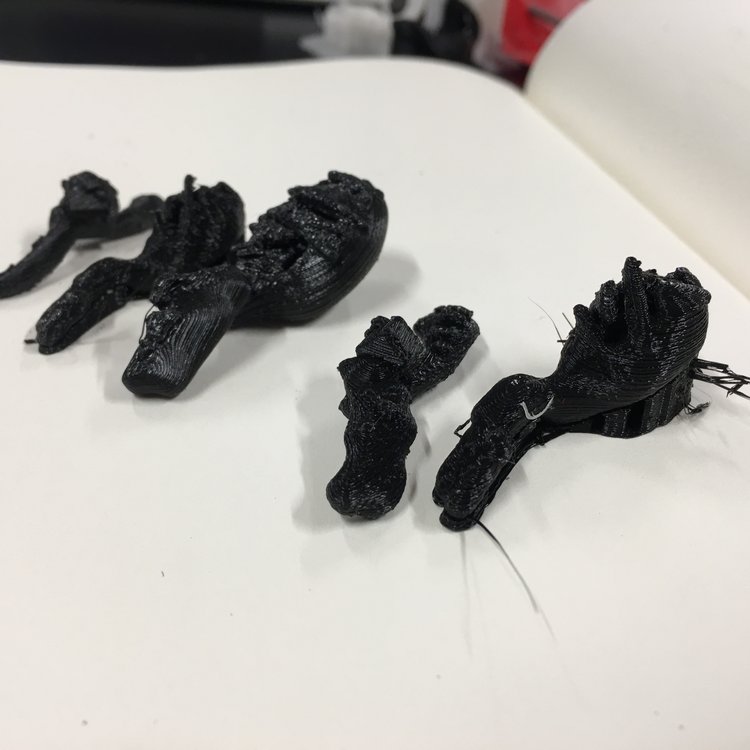
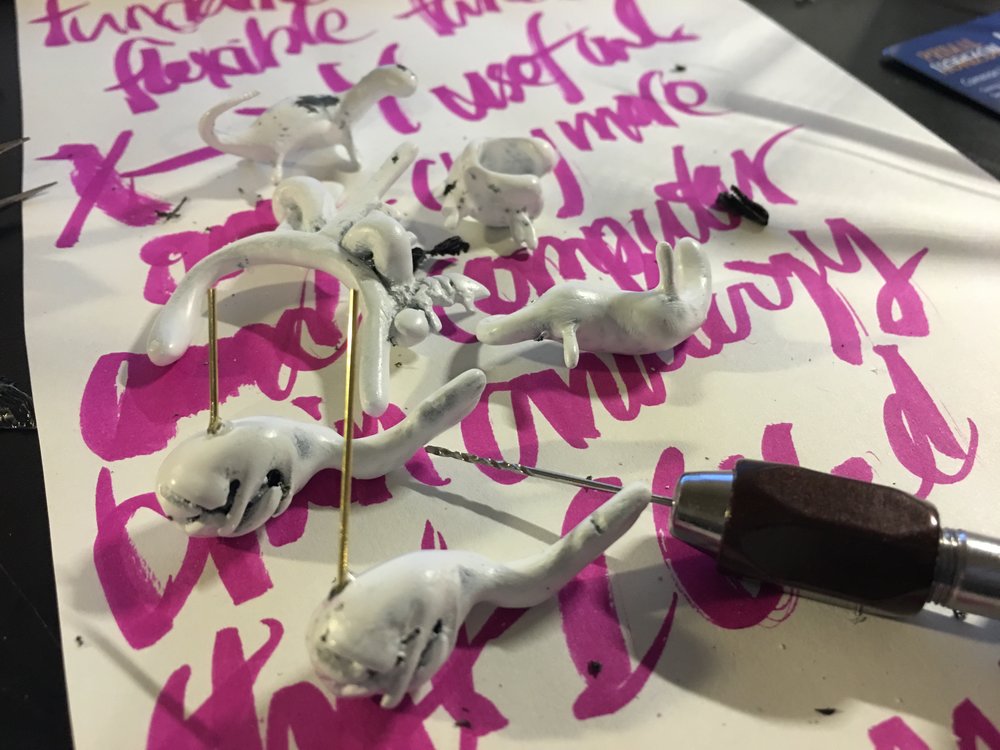
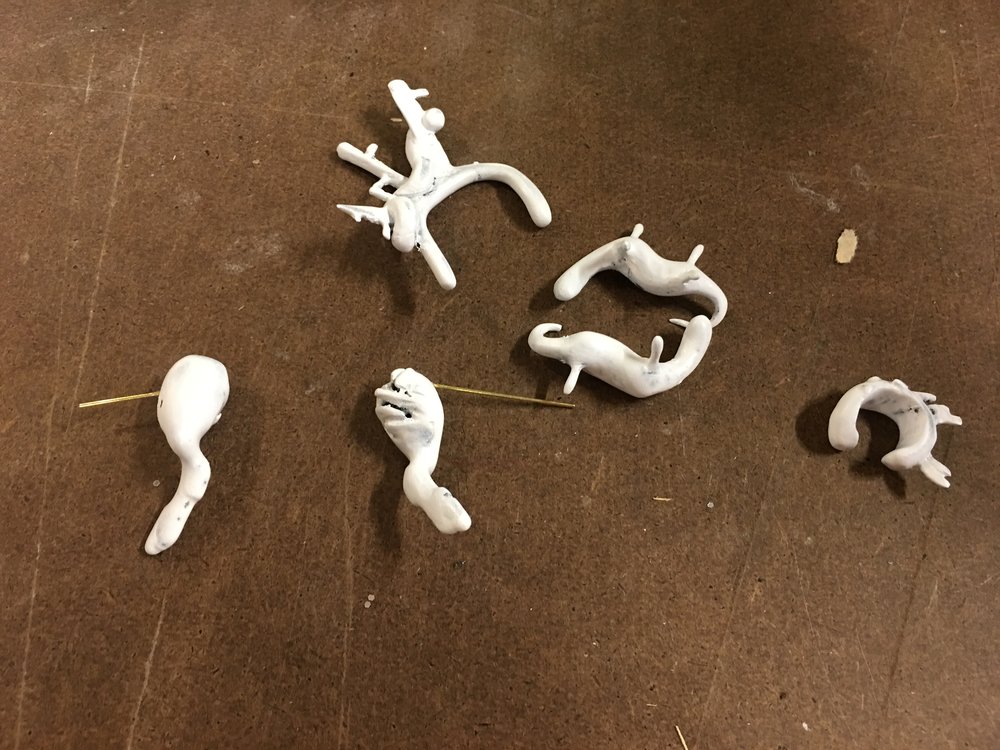
I sanded with 0. coarse sand paper 1. nail filer 2. fine sandpaper and the last one felt like stone. It was so good but I kept breaking legs for each model. It was frustrating and consuming a lot of time, and I noticed,
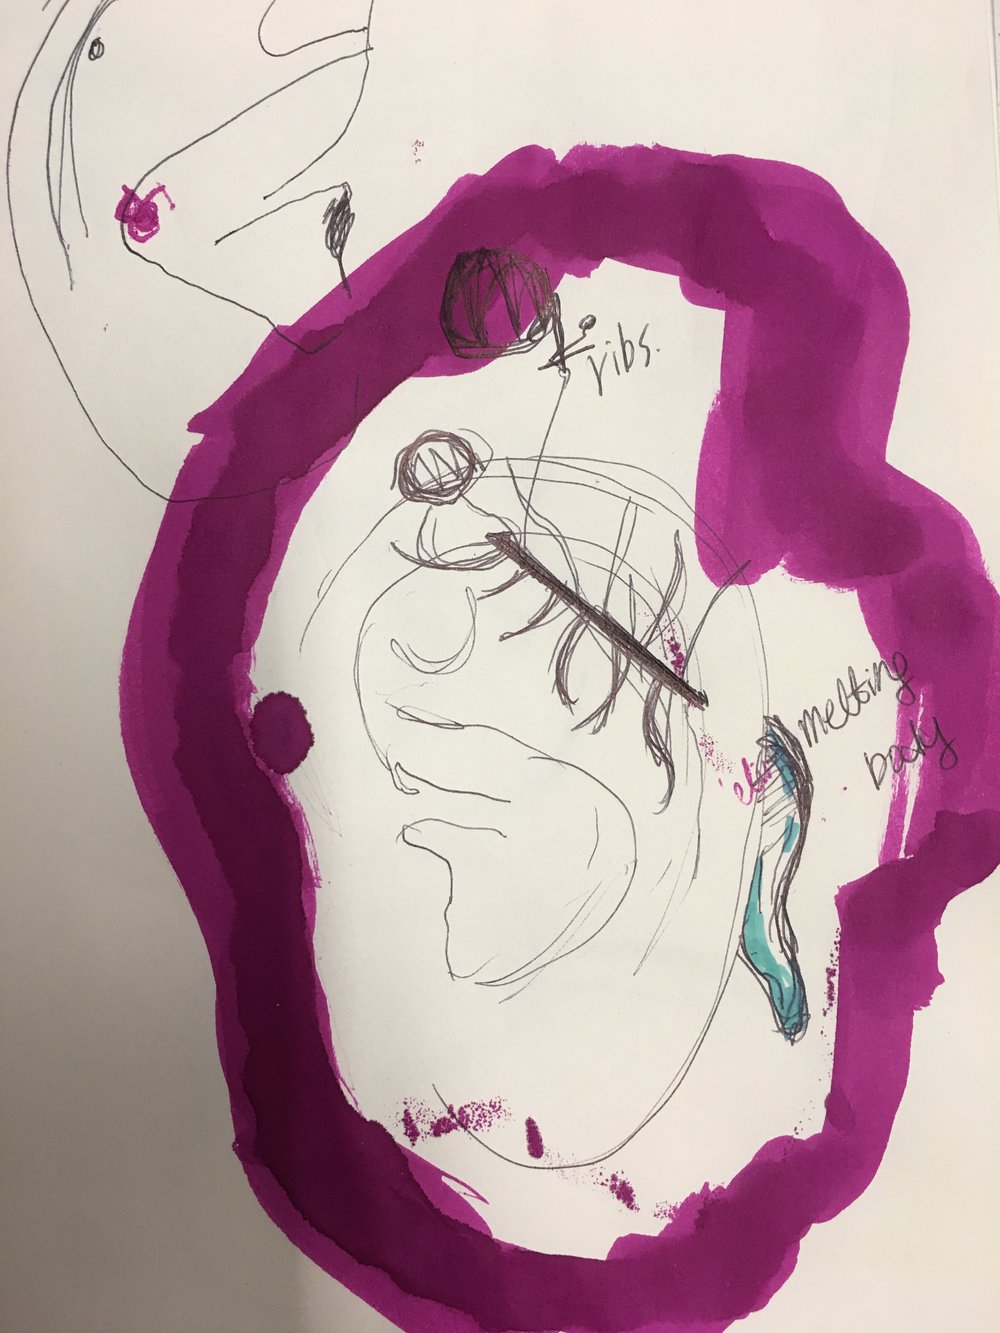
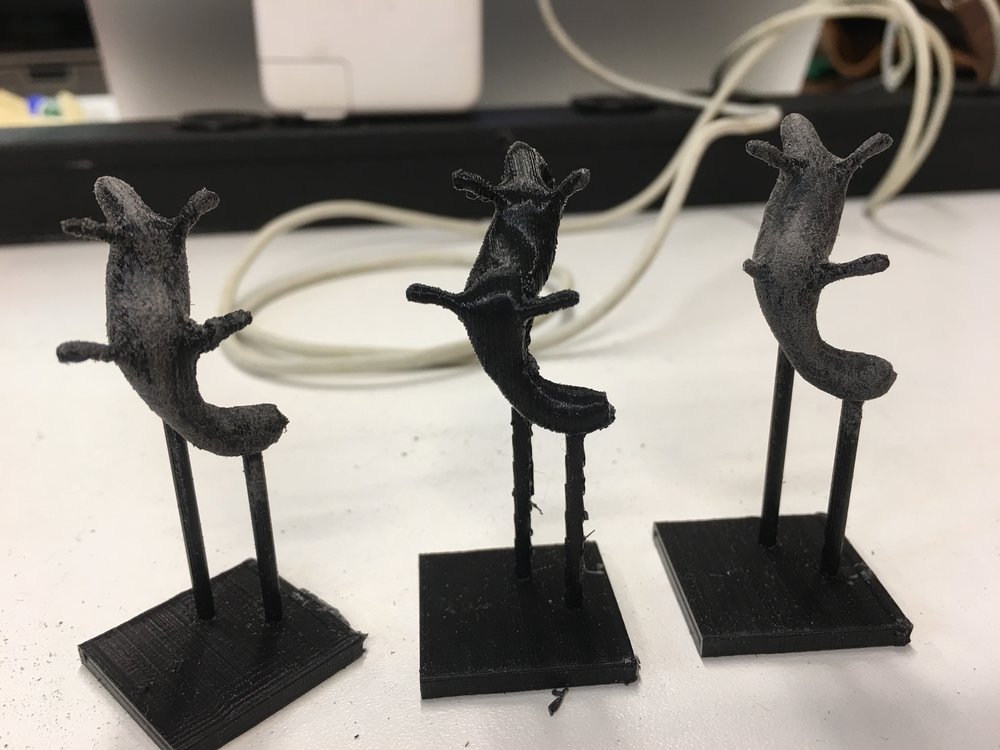
- Who decided Nesi has four legs? It is so boring having four legs. It could be odd number, too many or even none! legs are not even supposed to seem like regular legs.
- Having these tiny legs is definitely wrong design for 3d prototyping.
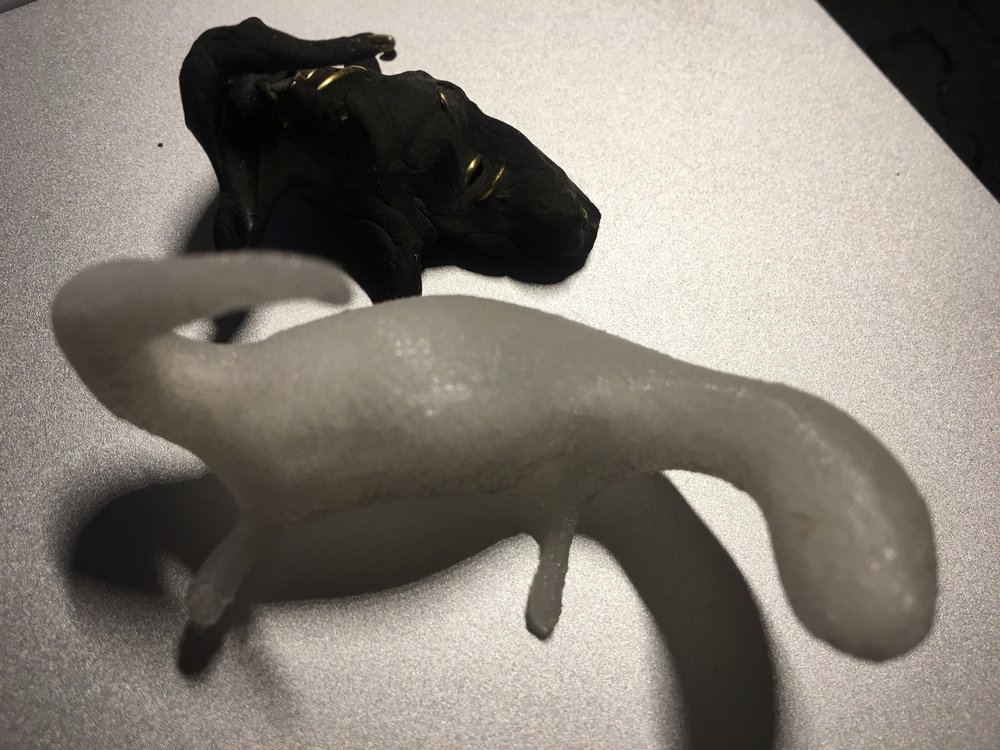
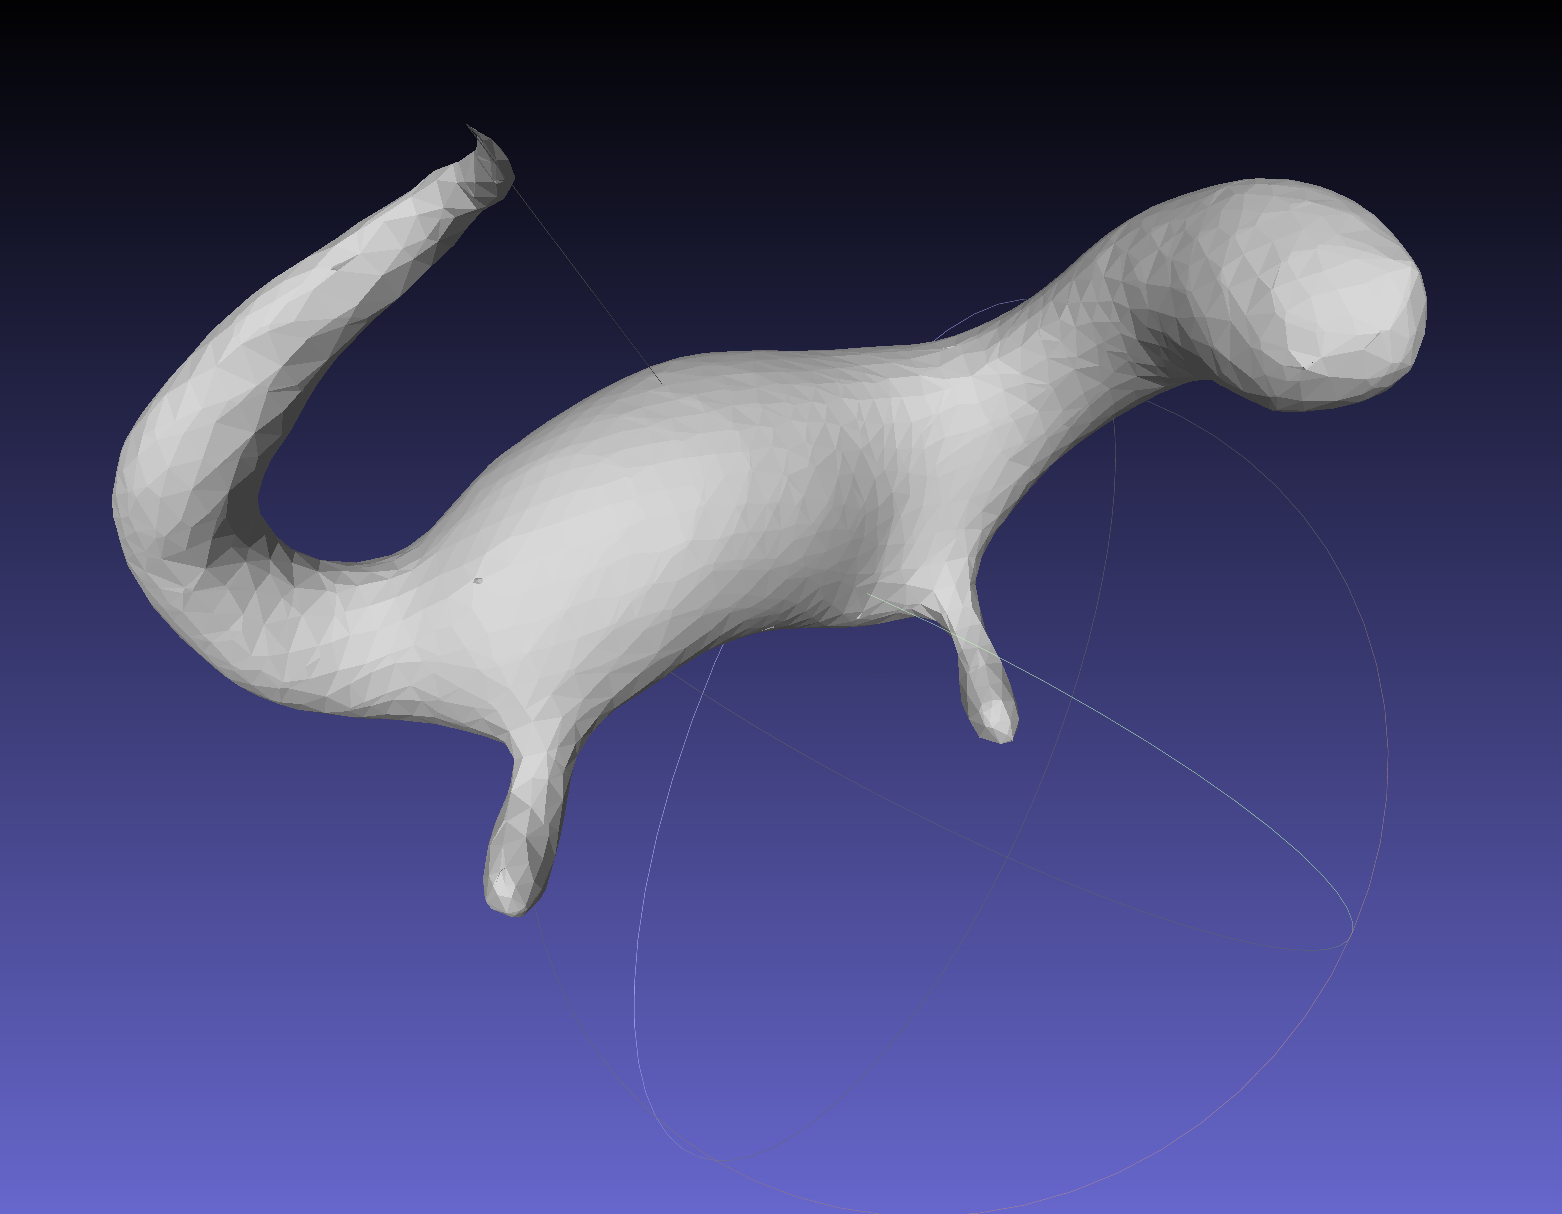
I decided go with 2 legs left after sanding.
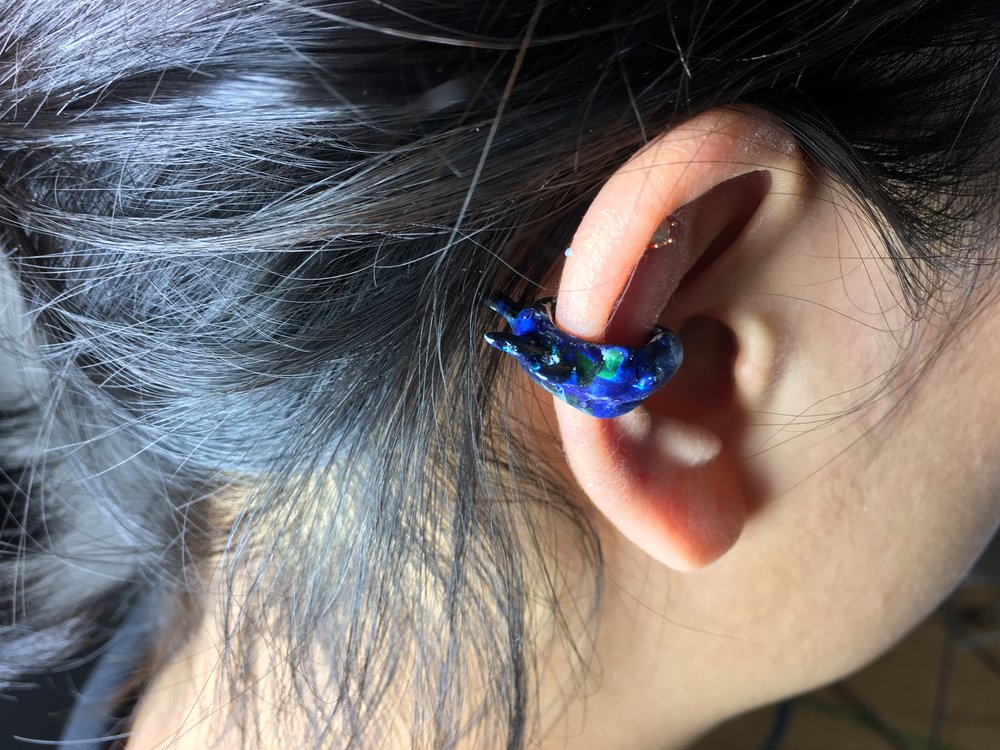
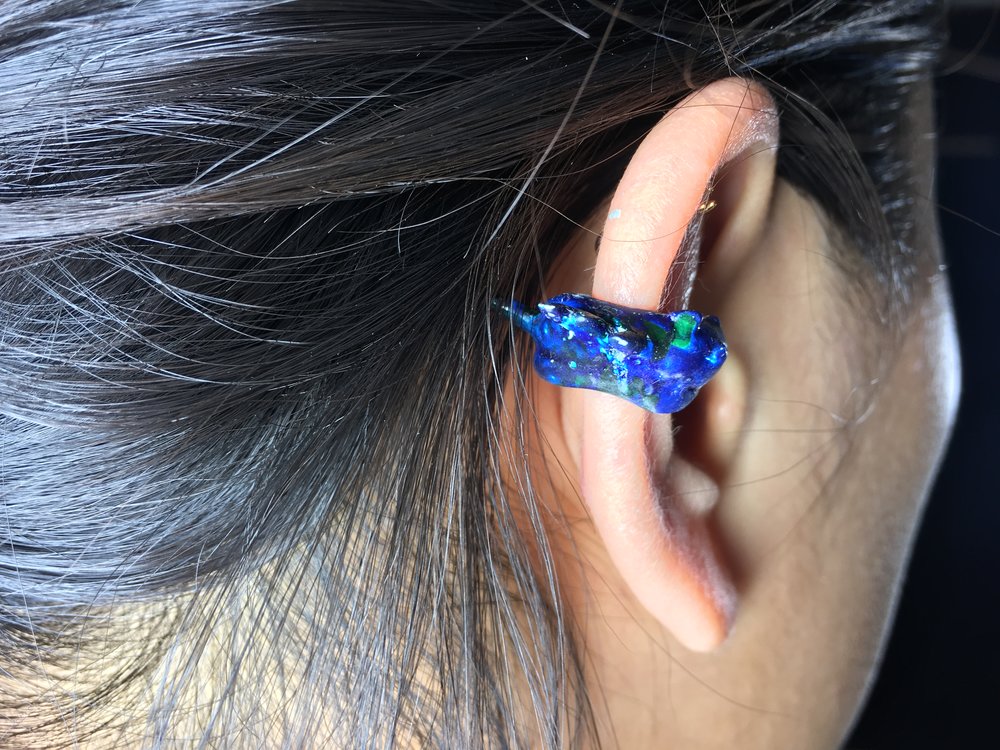
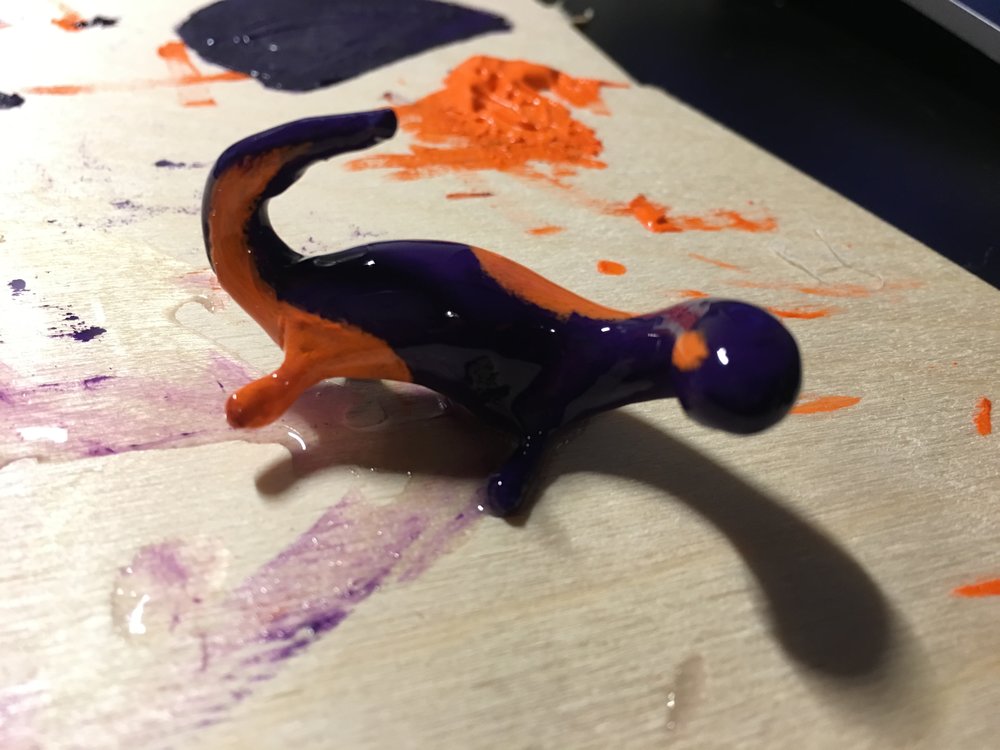
Nesi with 2 legs looked awesome, it seems a bit of a plant and an animal at the same time.
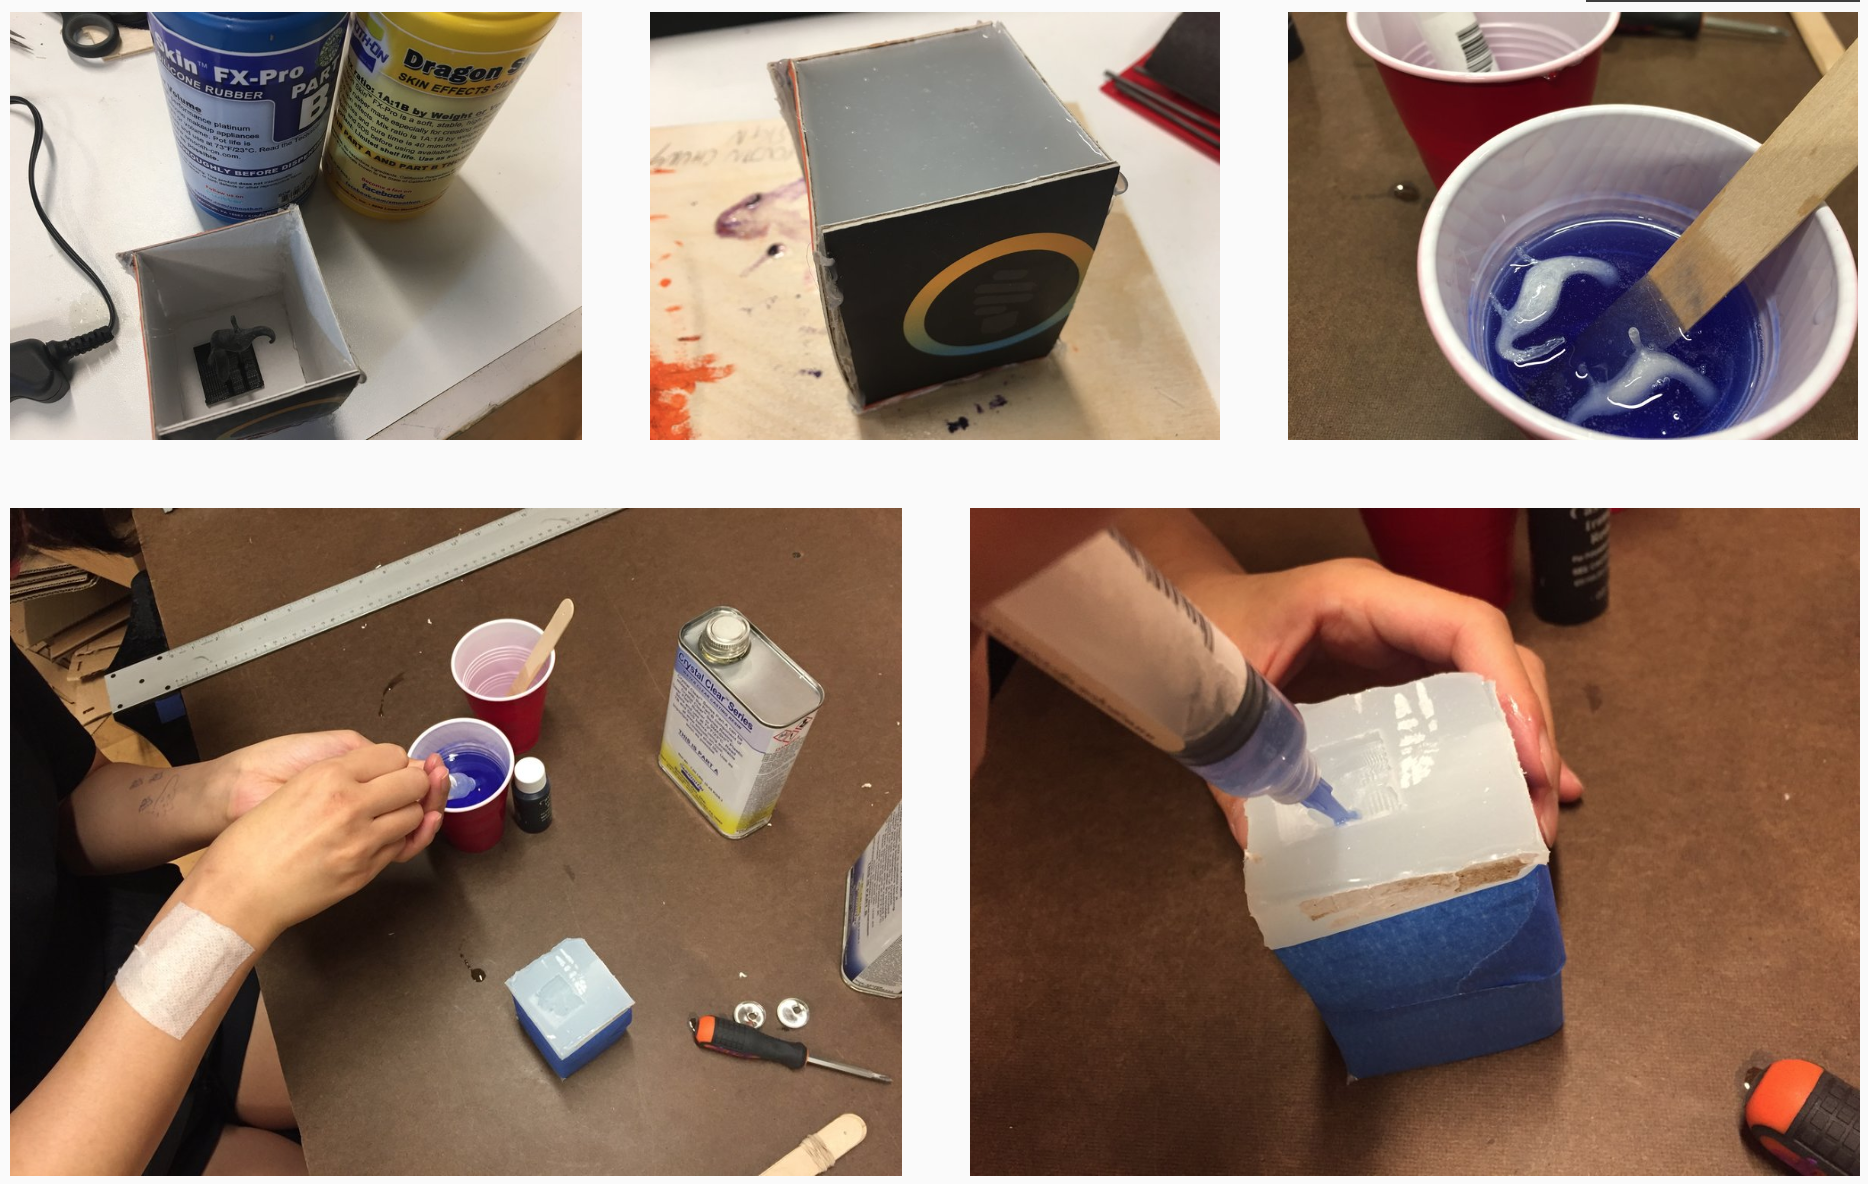
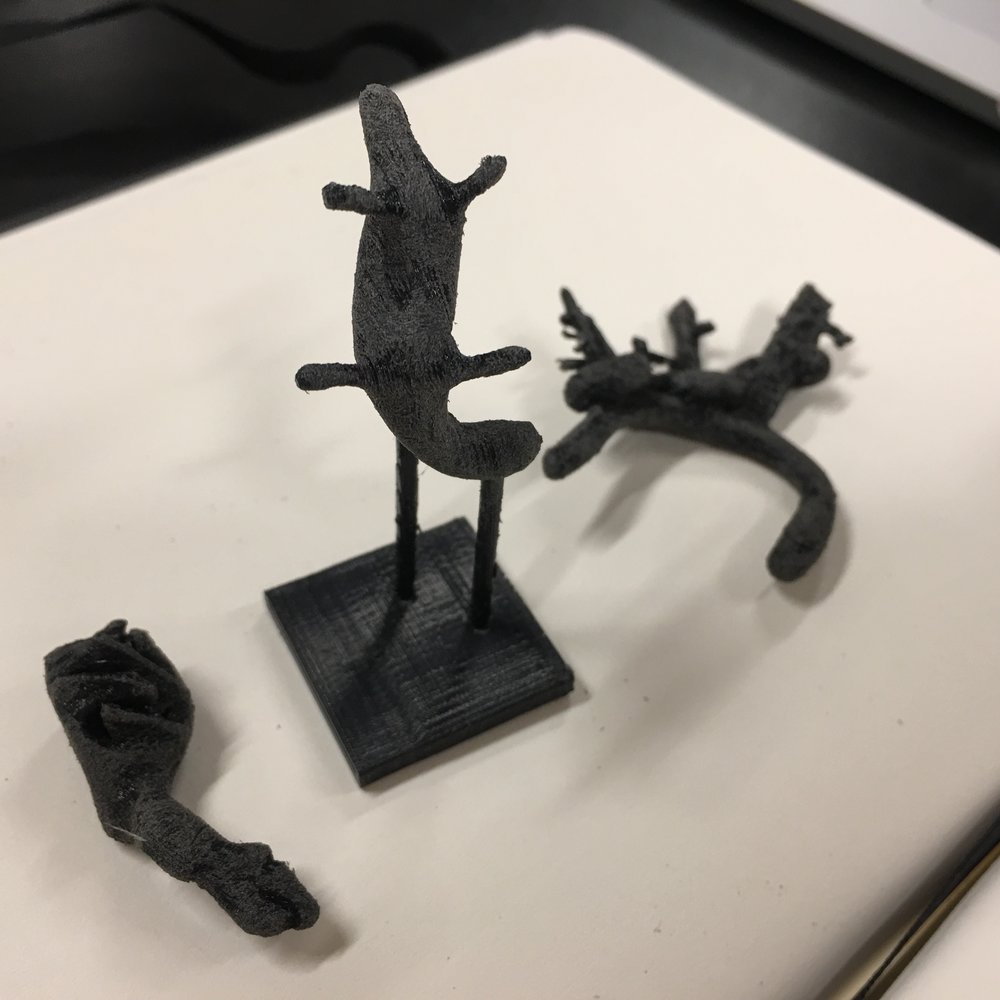
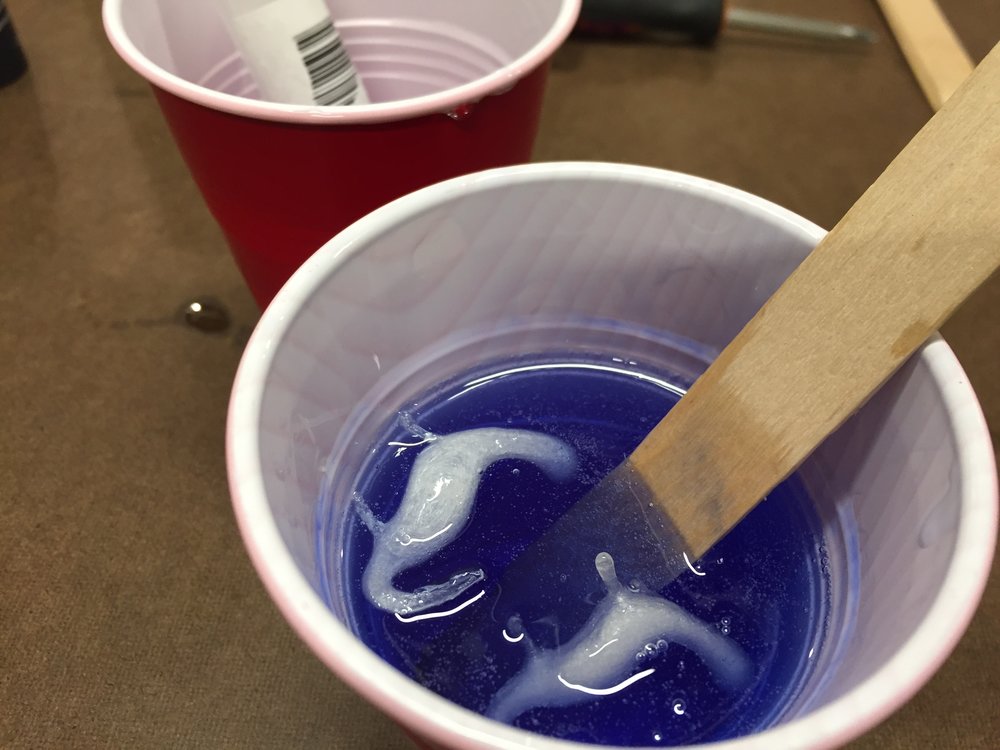
I went through silicone casting and resin mold with a new model and found I am wasting material compare to the size of my model..I need to find a way to save them. I just put a blue color for the first trial, but I will try color mix if the resin mold success. With the resin leftover, I made preserved Nesi’s. (Hopefully they could look like amber fossils.)
MATERIAL AND TECHNIQUE SCULPT
This week I just went through the whole process to the finish of my sculpture.Bottom line first, I decided to use resin mold for rest of this semester. Considering the shape of my toy, I cannot use CNC unless break down the sculpture.
If I stick with 3D printing, there are 3 ways to do that:
-PLA(most common) print and do after works.
-Resin printing
-PLA prototype and resin molding
The merits of resin mold are coloring and preciseness. I tried to color and polish the 3D model this week, and it just revealed how bad I am with painting, also even sanding. If I want to color the PLA printed model, I’d better use spray brushes. but I still need to make maskings for color blocks.
Resin mold is a traditional technique for high-end jewelries and fountain pens, which makes my toy more persuasive as a product.
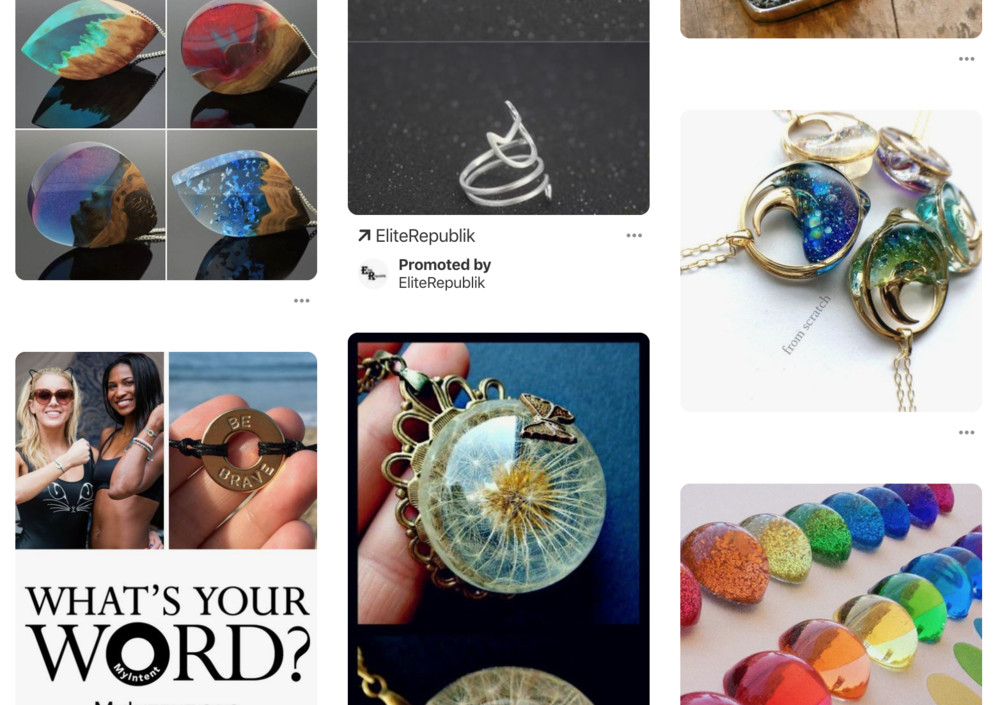

I got some inspiration meanwhile
- sneakers color blocking - I was thinking art/designer toys are alike sneakers somehow. Since the streetwear culture is what I am familiar with than art toy, I wanted to co-op them.
![]()
![]()
![]()


- glossy finish - the candy-like, glossy and smooth finish caught me. Especially ceramic glaze finish looked so cool to me.
![]()
![]()


- wearable - my toys will be wearable anyway, I need to exchange some part of toy with metal. Many earrings such as ear hoop, ear climbers, ear jackets are actually bendable so customers can adjust jewelry to their body. I think I can print bass part when I decide the final 3d model.
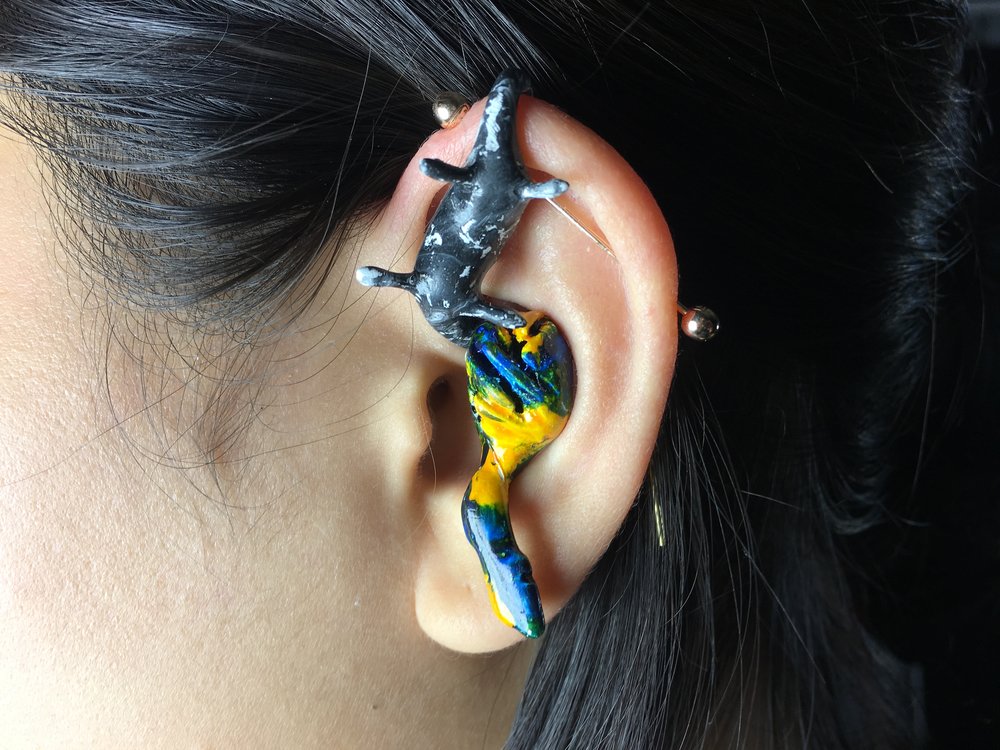
The plan for the final 4 pieces are like this.
- The original color-blocking ear bug.
- one with fur on the belly.
- one with audio filter by DIY PCB. Neuromancer inspired.
- chimera version with bone / insect crust.
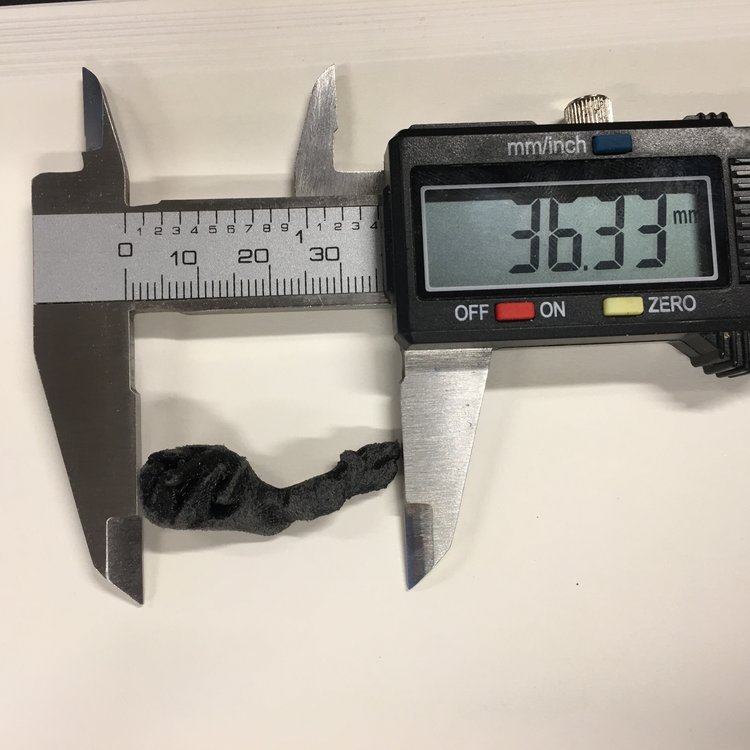
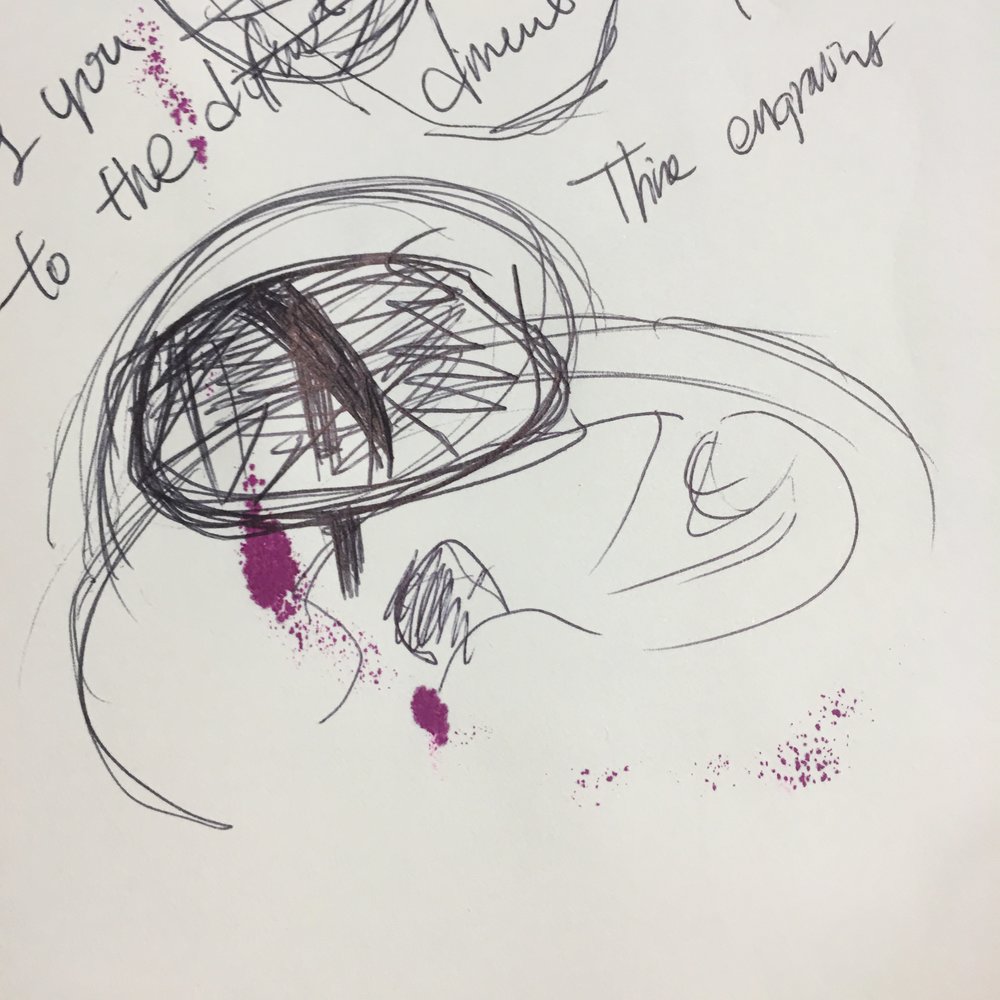
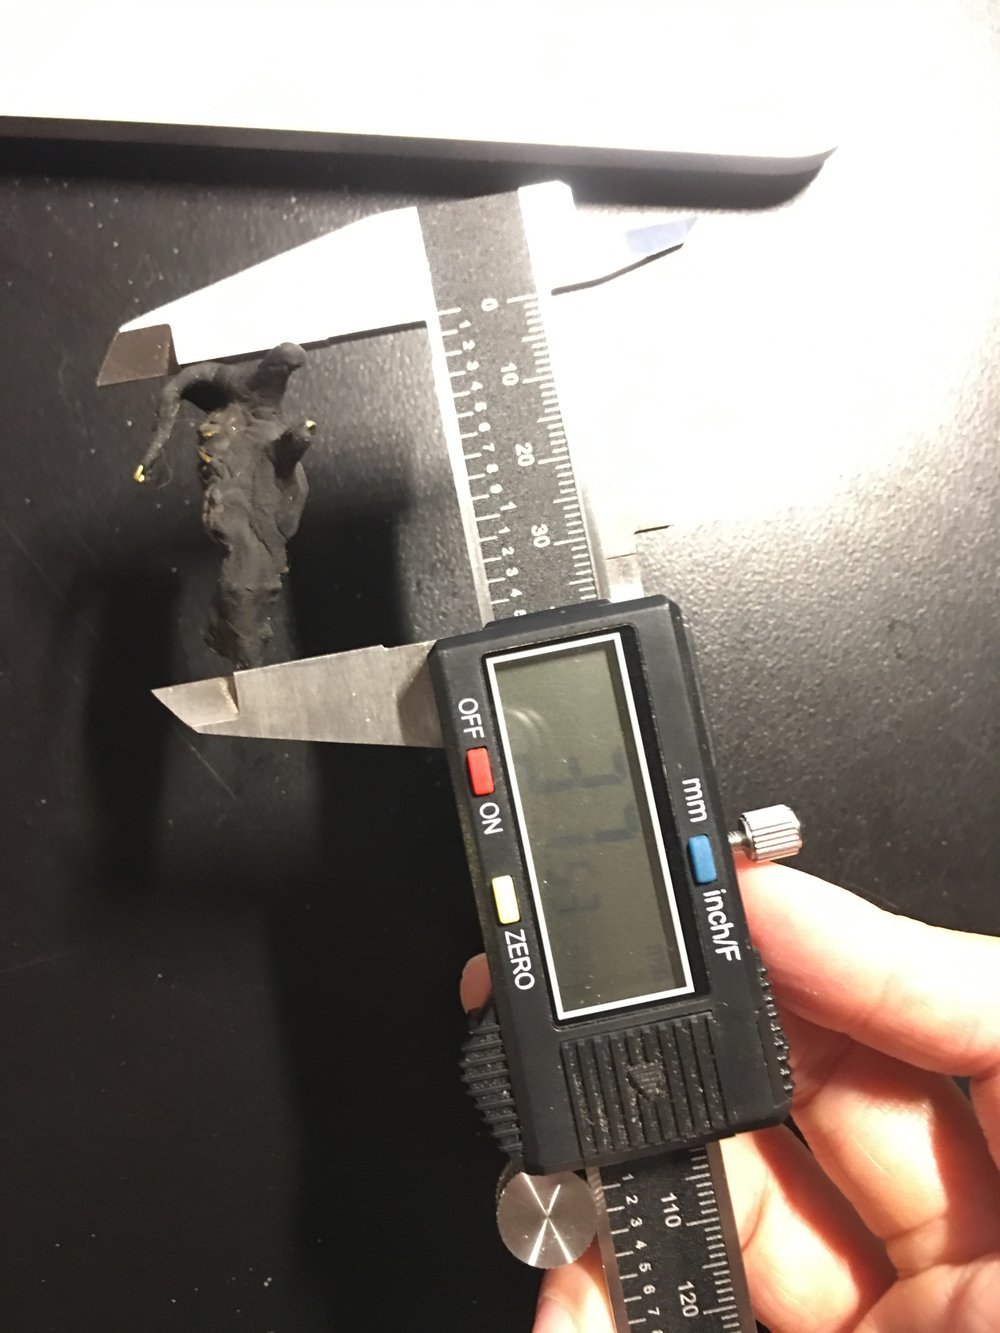
For actual scaling, I made a clay version of the creature and measured it. It was 37.53mm from end to end, I can scale 3d model again for prototype.

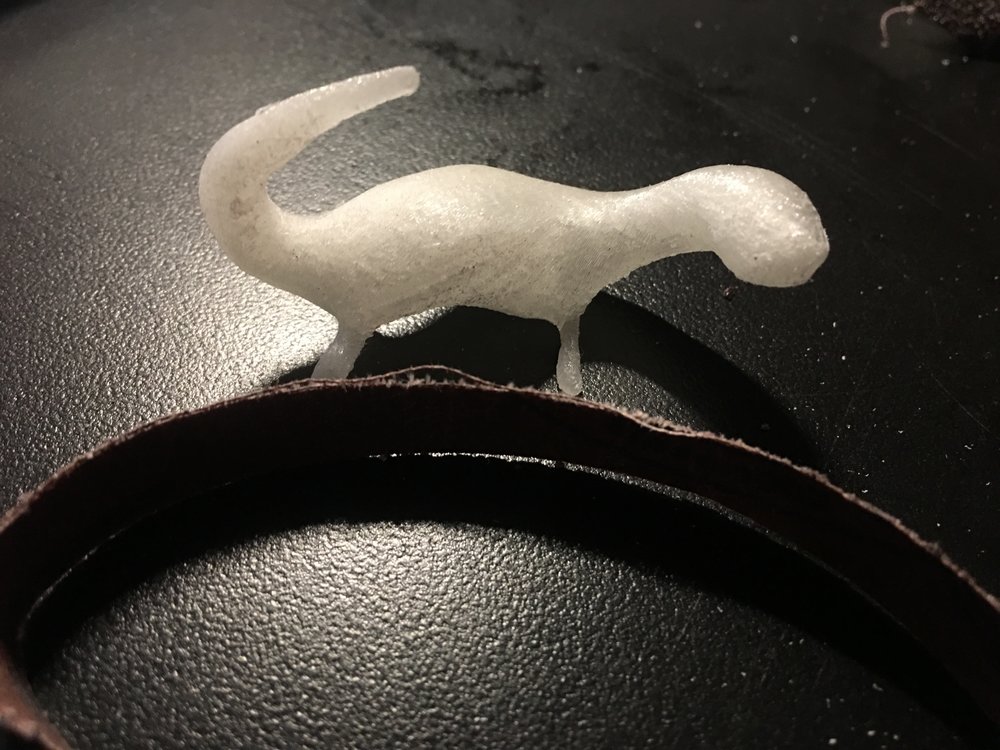
I sanded it and sprayed the primer. I broke a leg and the tail tip while sanding. Maybe I can try tumbler in stead of sanding. I heard I can wipe with alcohol if I want to color 3d printed models. (Before using primer I guess) I can try next time.
I marked borderline with sharpie. I expected the facial expression remains, but the sharpie blurred and disappeared when I painted only one time. A very basic tip - paint with bright color first..
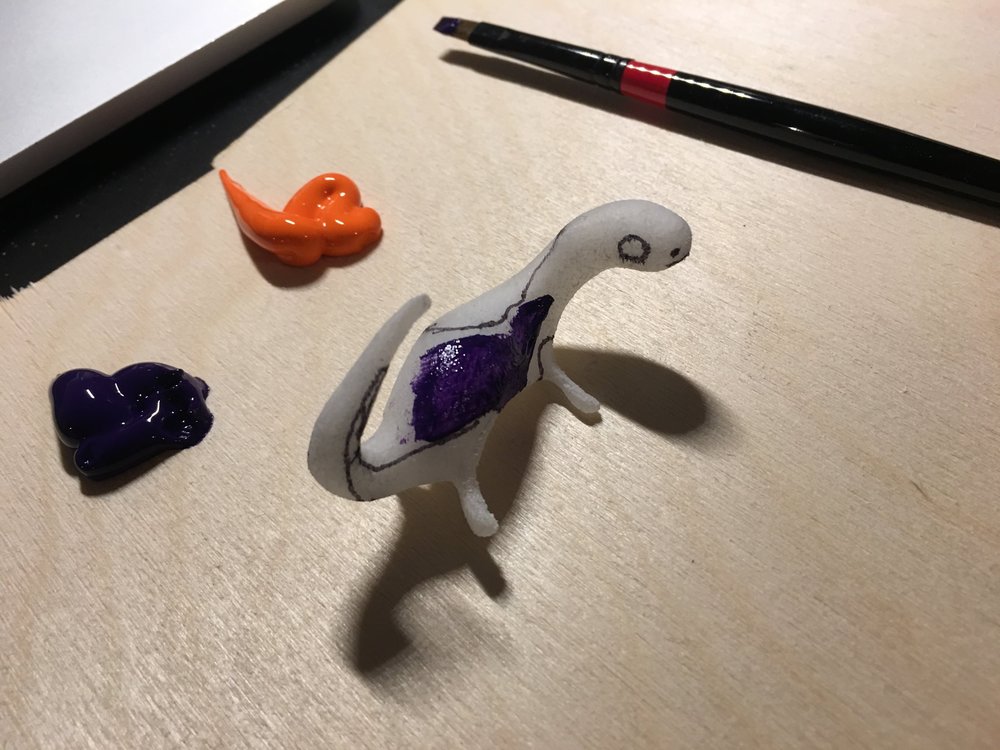
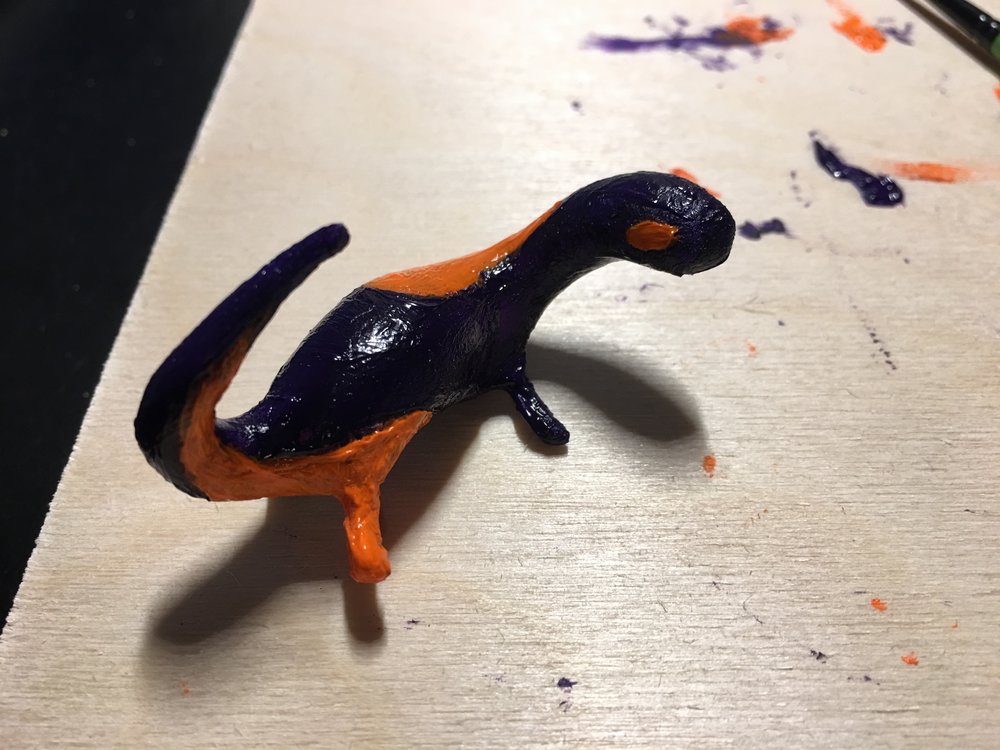
Anyways, finished with glossy vanish and waiting to dry.. One thing to think about is, how to express color block while using resin mold.
SCULPT YOUR TOY
My goal of this class is making wearable art toys, especially on ears.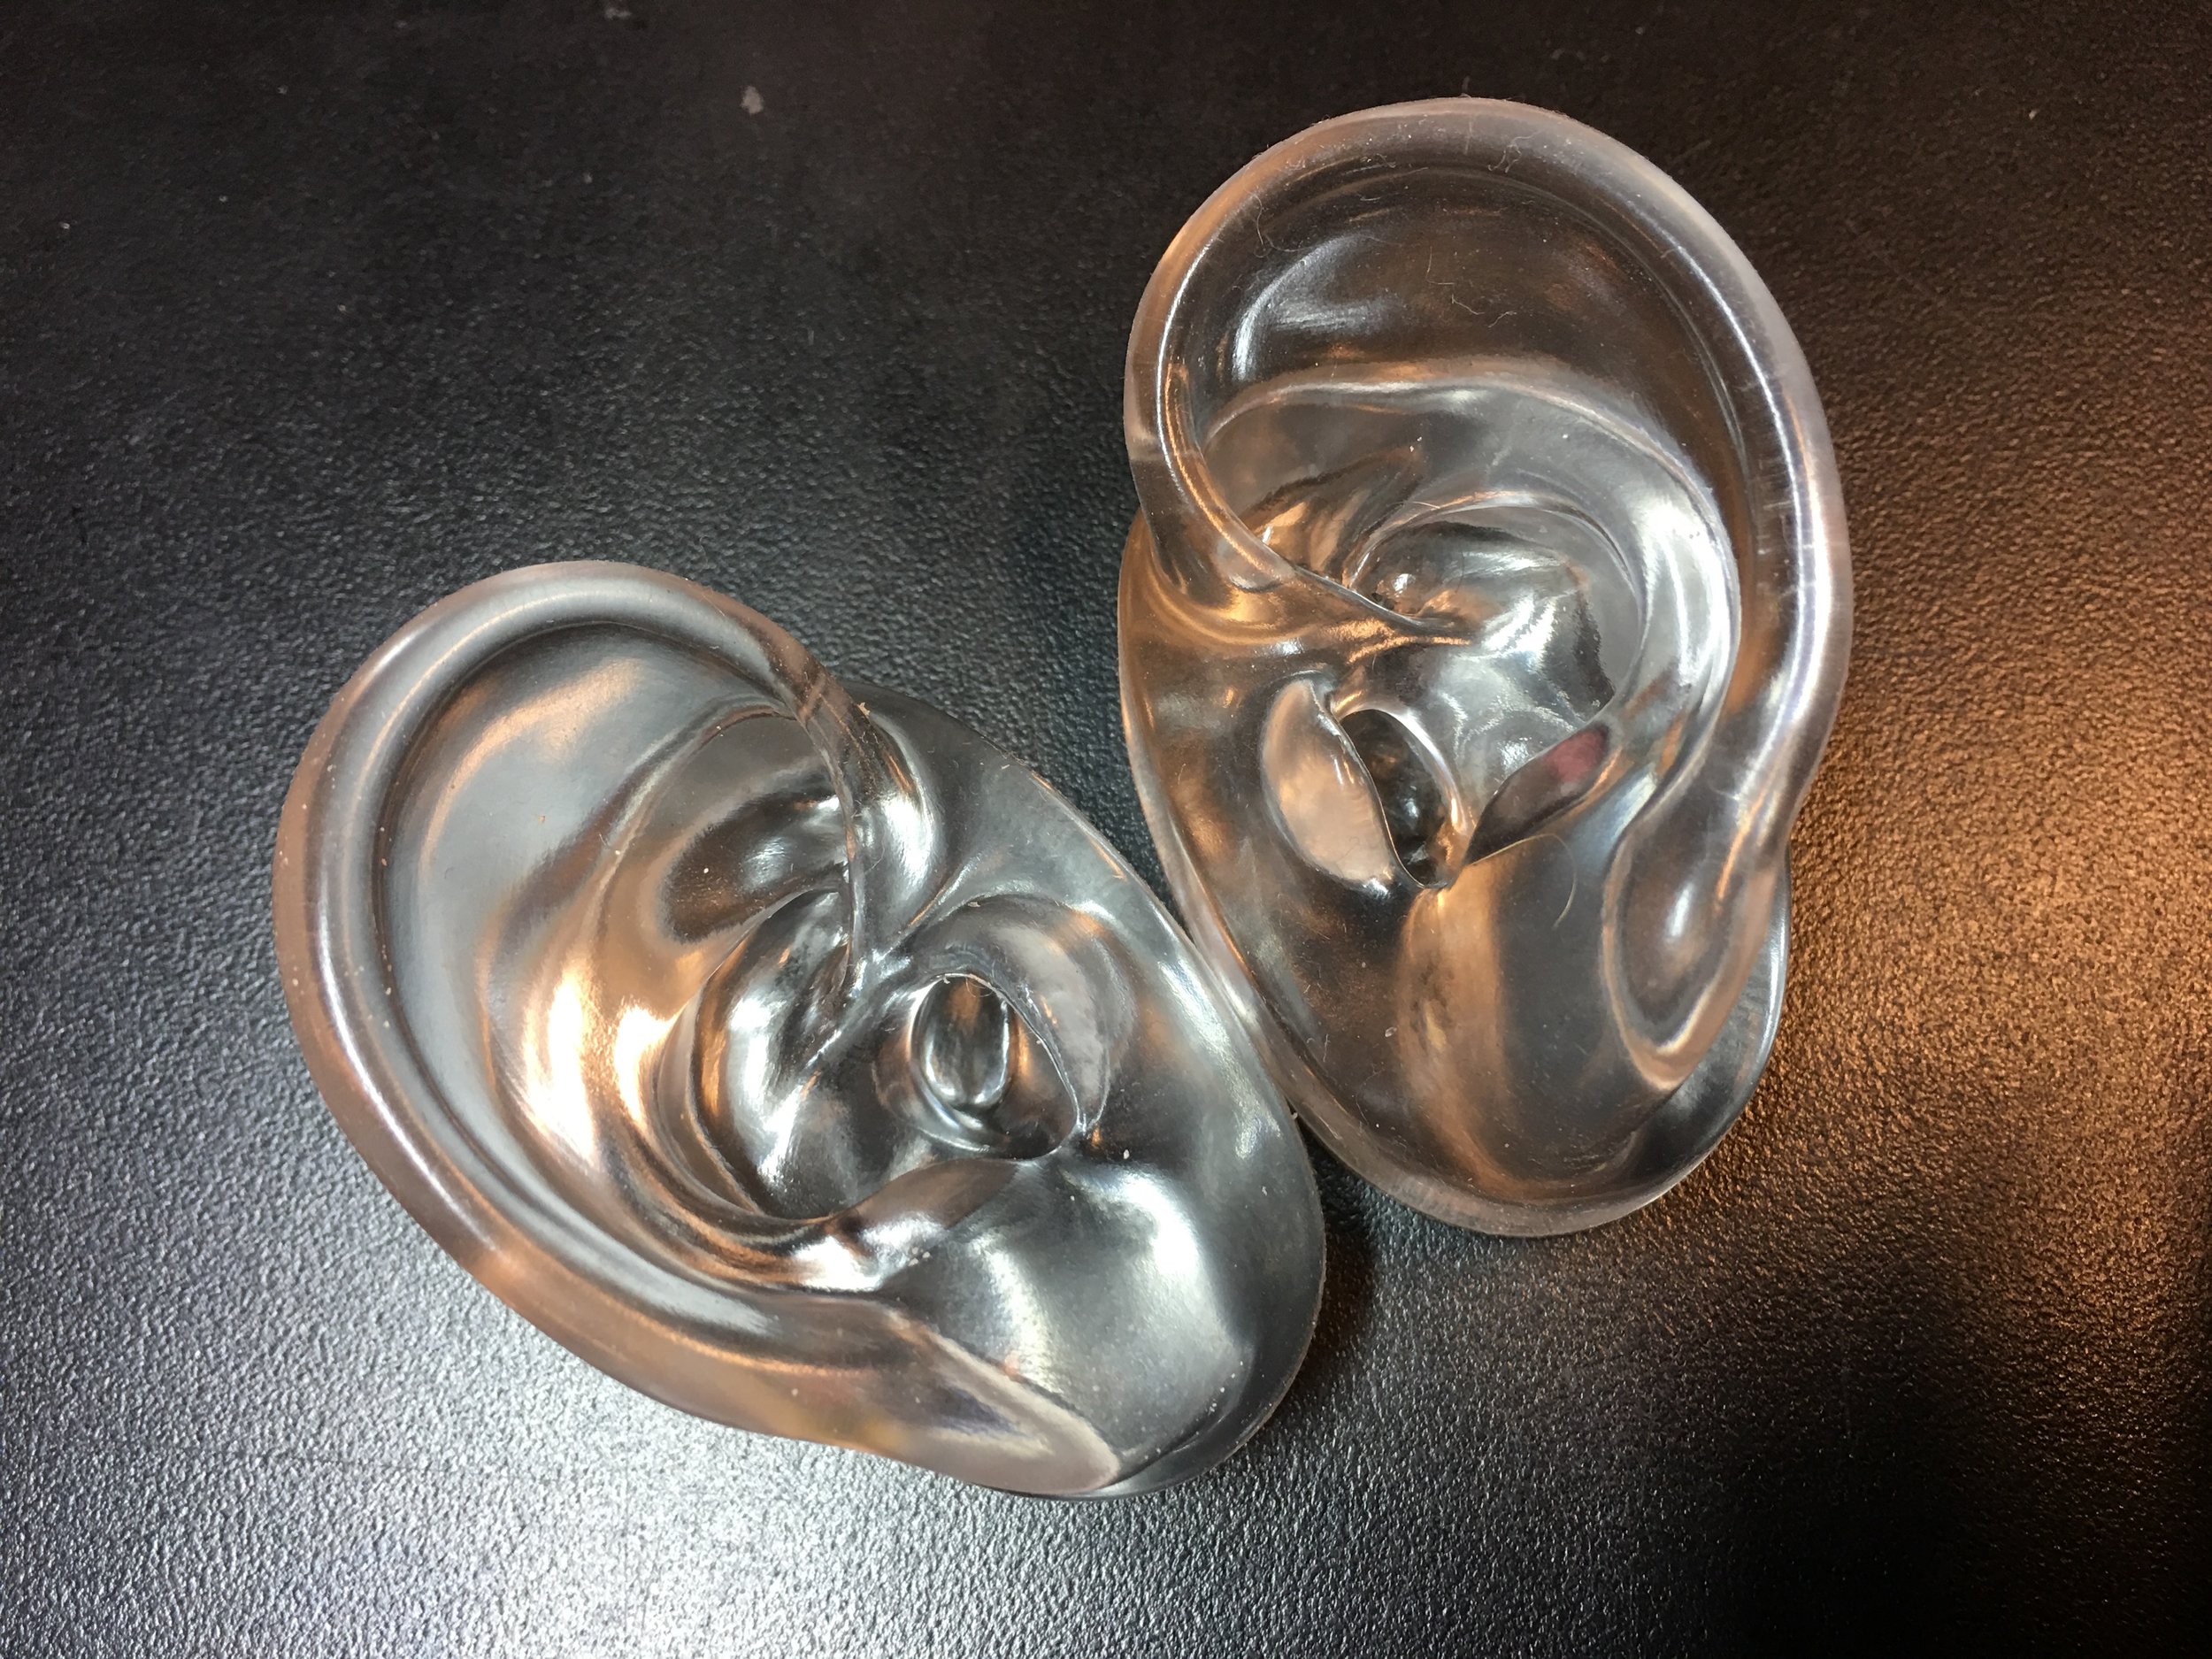
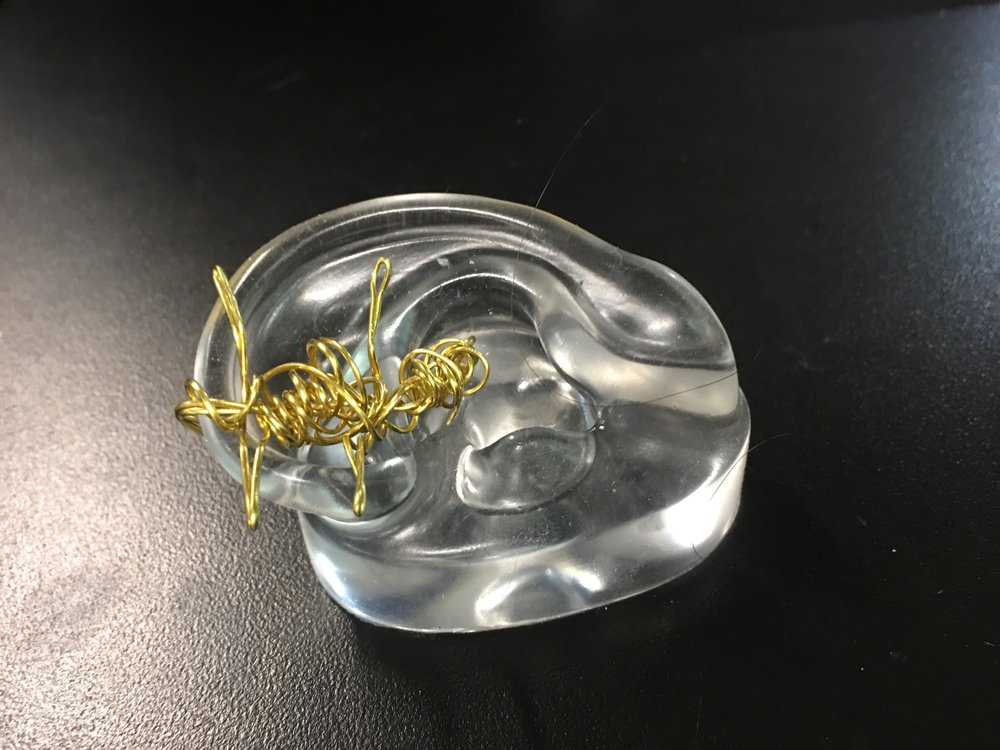
Bought some silicon ear model from Amazon. It’s hard to borrow someone’s ear all the time, these are for hands on fabrication and scaling.
I bought some clay and wires for sculpting anyway, I tried Oculus Medium and it was much intuitive and easy than I expect. I just finished my first piece.
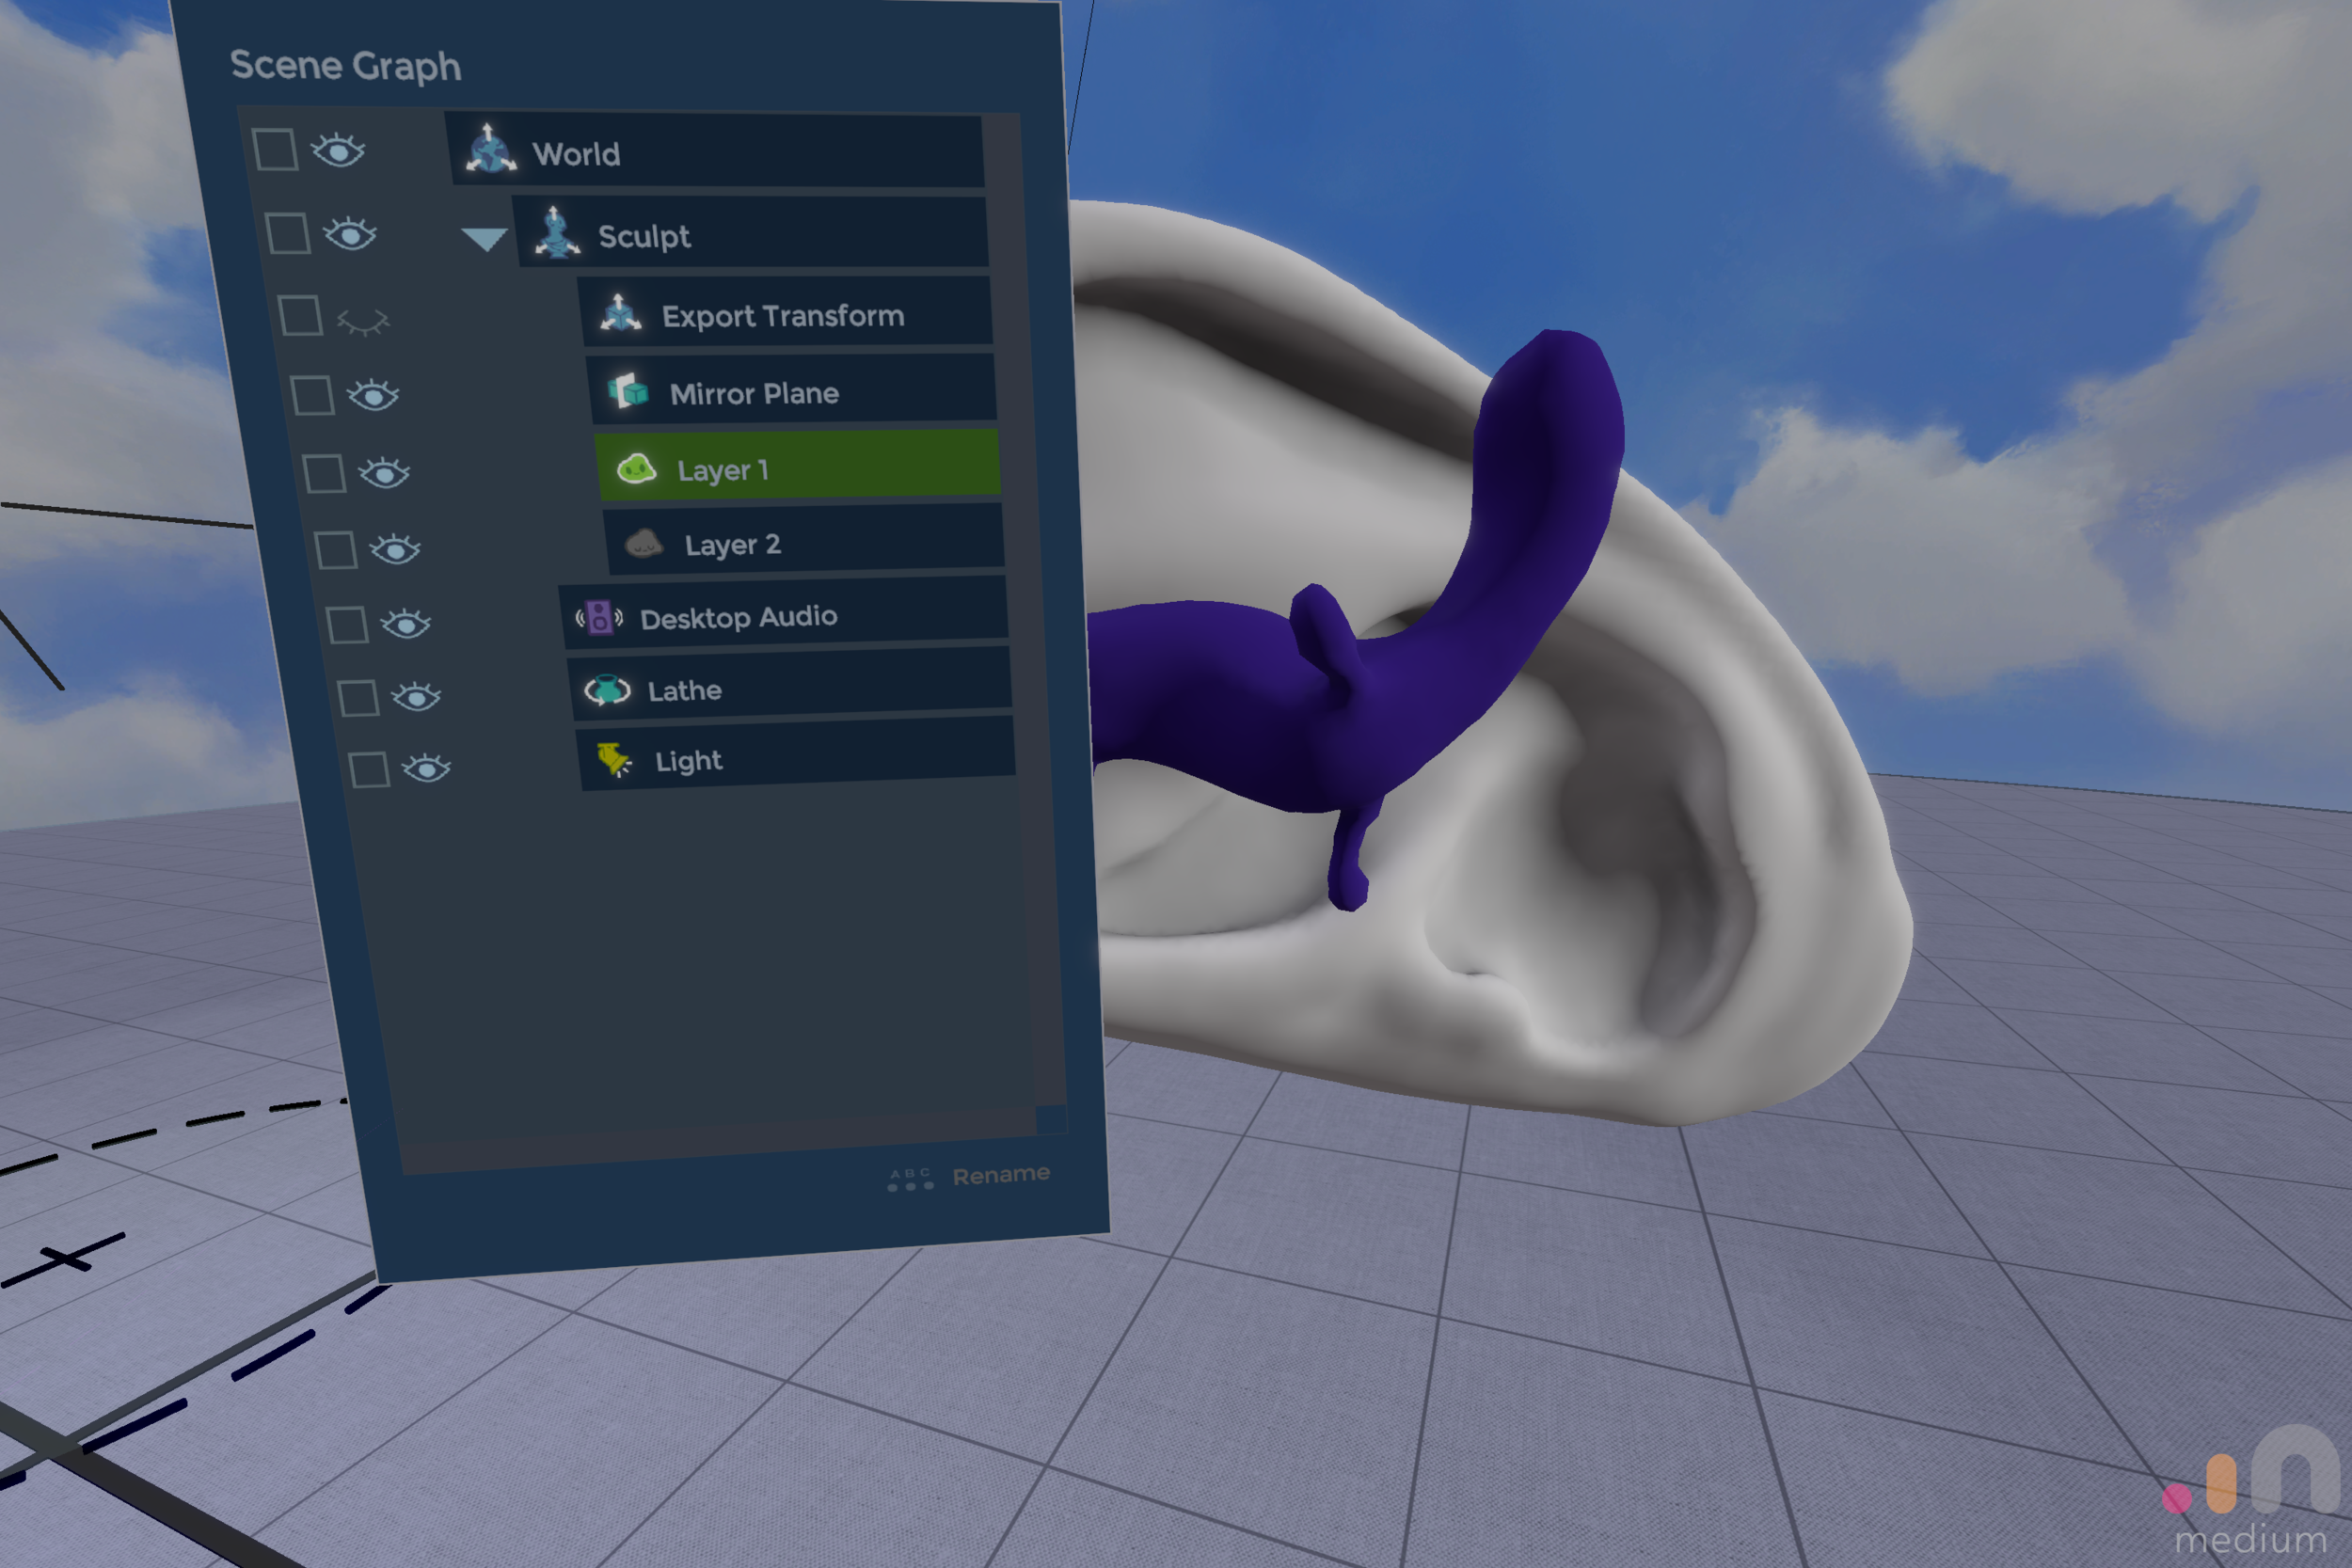
I used an ear stamp as base, and put continuous clay over it. Since I used 2 separate layers, there’s no issue for extraction or so on. After putting clays, I turned off the layer of the ear stamp so the size and coordinate is off. Mostly I used smoothing tool, cuz swirl made clay twist in clockwise.

I was inspired Nesi laying on back on the surface of the ear. Wanted to put furry fair on the belly later. I can still try when I find the right scale.
All the earring series will be inspired on fears regarding ears, such as water, ear bugs, optic nerve coming from earring holes…(totally urban legend)

Medium was super intuitive though, the big pitfall is hard to scale to real size. 3D modeling tools provide measures thought, it won’t be accurate till I make a real size prototype and measure equivalent points.
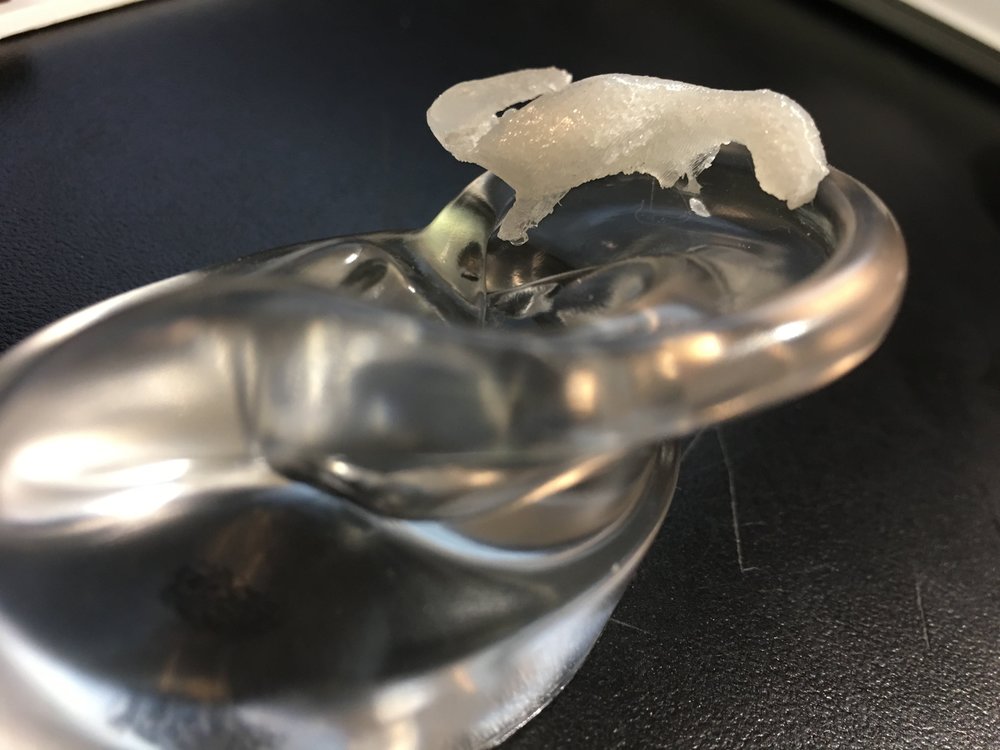
Apparently too small for ears, but I guess you can get the sense what I intended.
I scaled up the model with meshlab. (it’s the most reachable tool for me) I scaled twice for each axis, meaning 8 times inflated than the original. (and I was a mistake. should done root 2 times scaling.) but the good part was I figured out that VR modeling is too low poly and I could to Laplacian smoothing with MeshLab.
I even put eyeballs on it, but it was not distinguishable for its size. I scaled it up 8 times bigger and printed again. The thing is I need to make a file using Ultimaker Cura or Cura Lulzbot edition and it was such pain in the ass. Both didn’t running well on MacOS.

The second one was too big. I can still go for the finishing, such as using spray brush or resin coating, and putting hair on the belly! I also learned removing supports is hard in the case of organic shape. I need swirl for this.
BLANK MODIFICATION
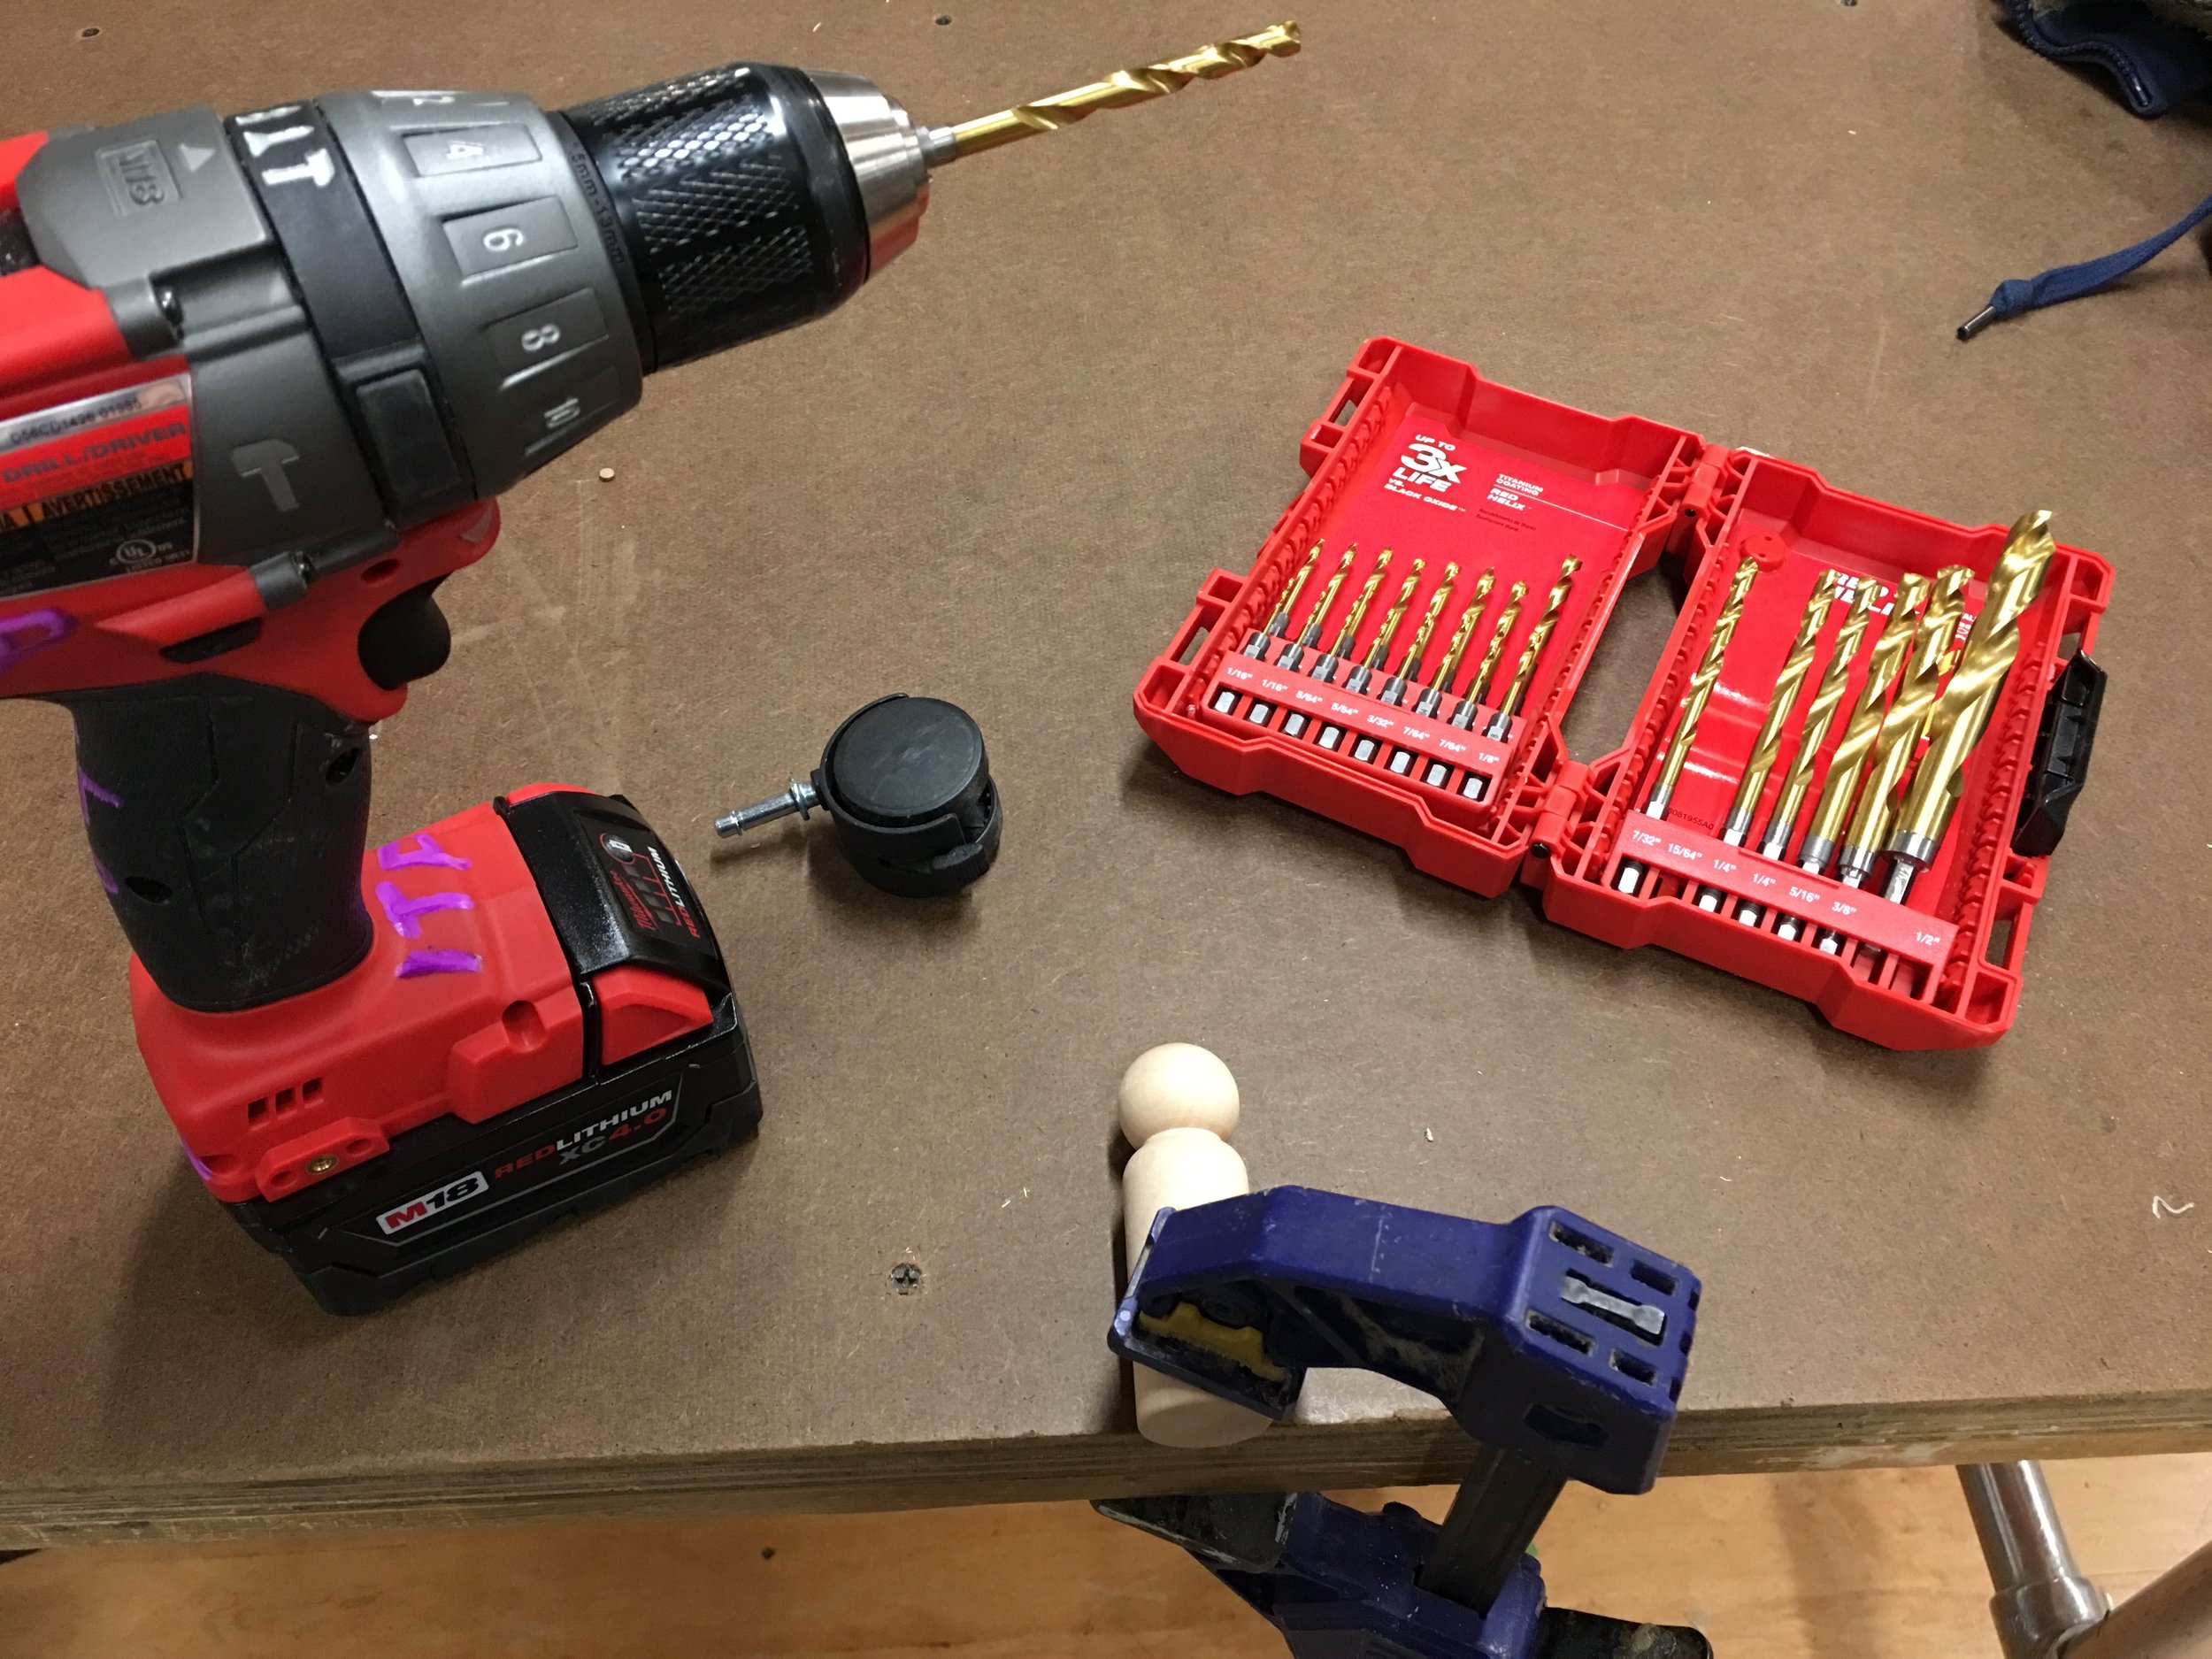
We’ve got 3 wooden pegs to modify.
Searched junk shelf, and got some junk pieces and inspiration.
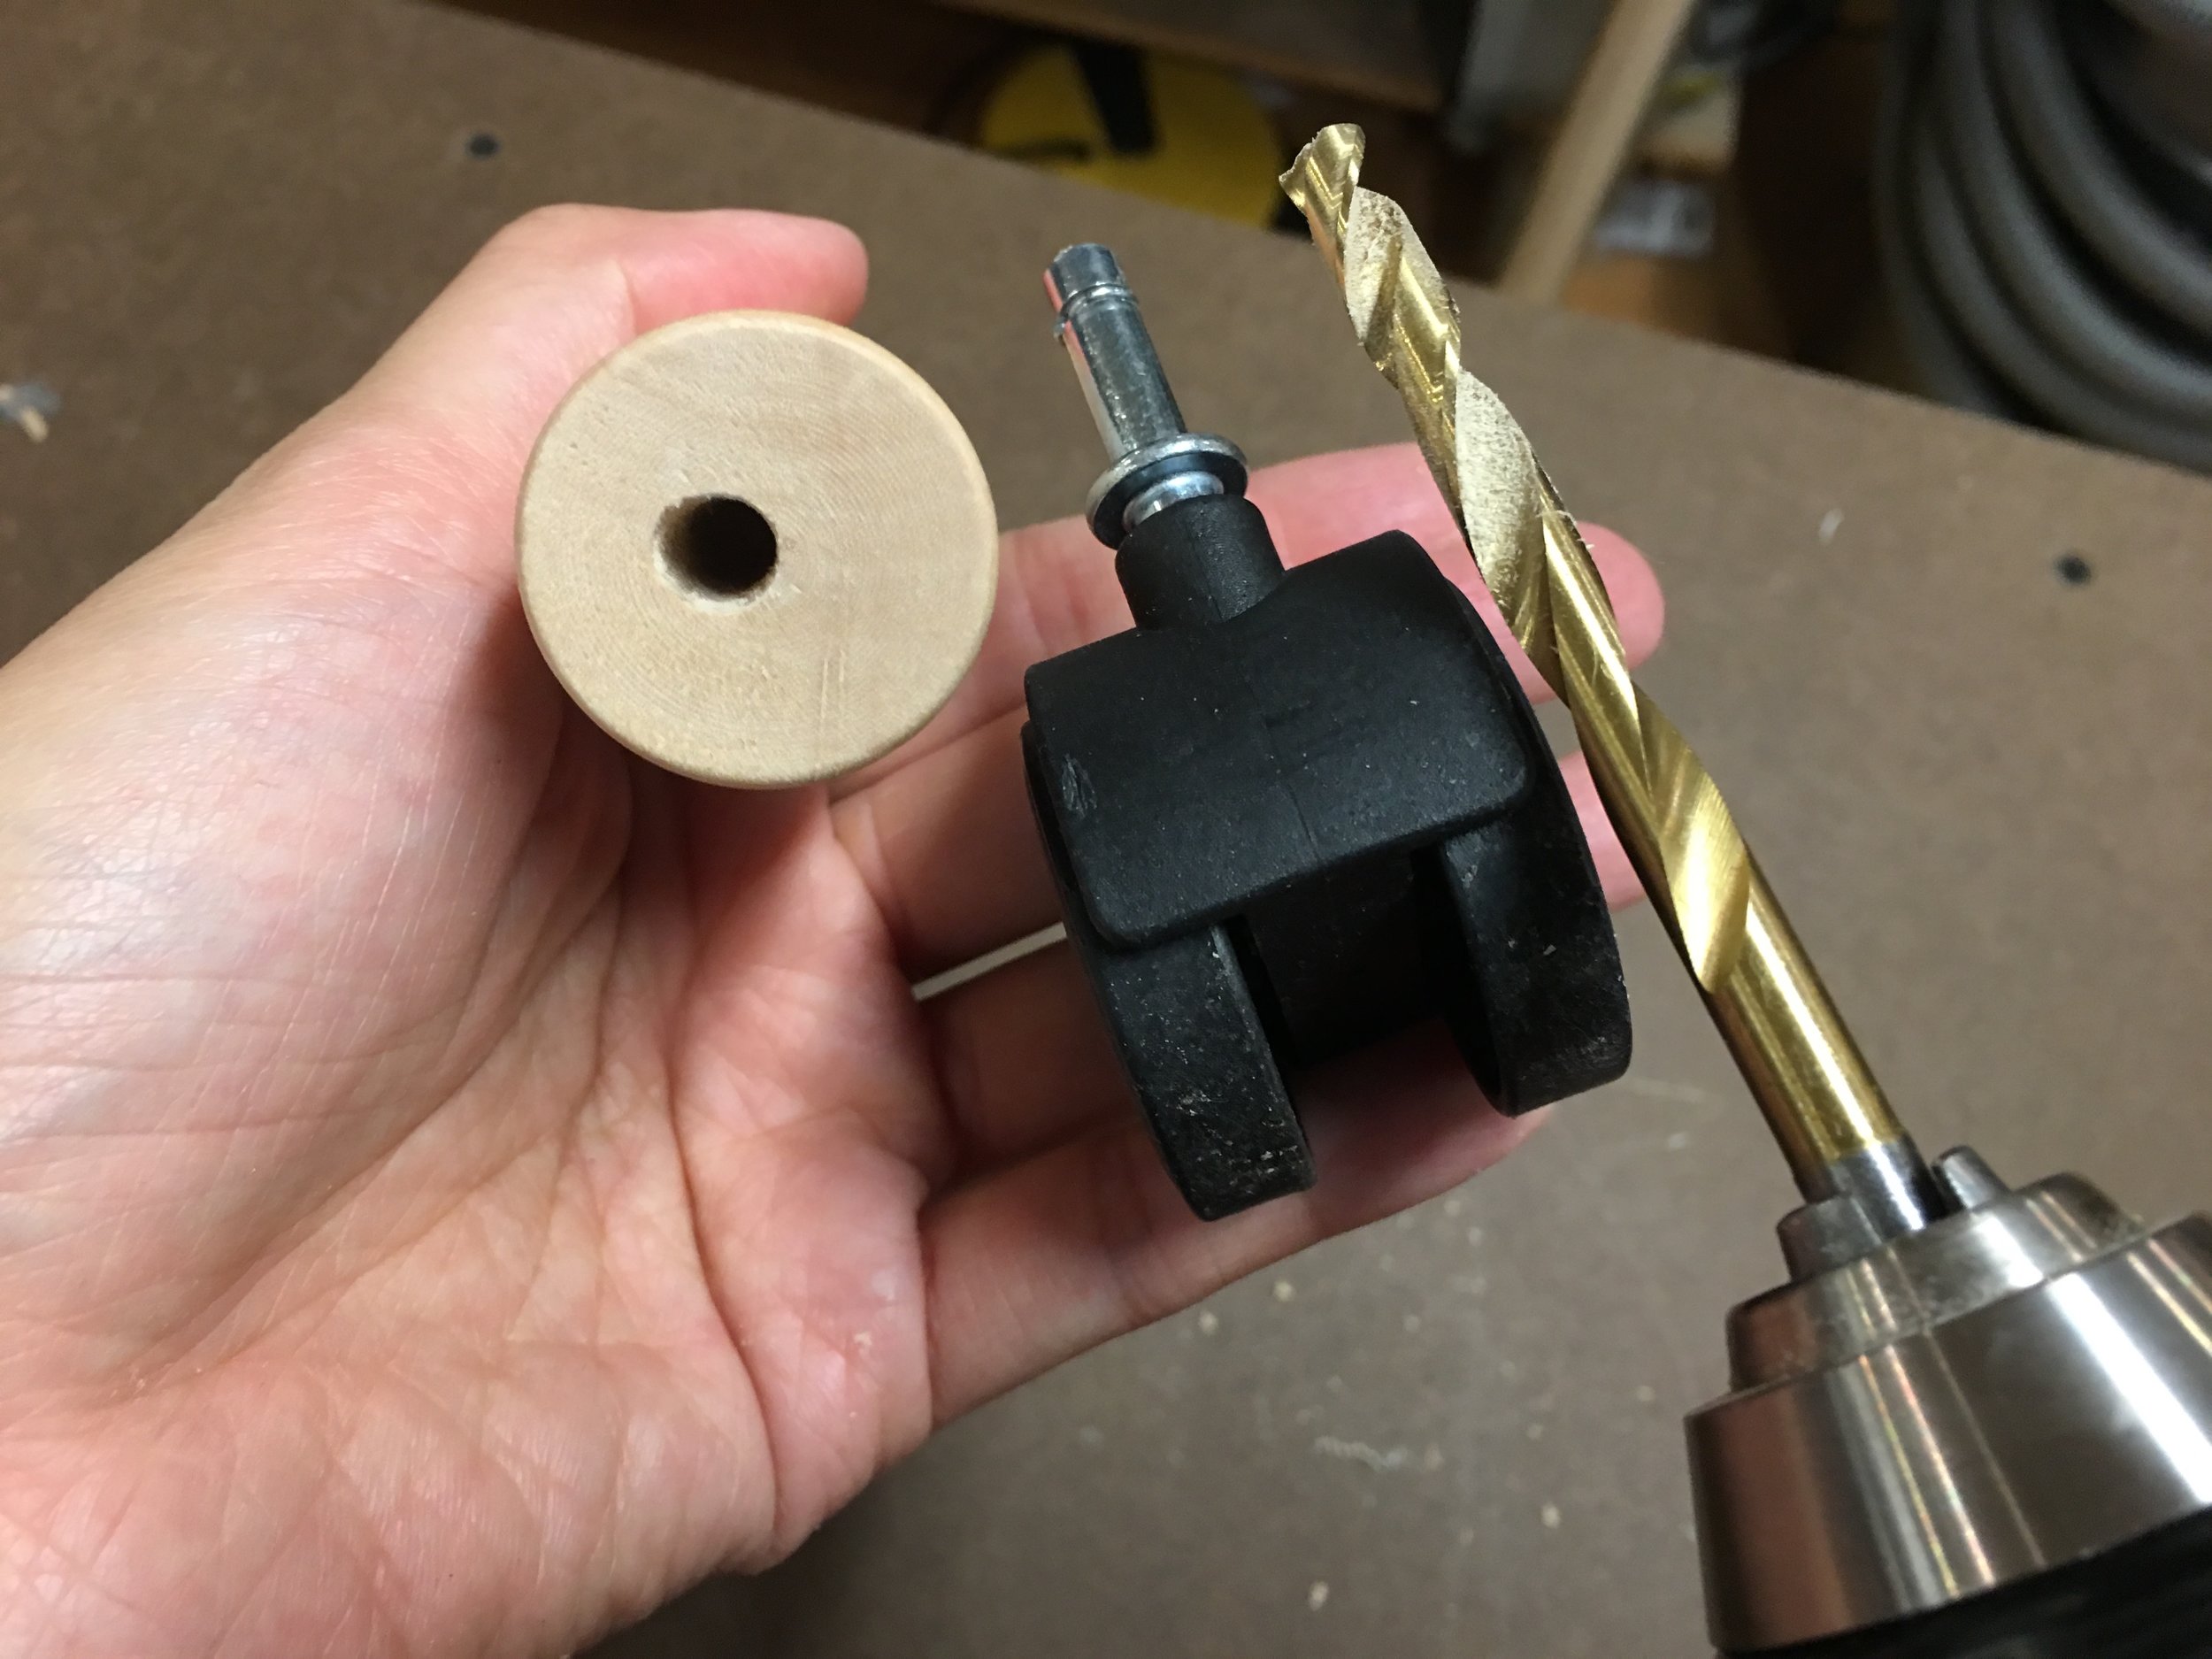
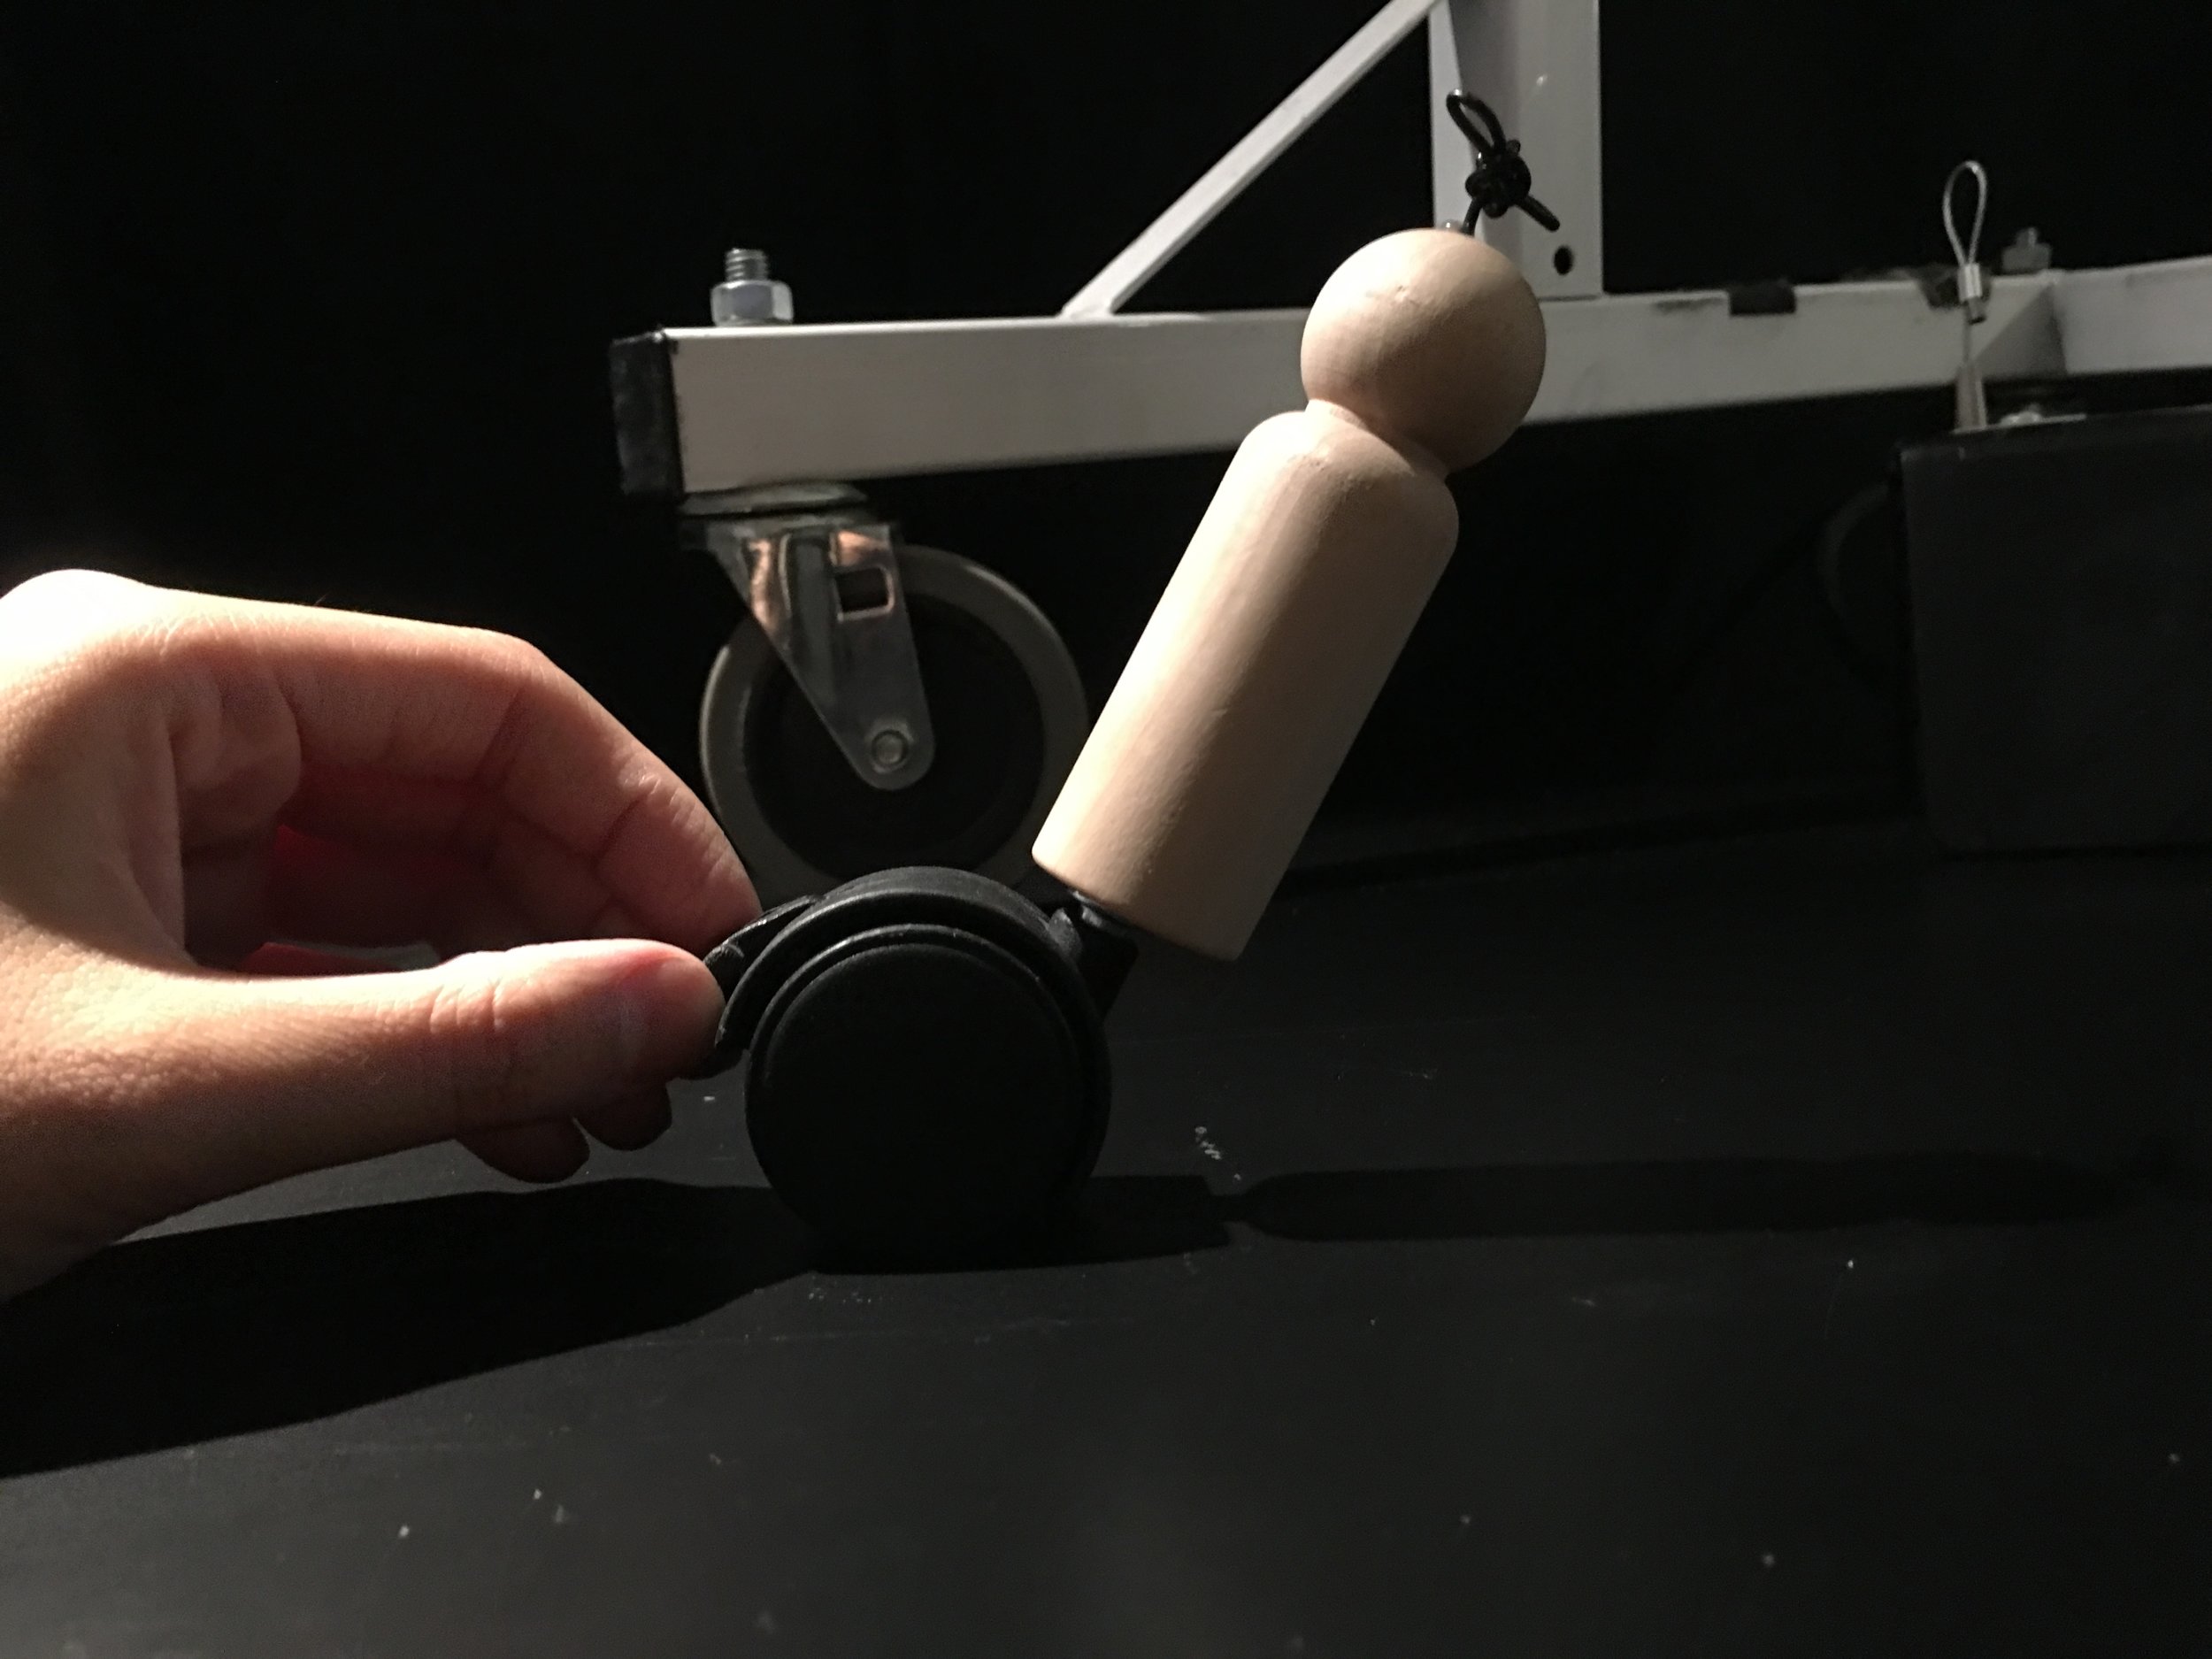
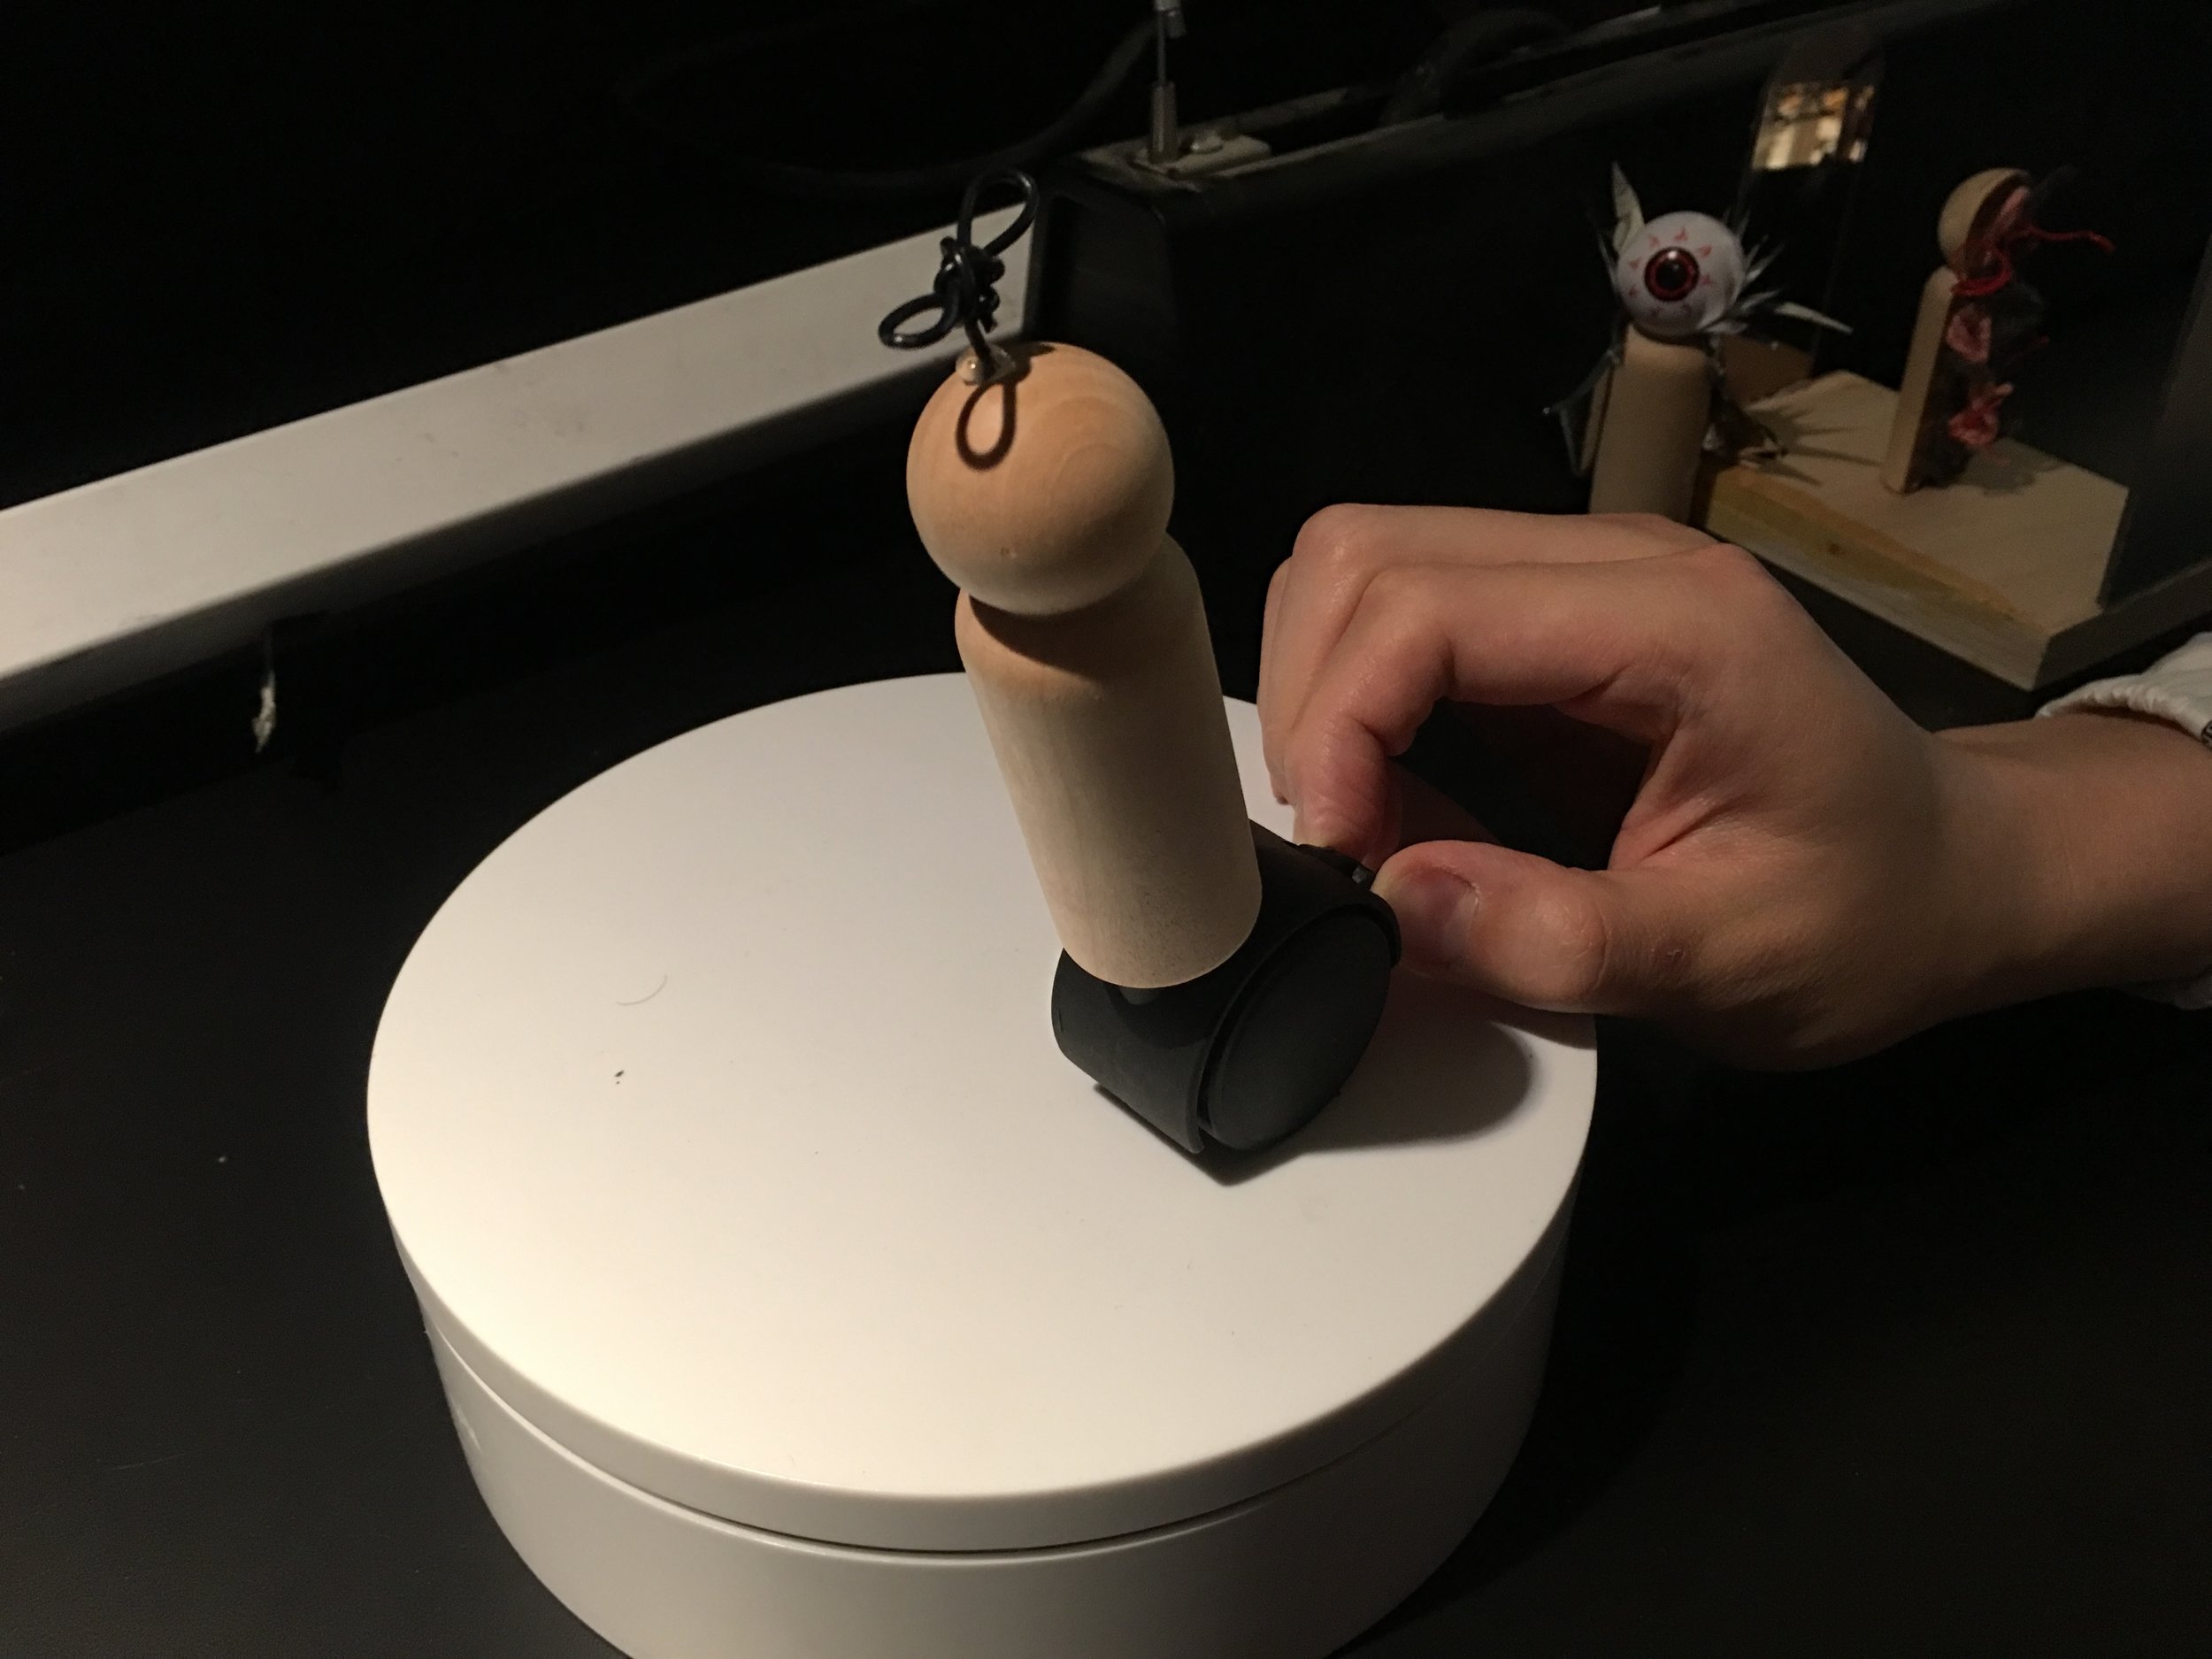
putting a wheel.
I found a wheel for chair. I put a hole on the bottom of the peg to hammer the wheel inside.
It seemed a bit simple, so I made a hat for it.
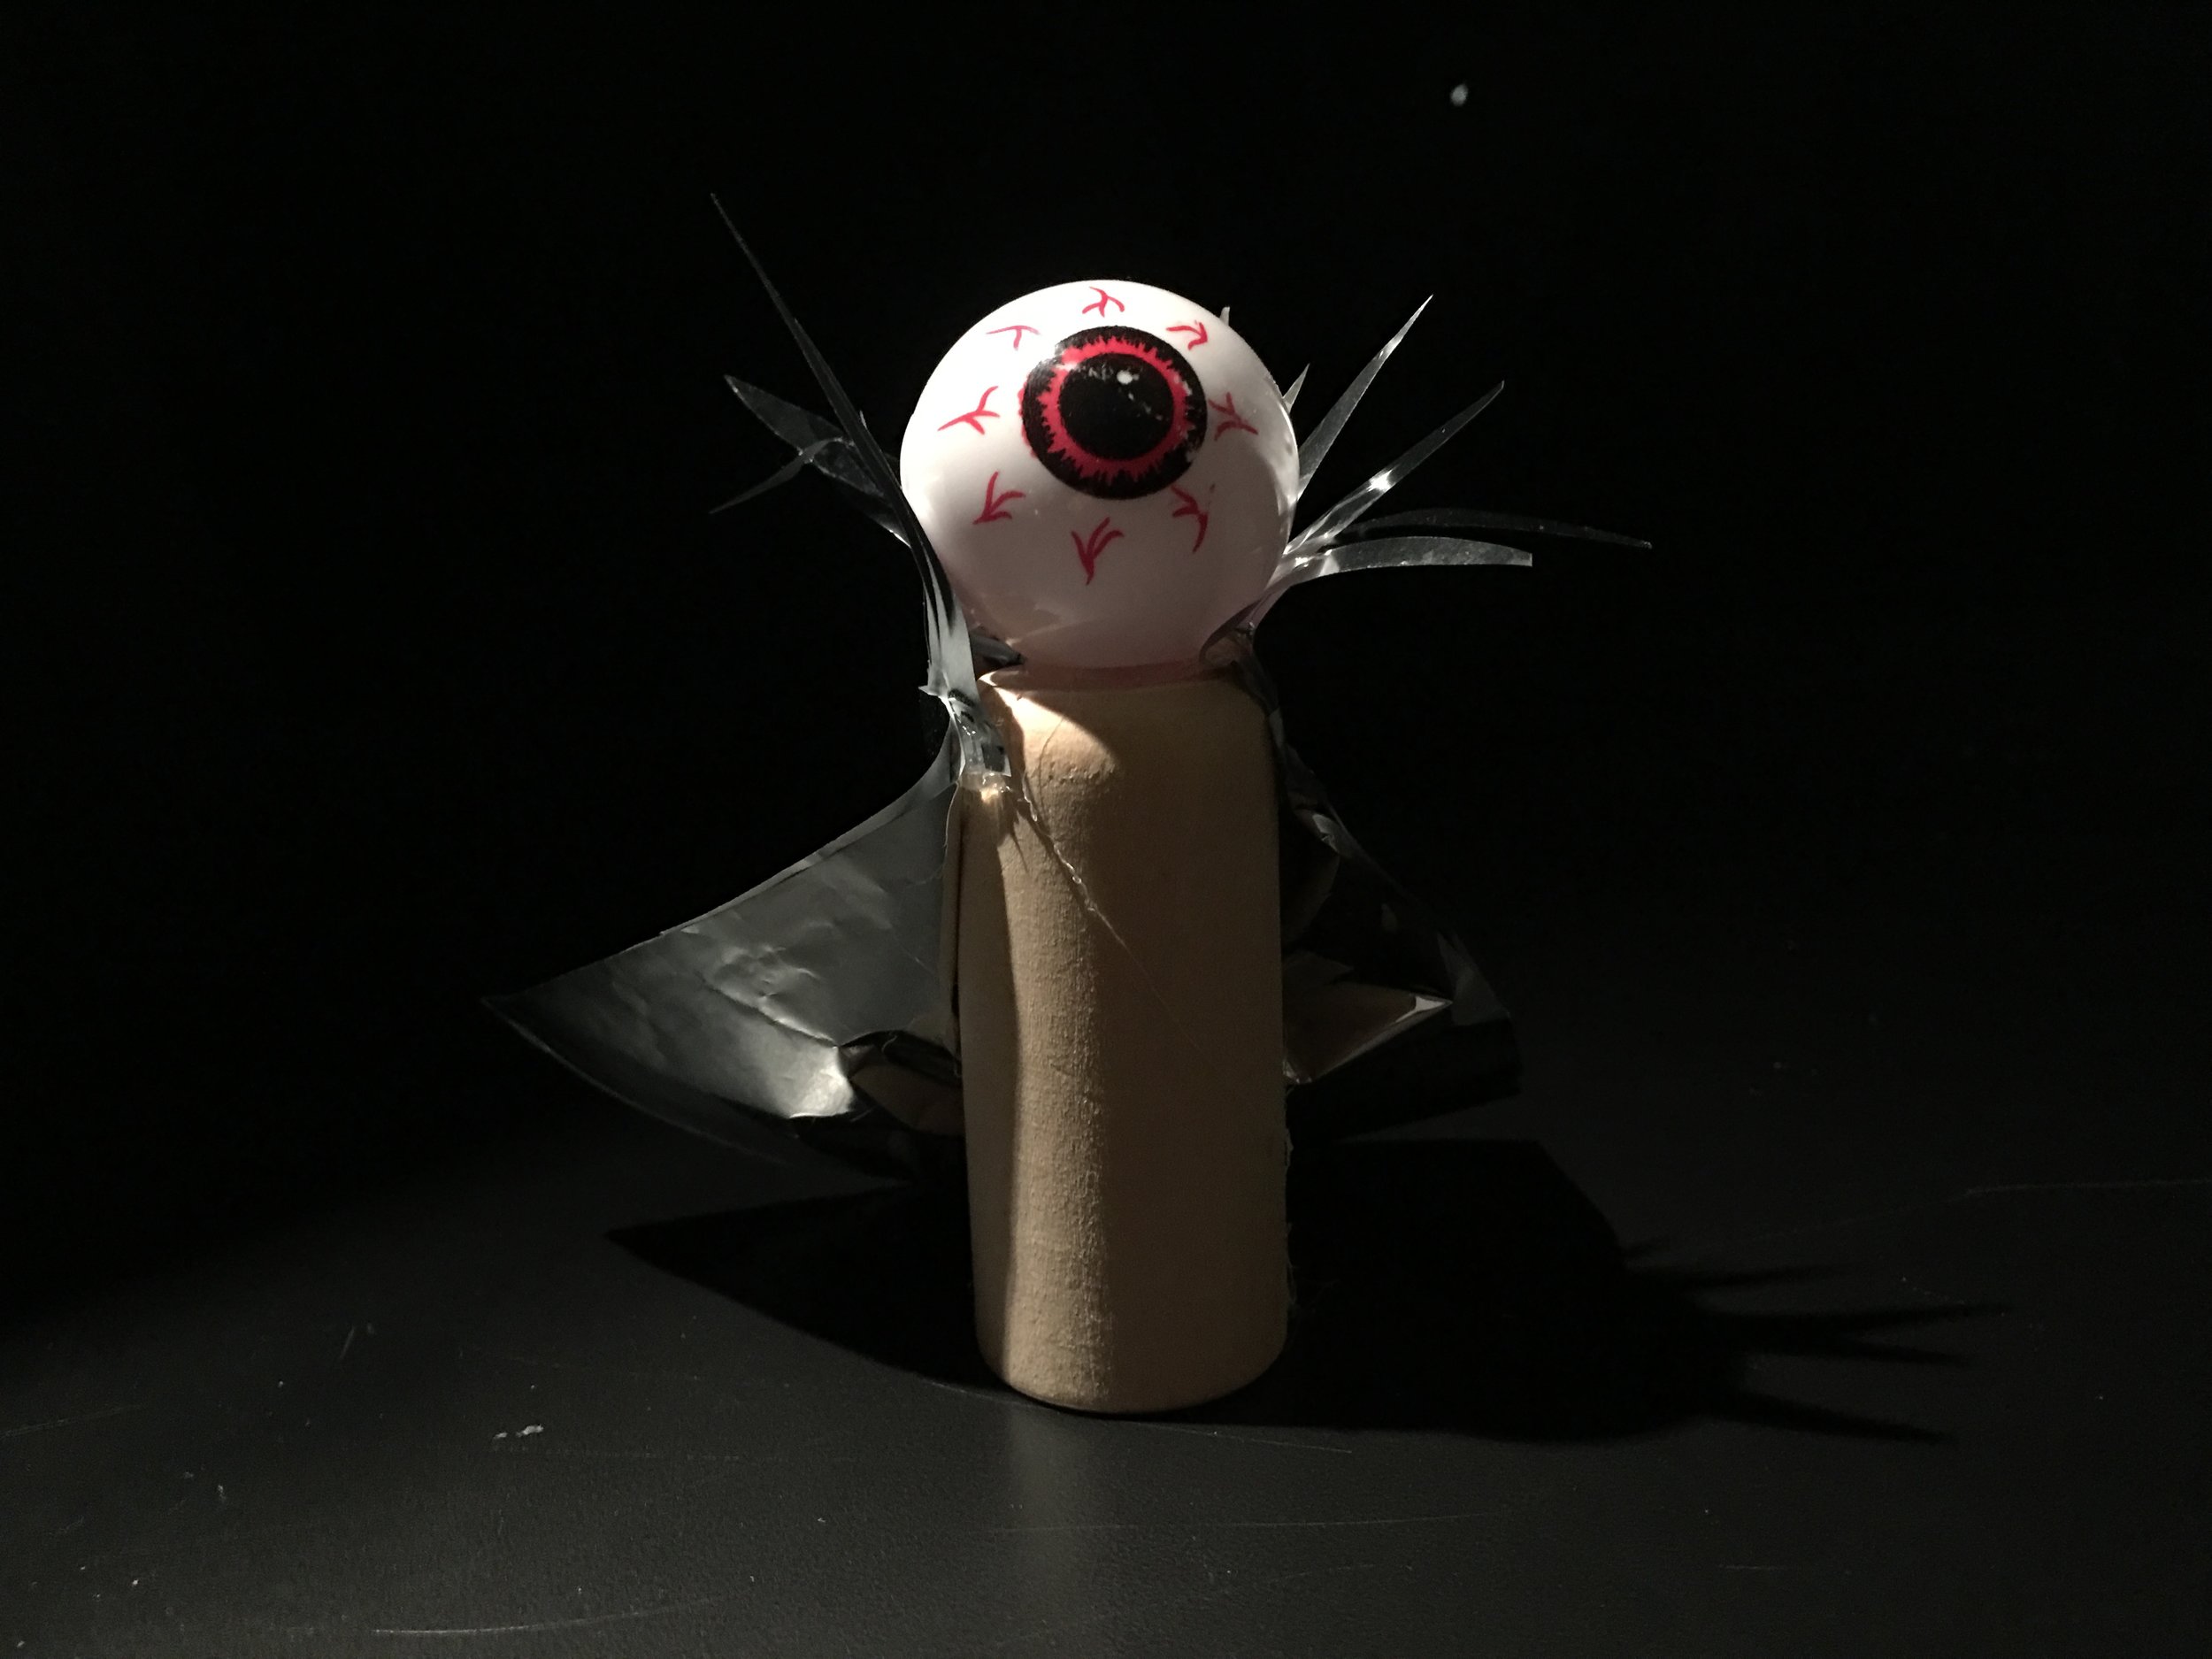
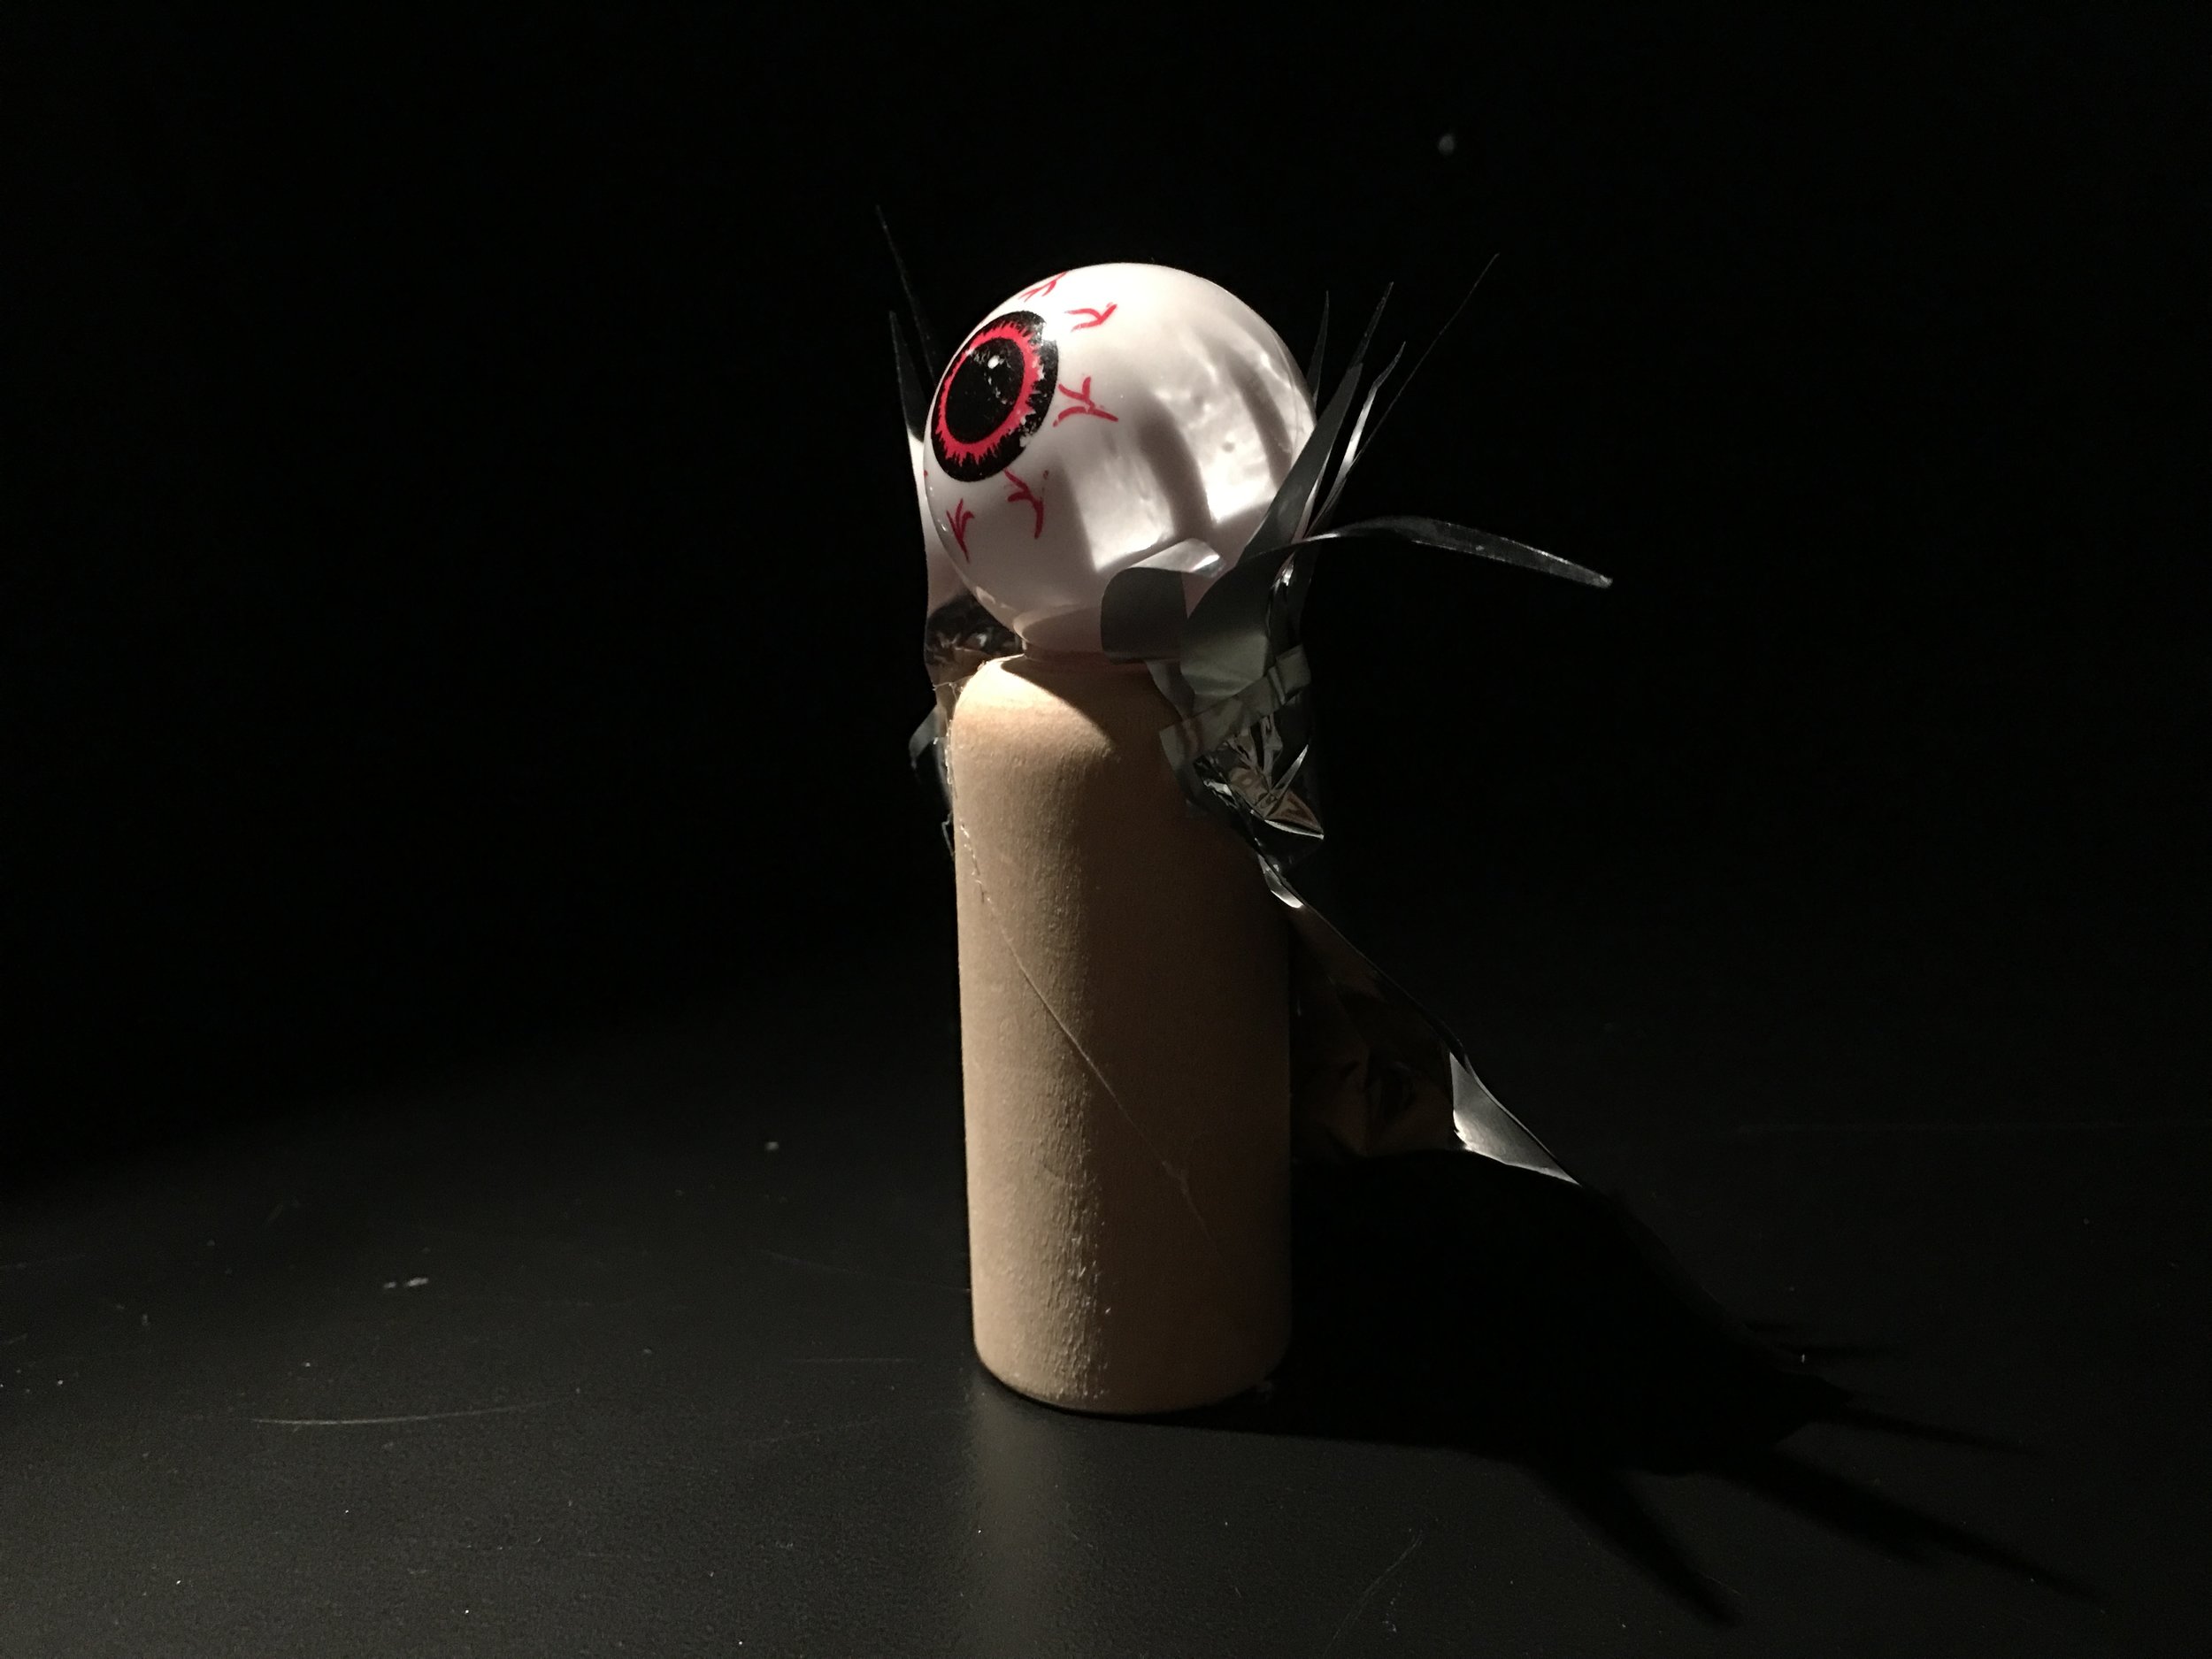
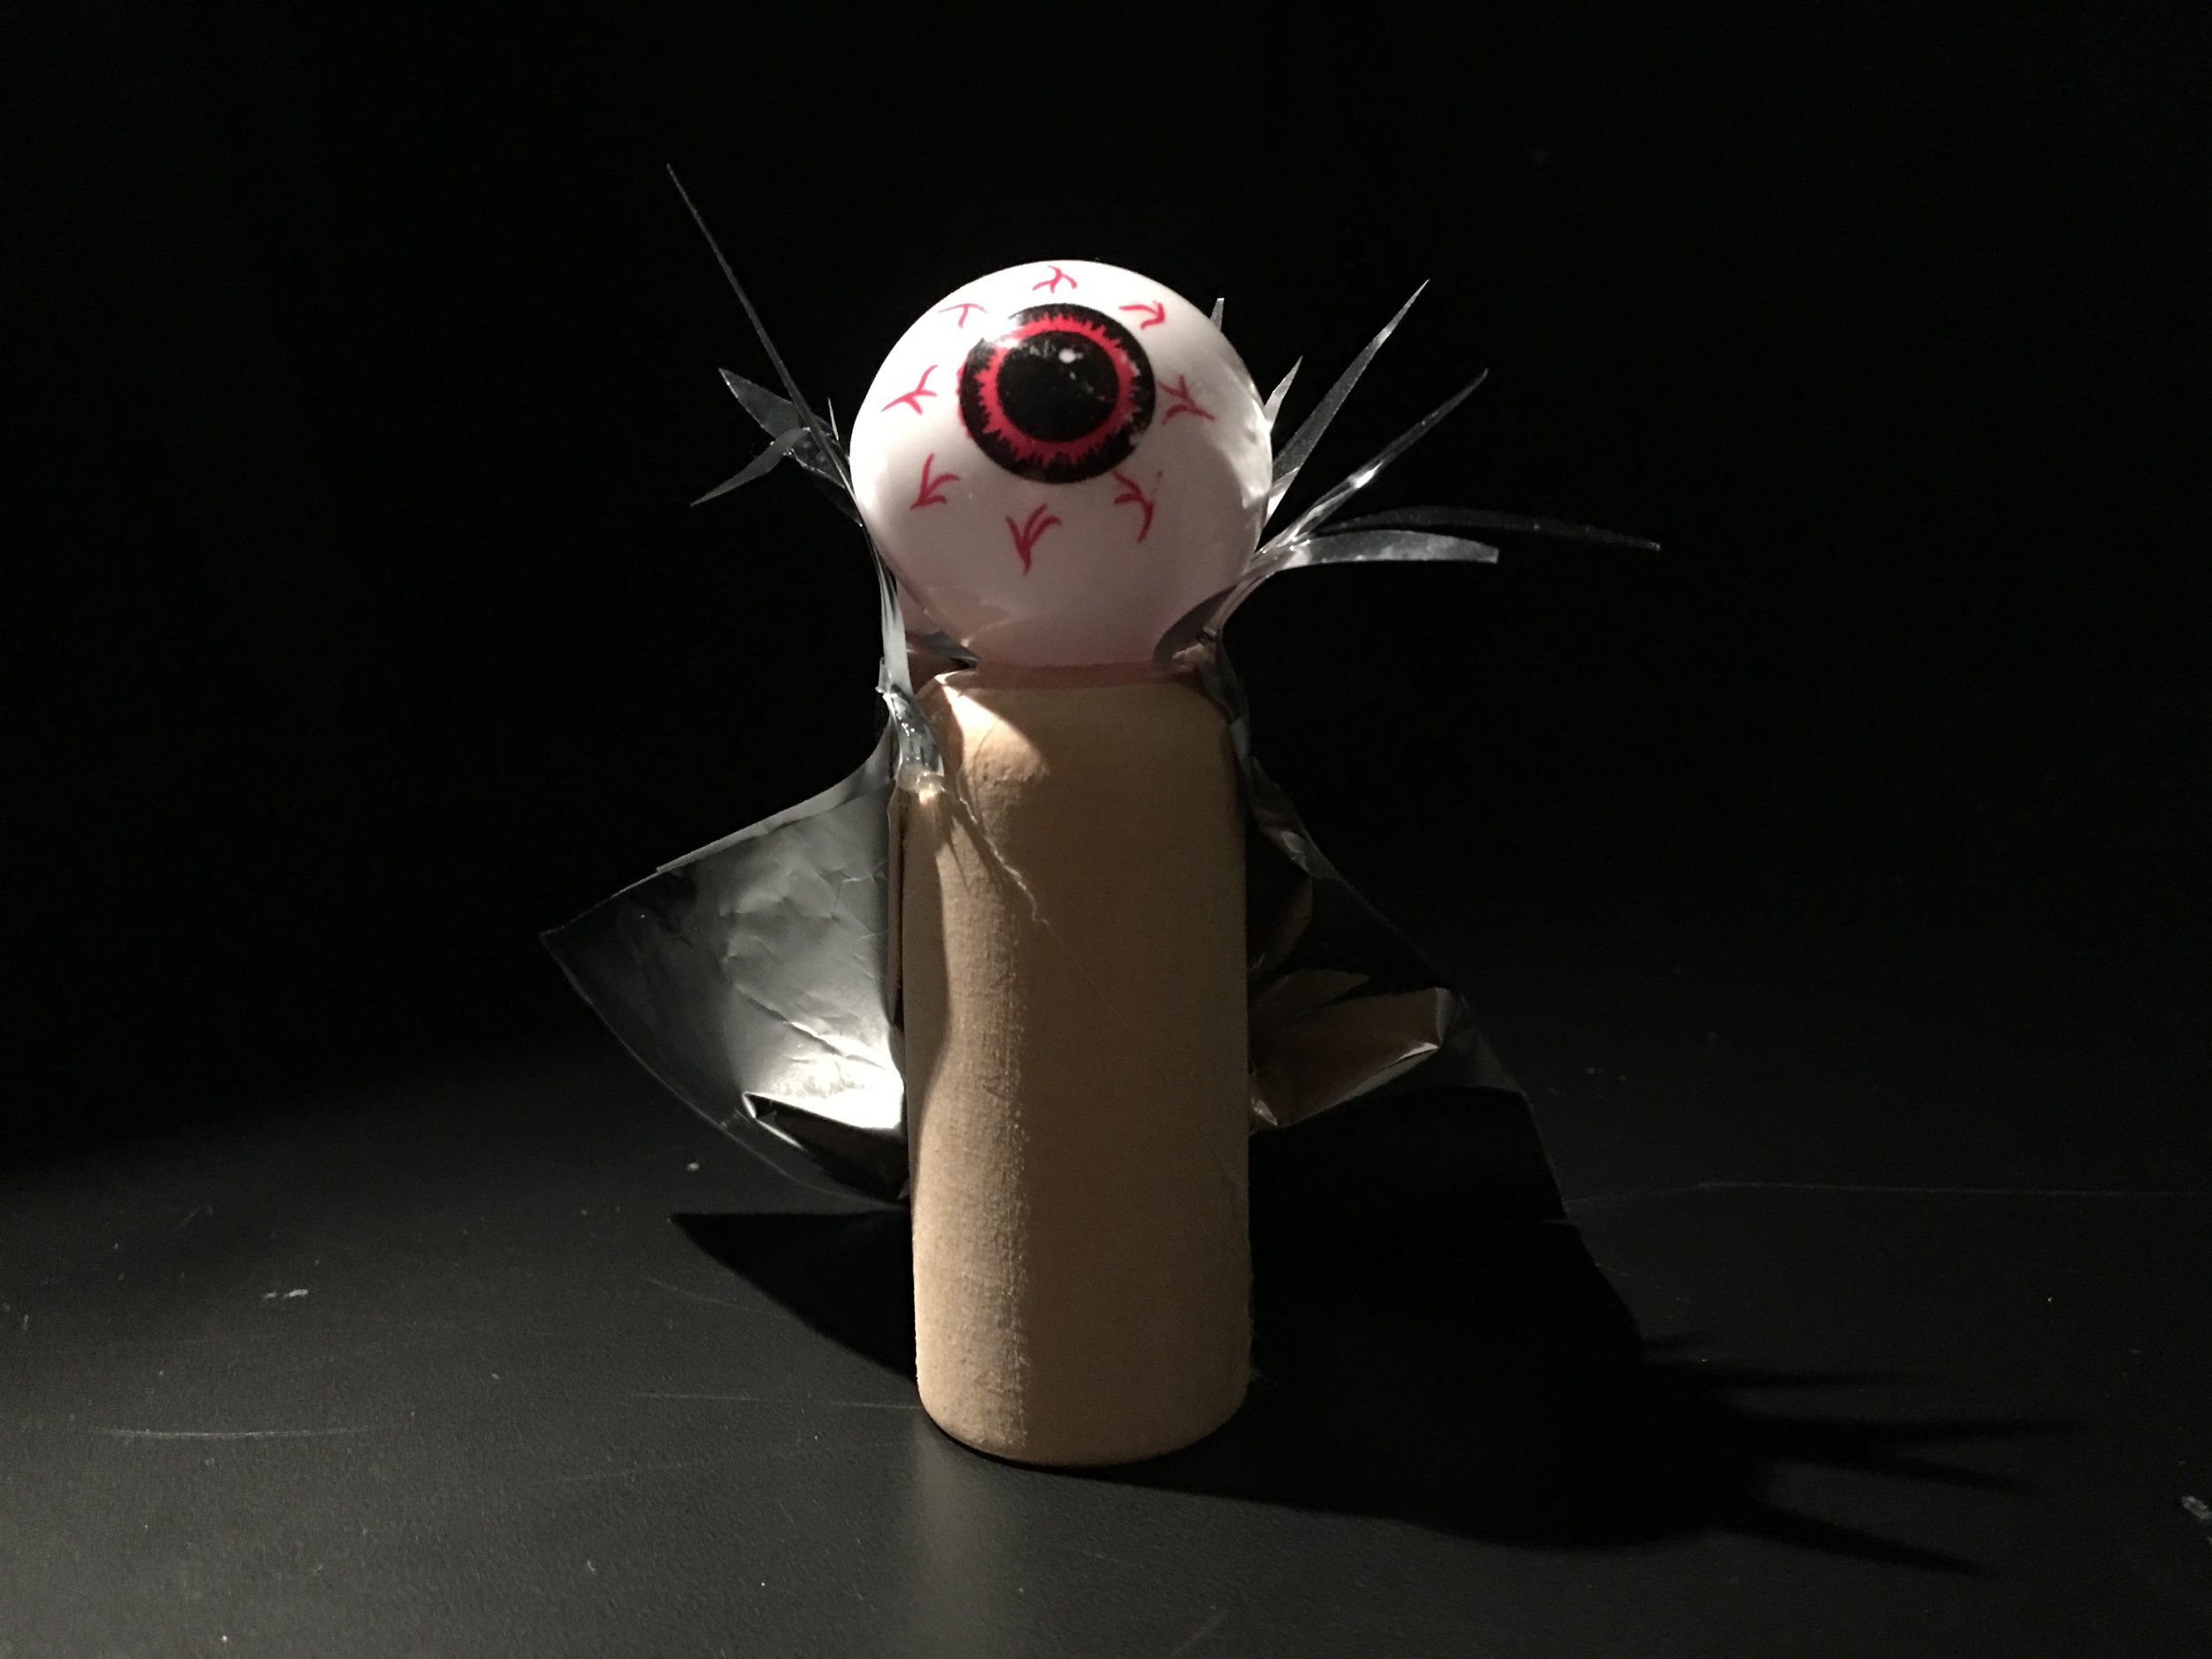
- Switch a head with an eyeball
Interestingly, Phil found an eyeball on the floor that looks like one in my character drawing. Inspired by Sauron, I made a… Sauron peg.
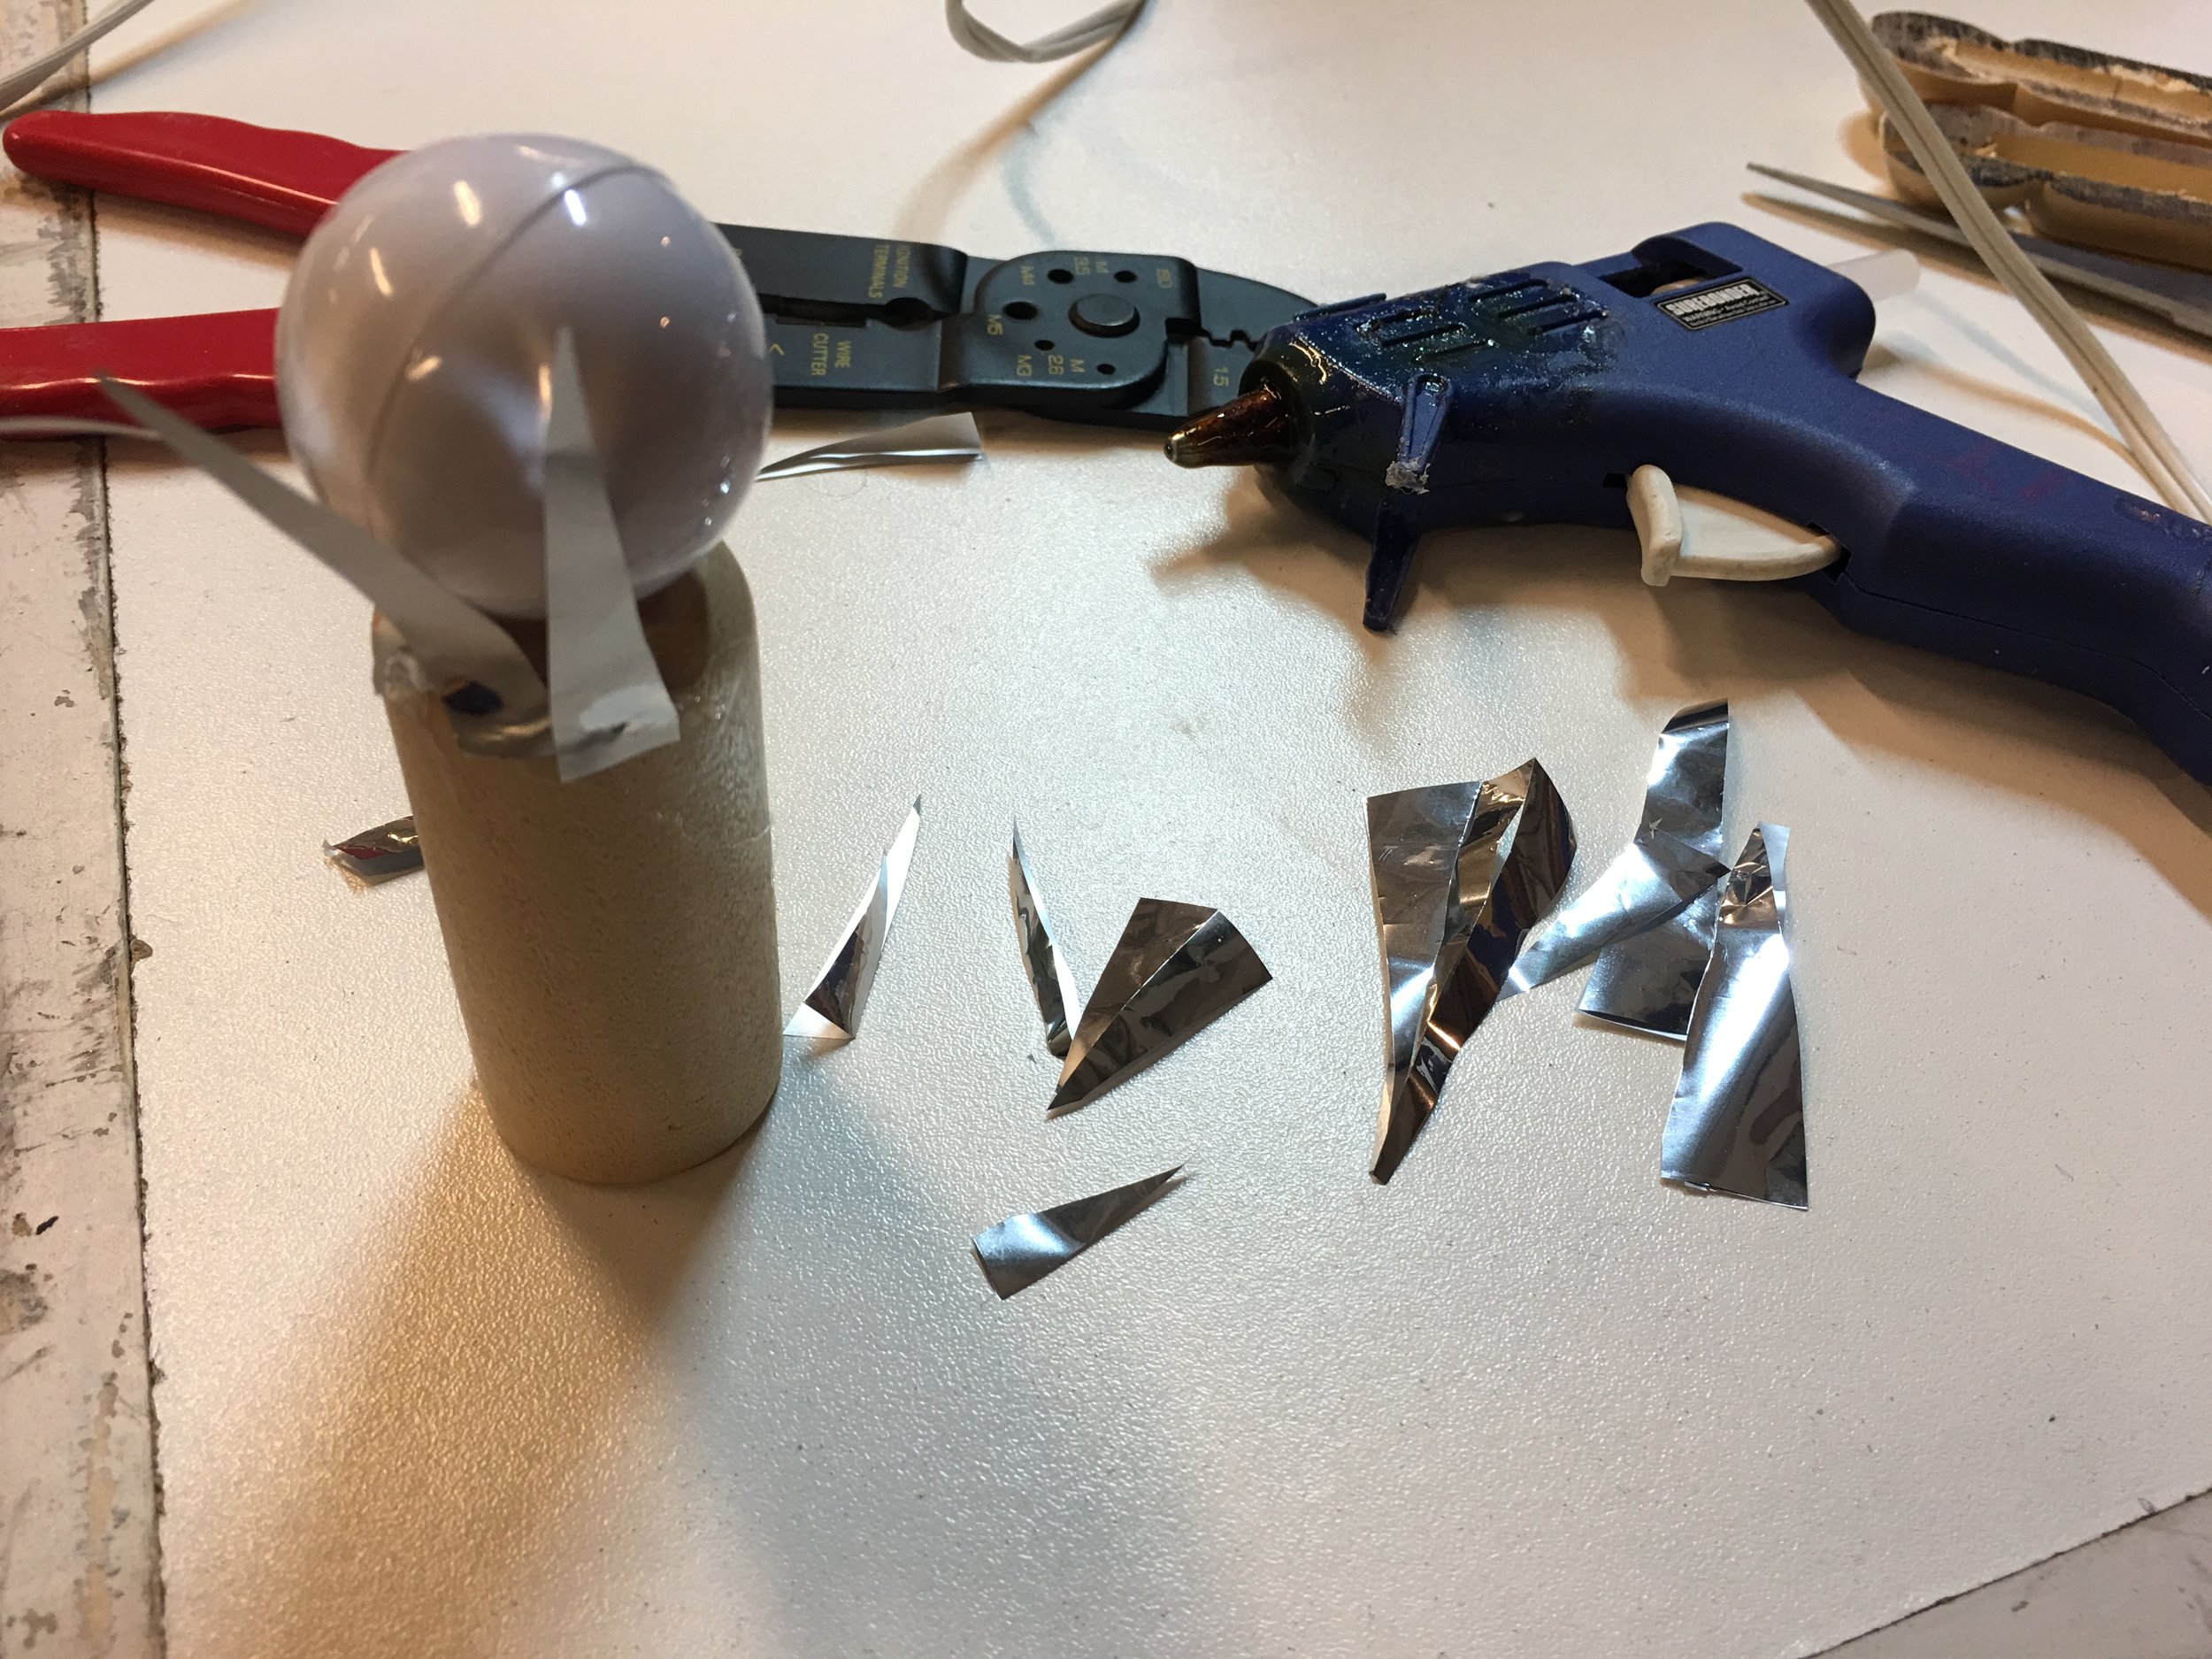
Simply I cut the head of the peg with a bandsaw, and put a plastic eyeball with glue.

I had mylar sheet in my bin, made a cloak for it.
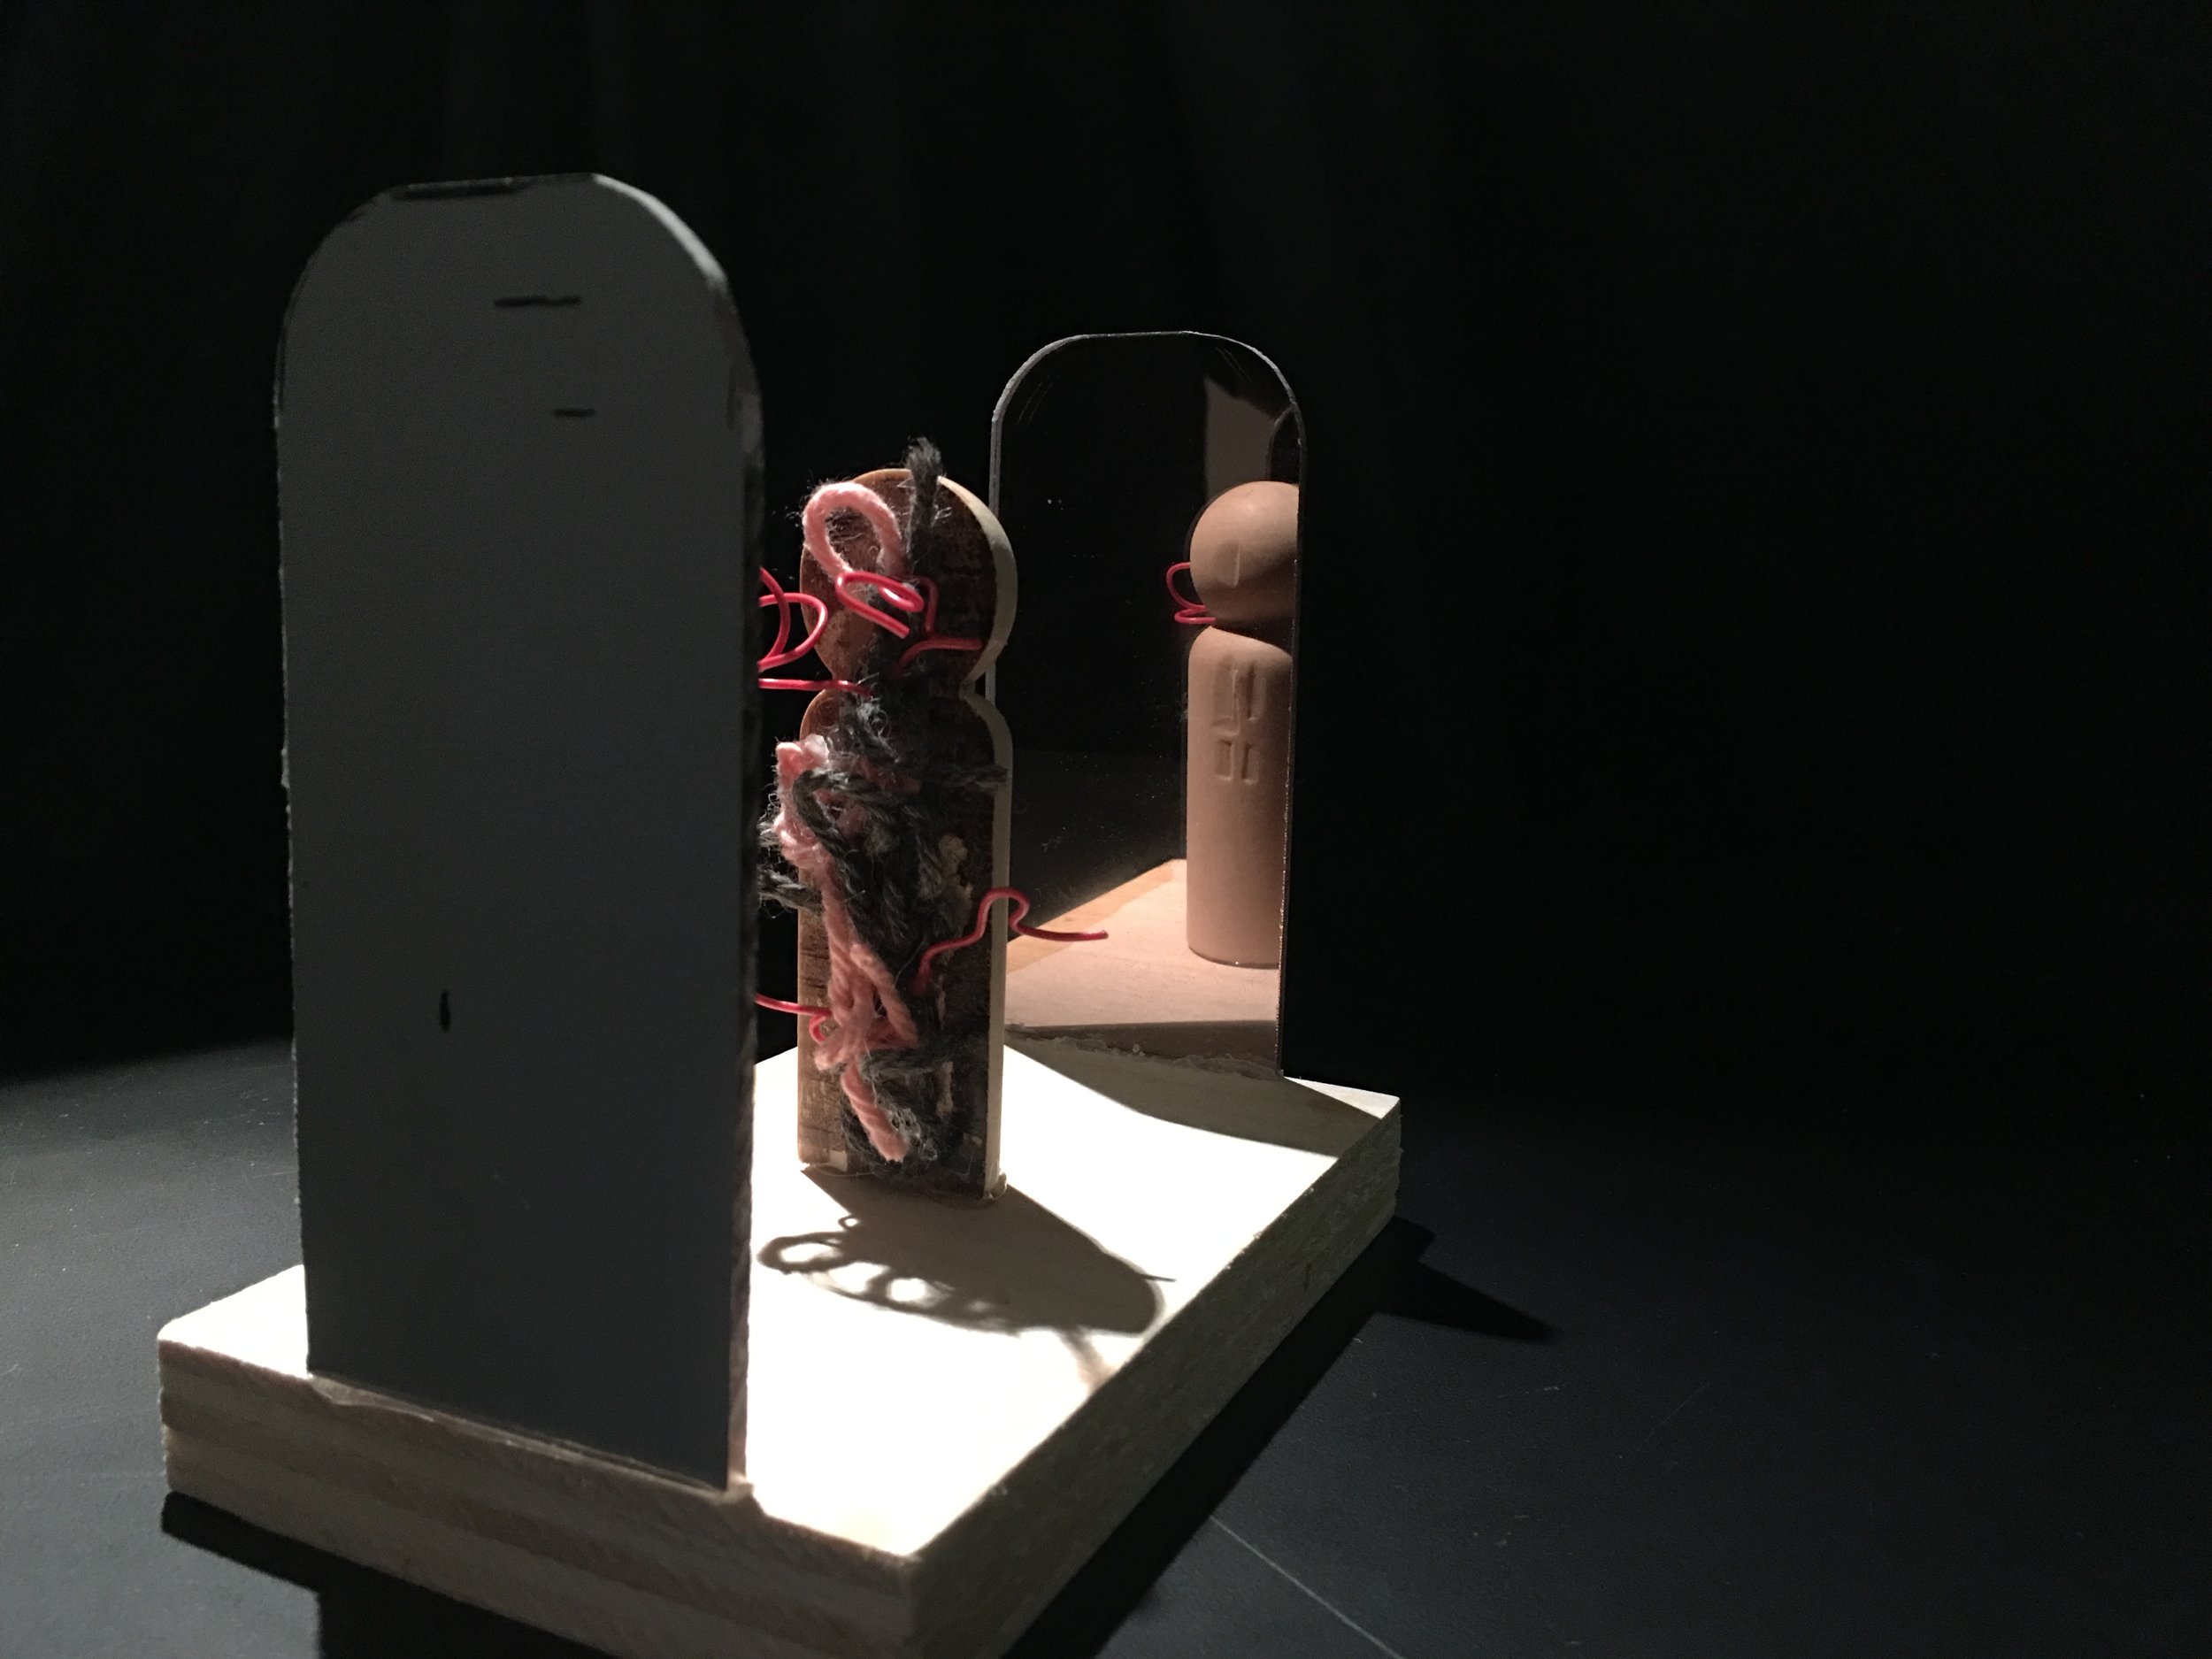
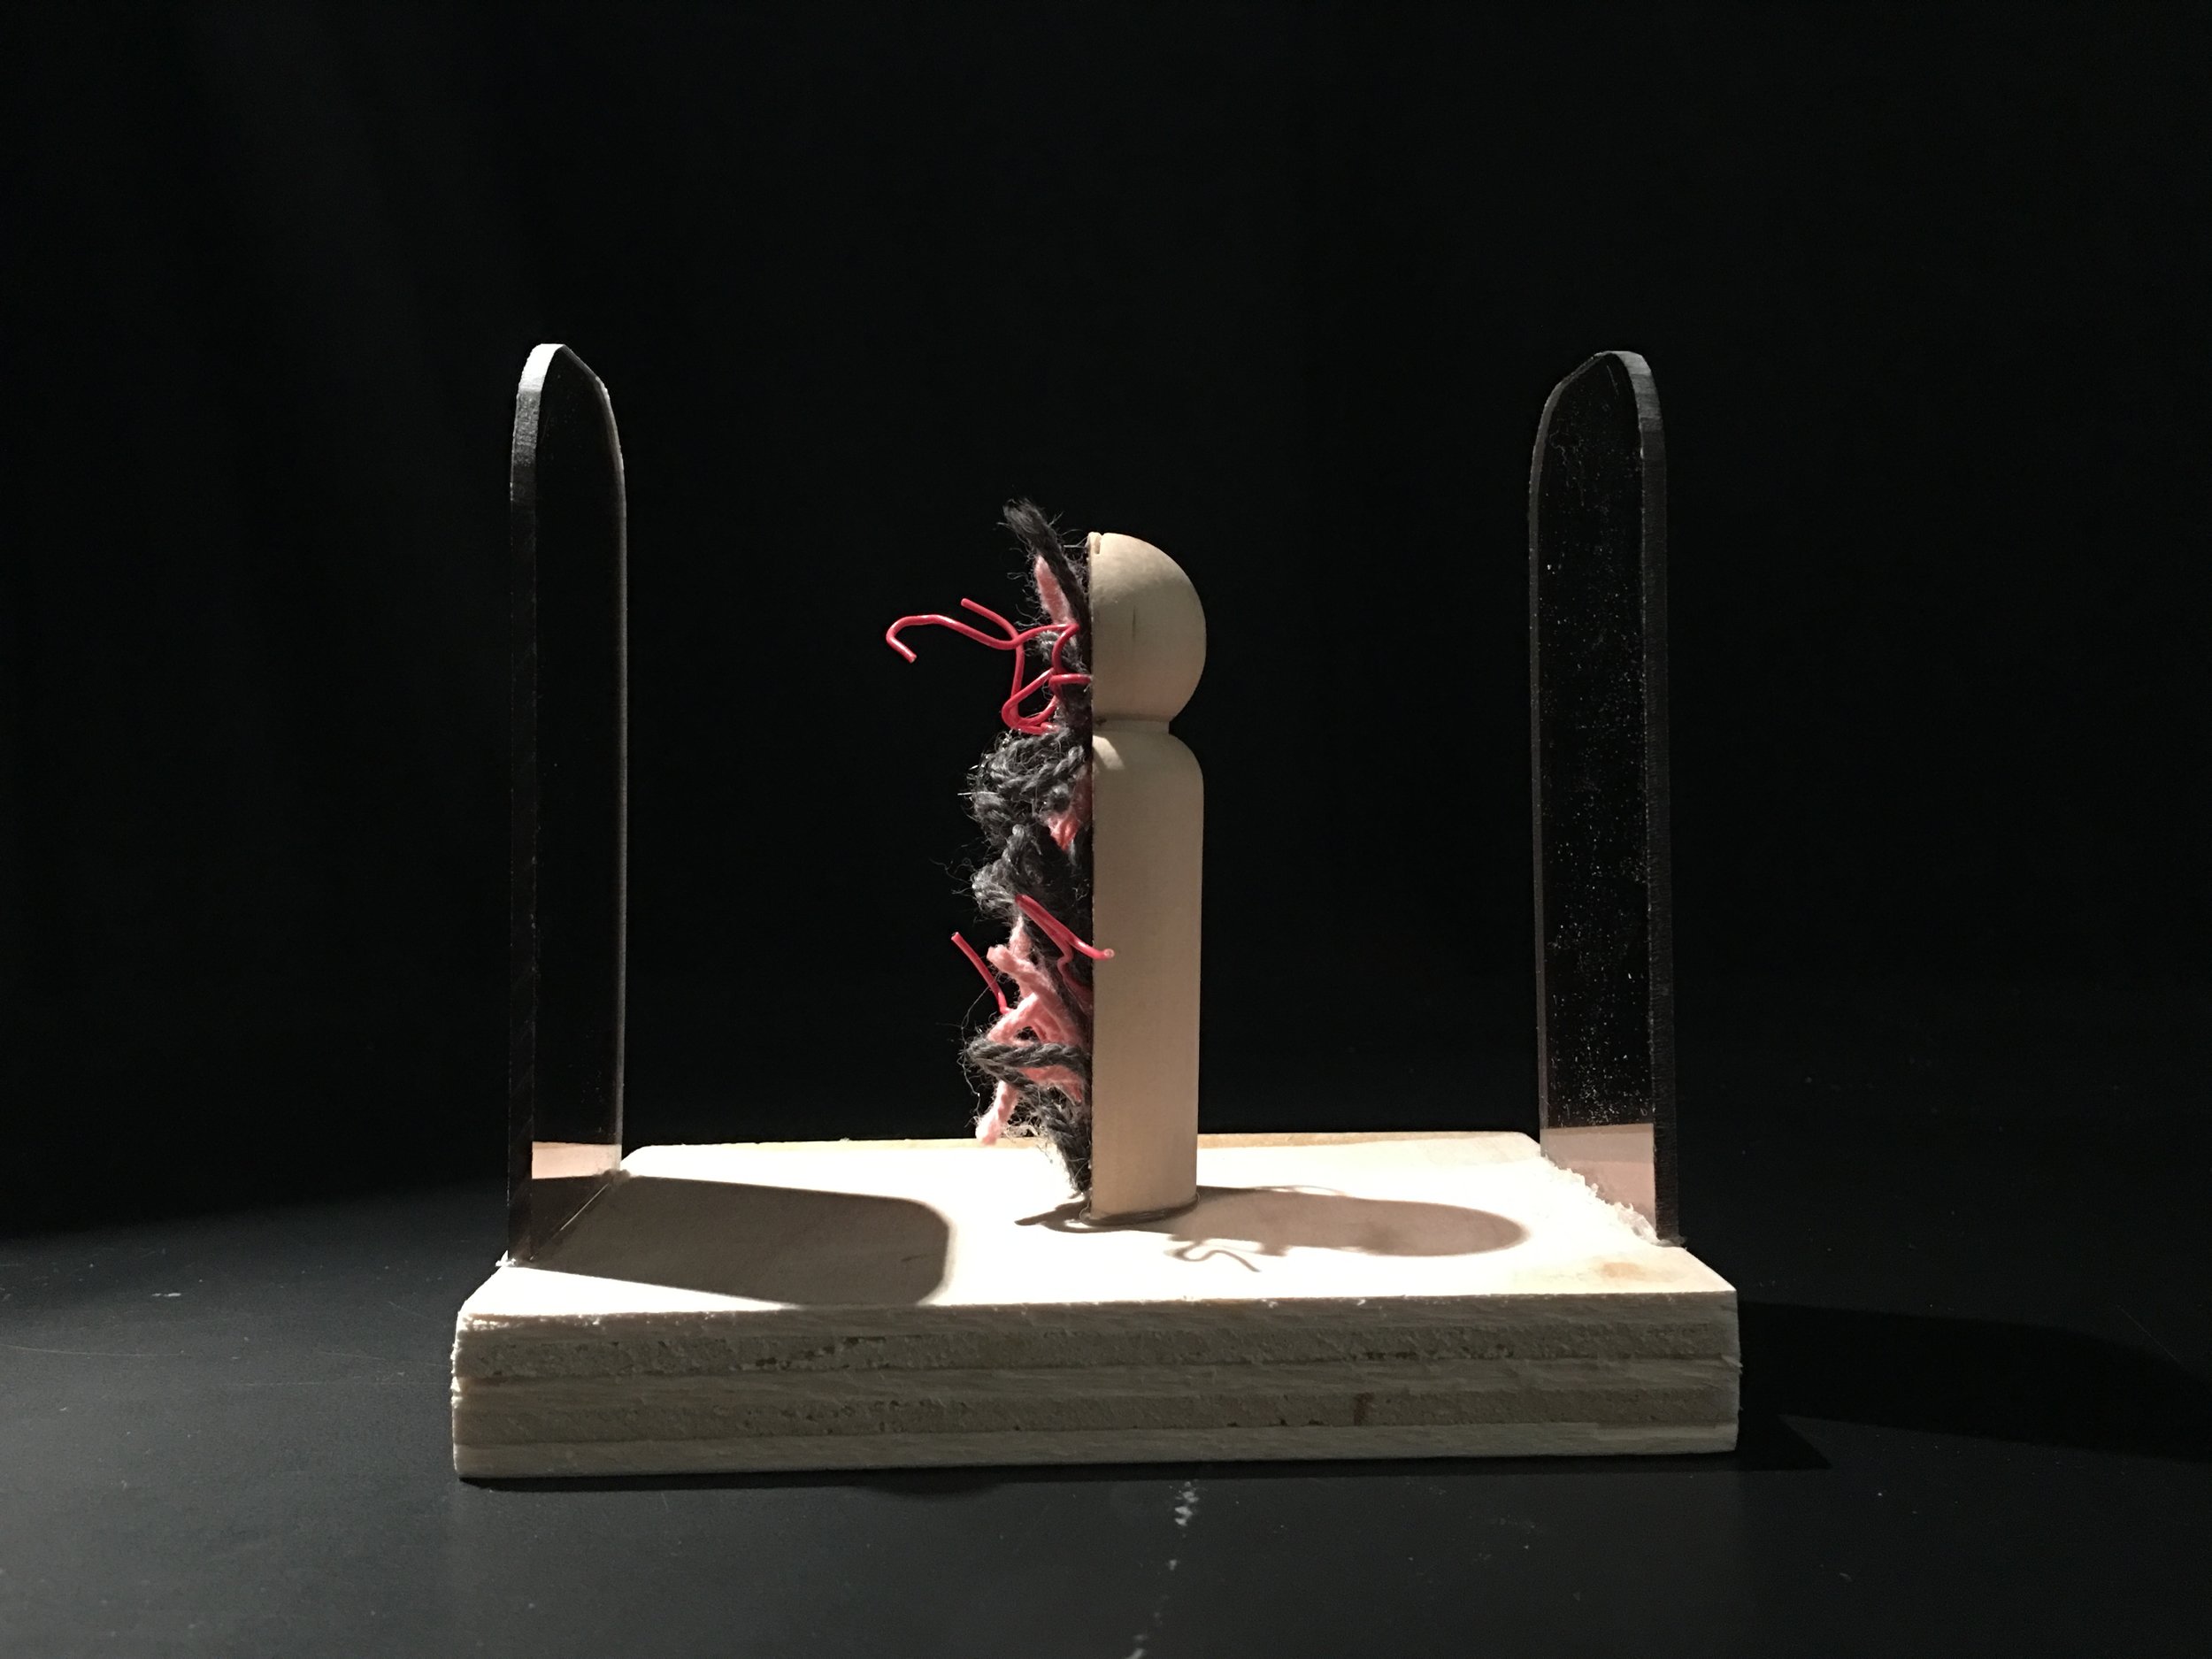
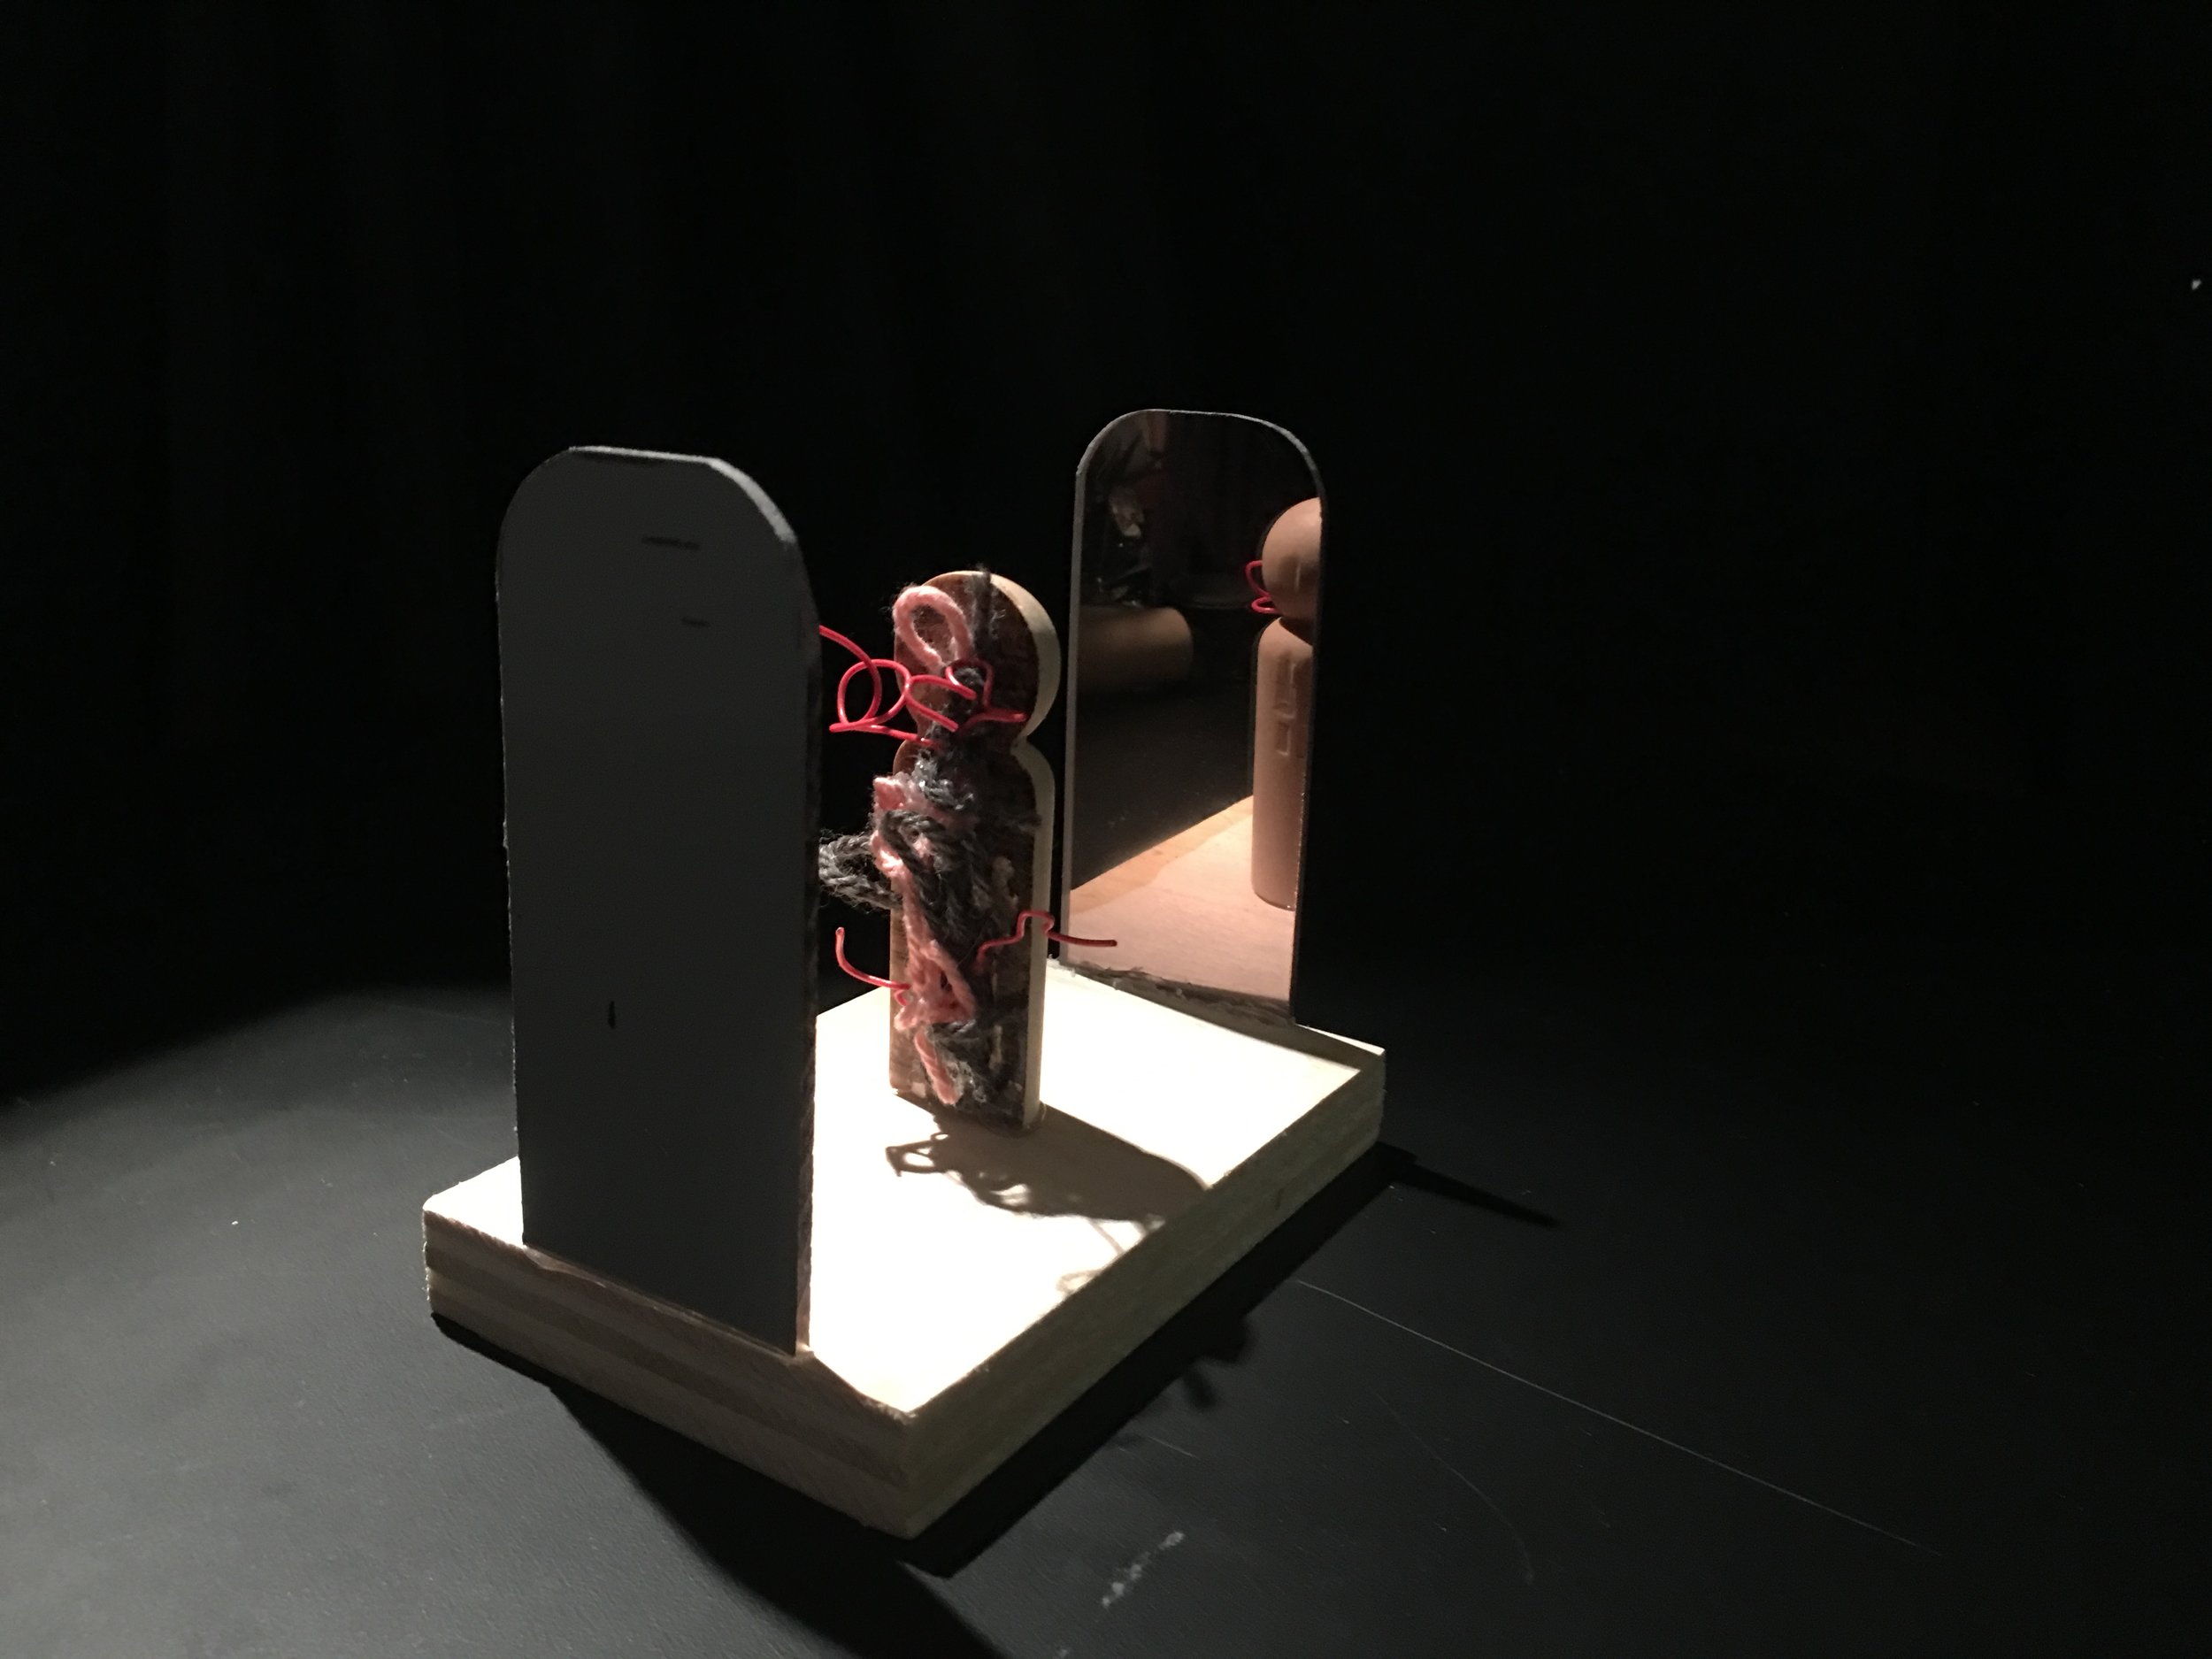
- Cut in a half
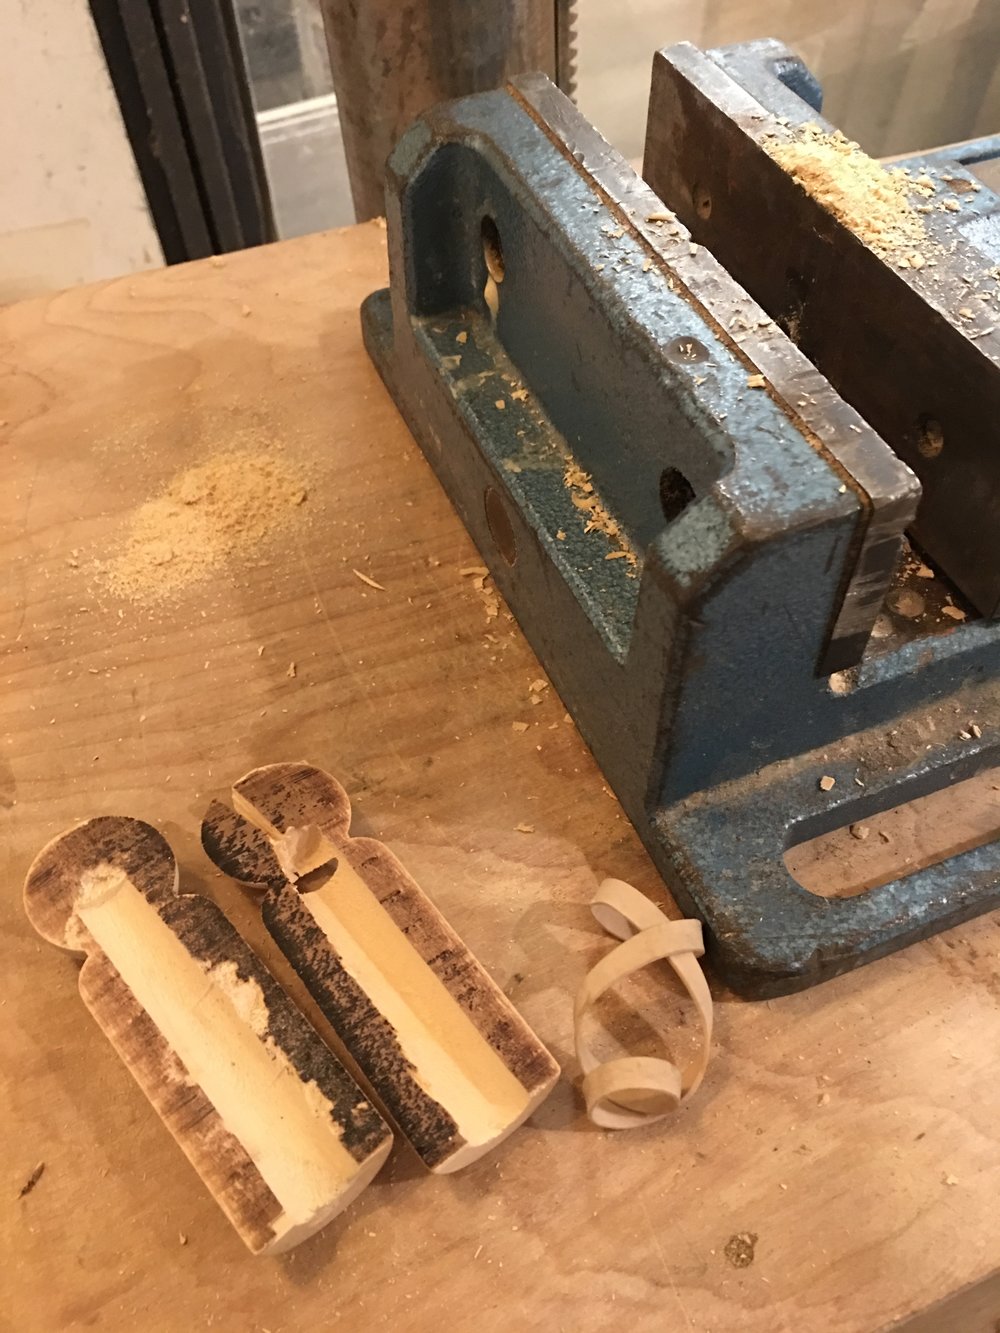
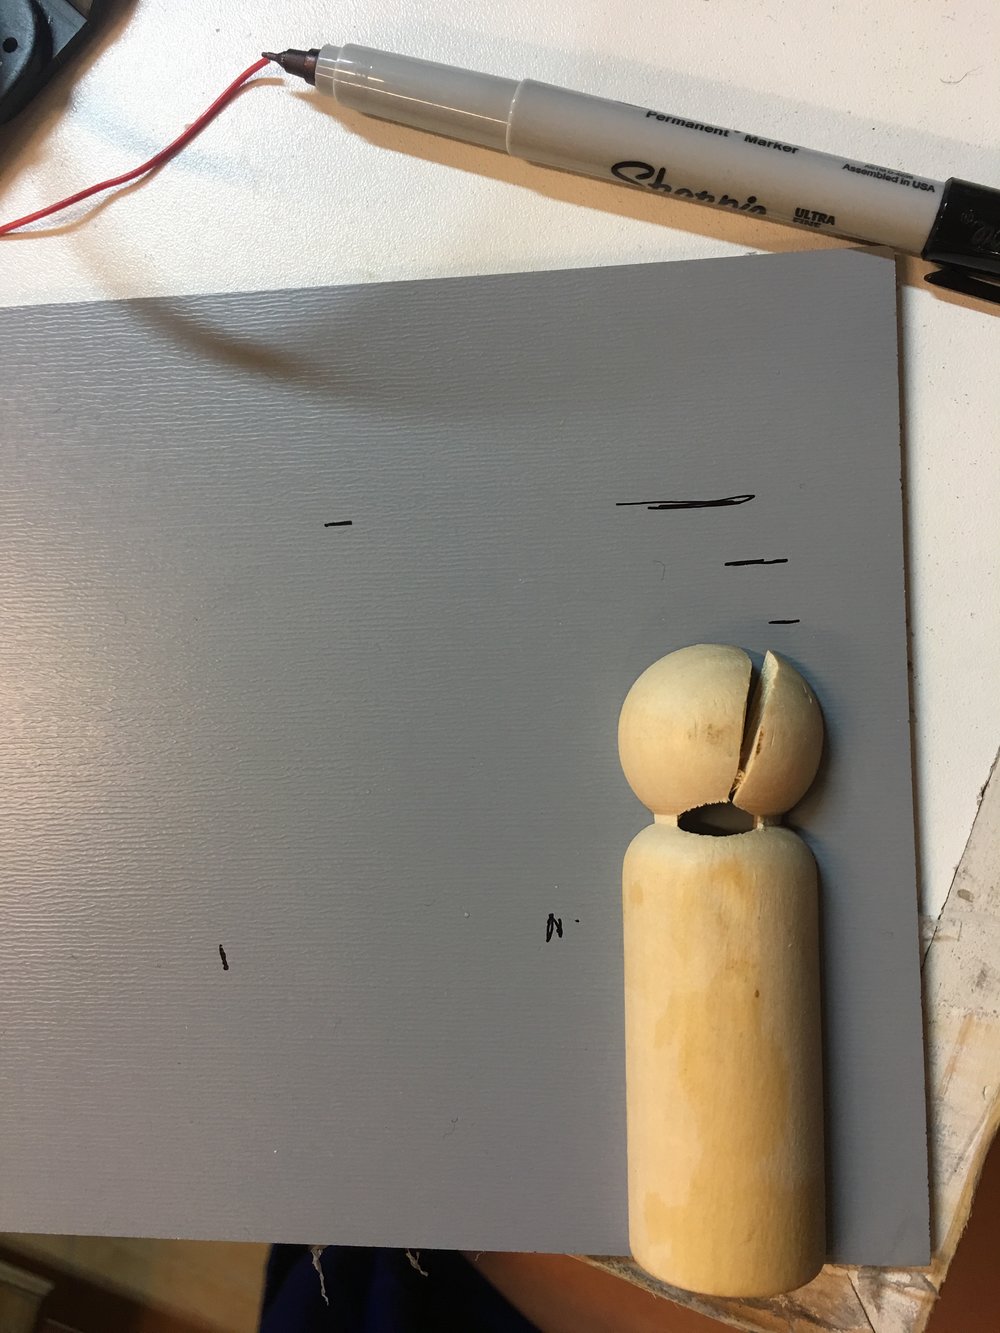
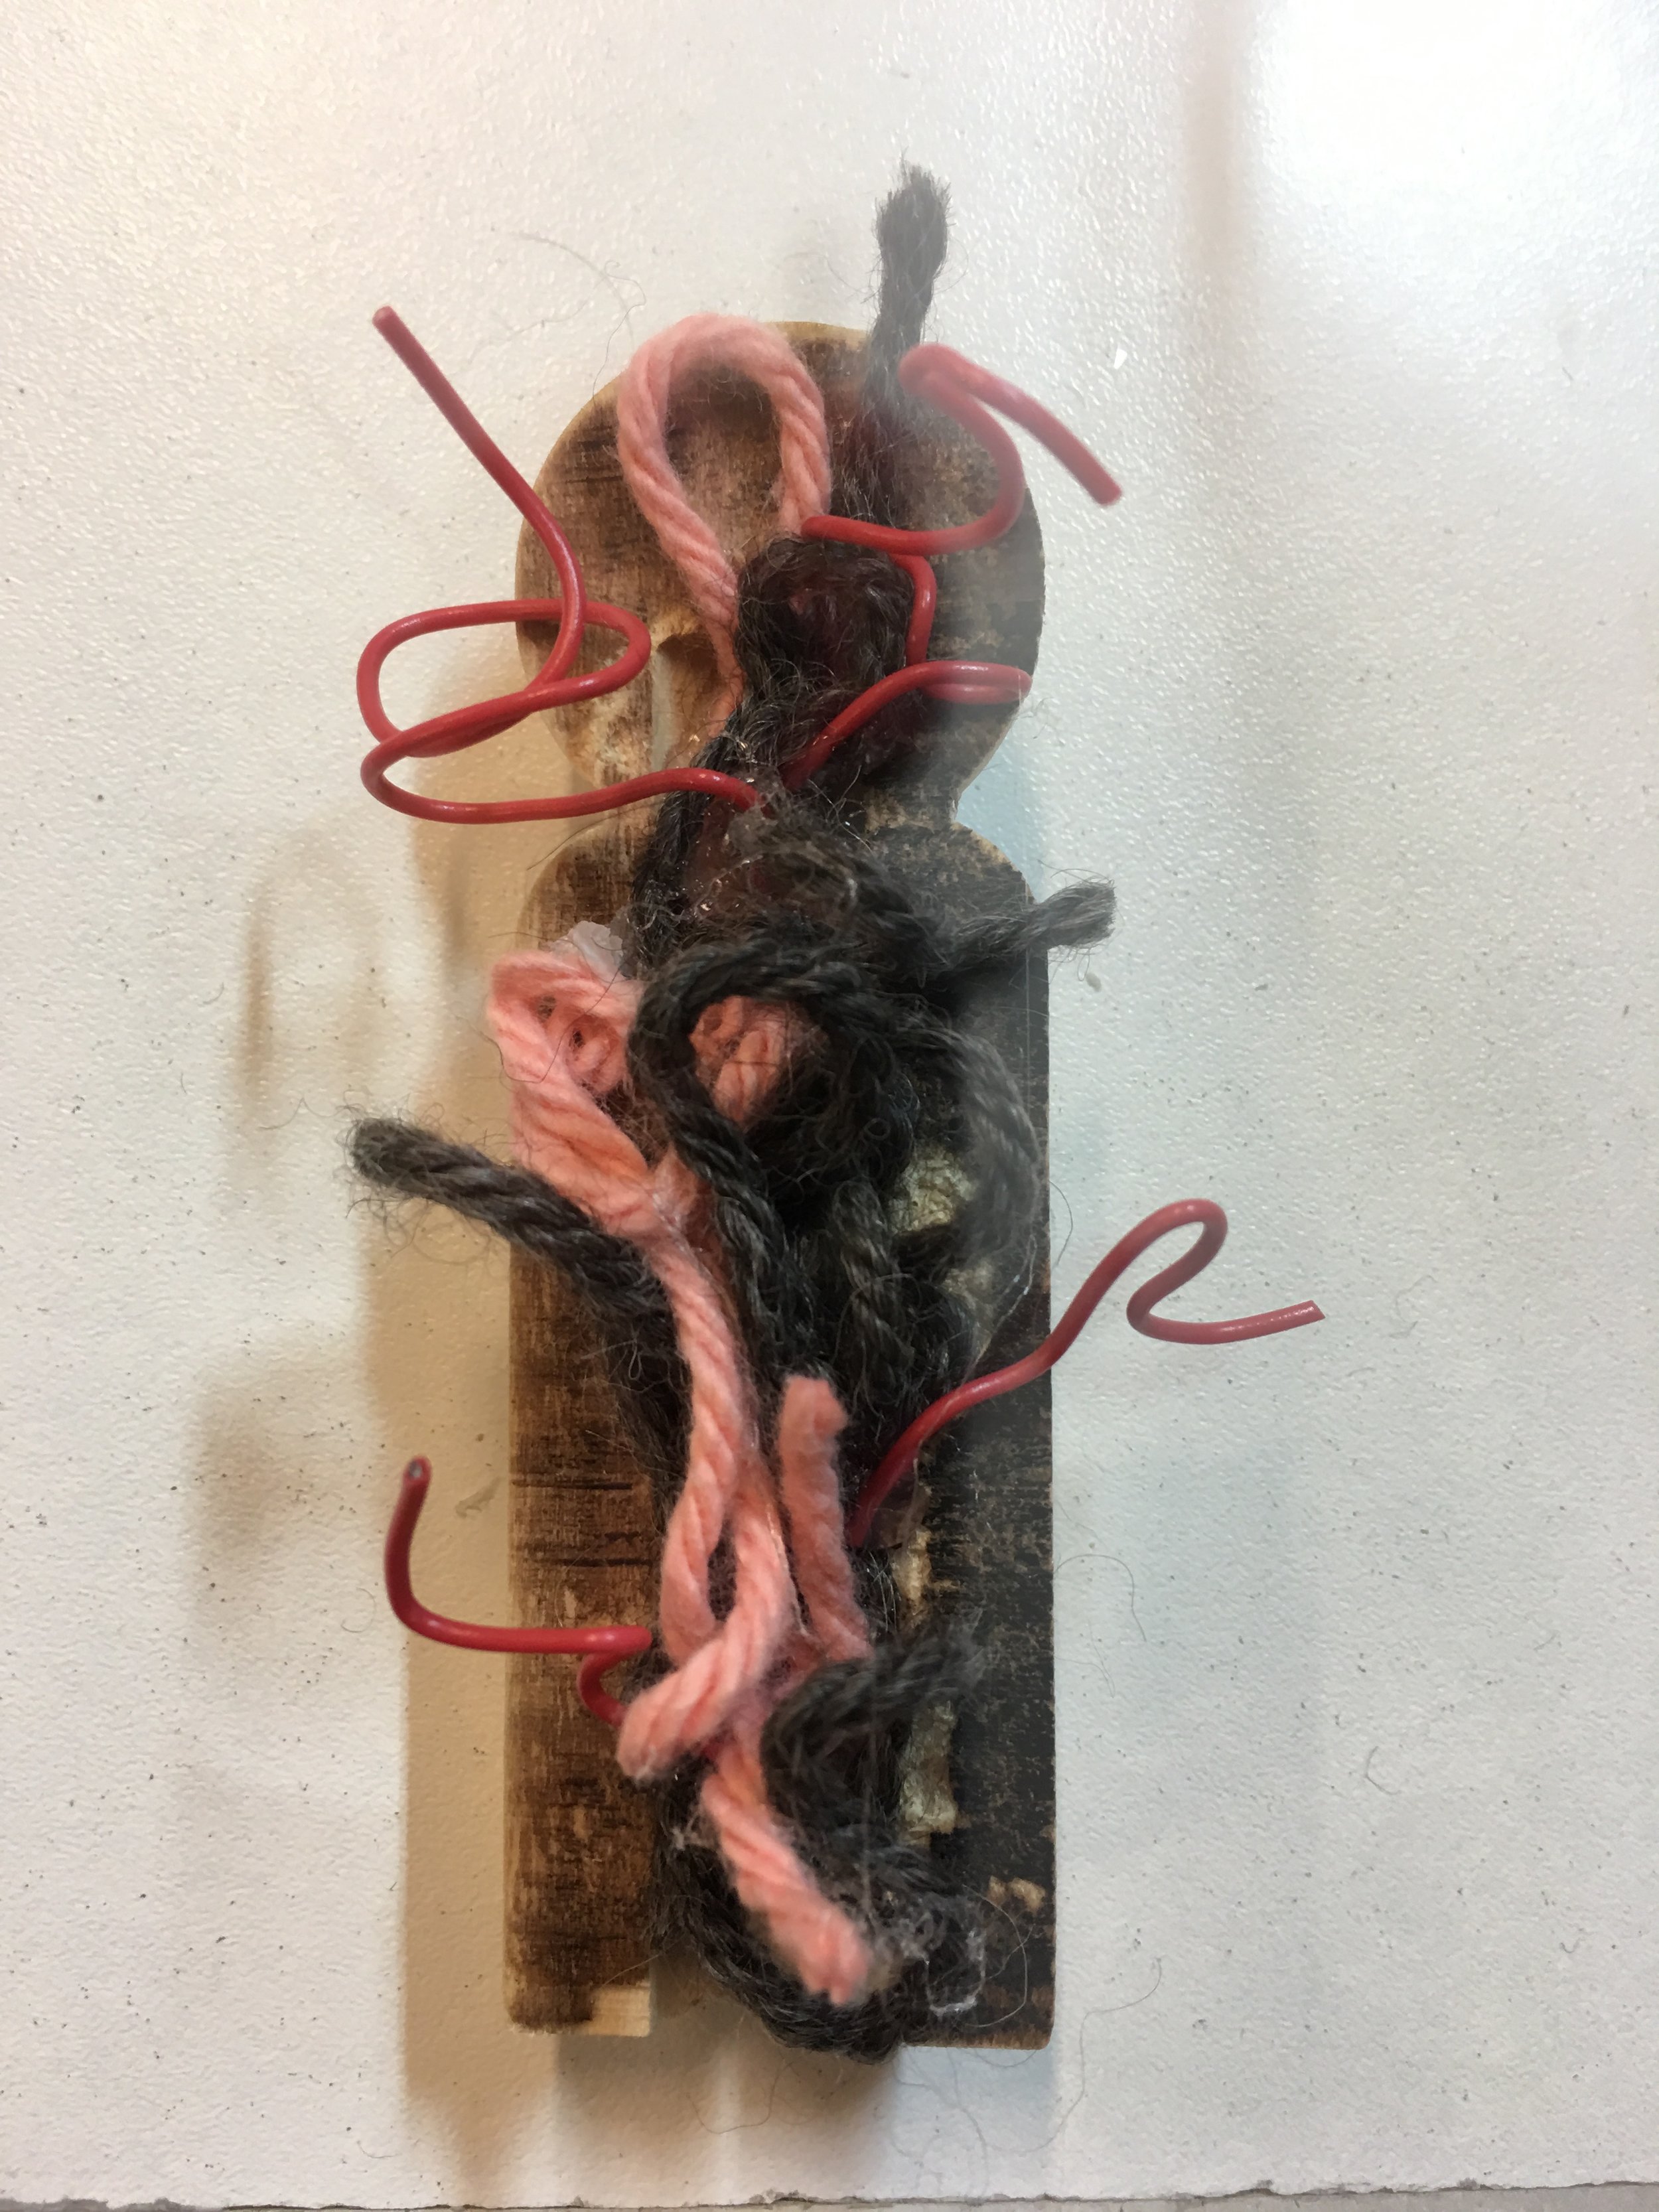
I make a hole and cut a head, why not cutting in half?
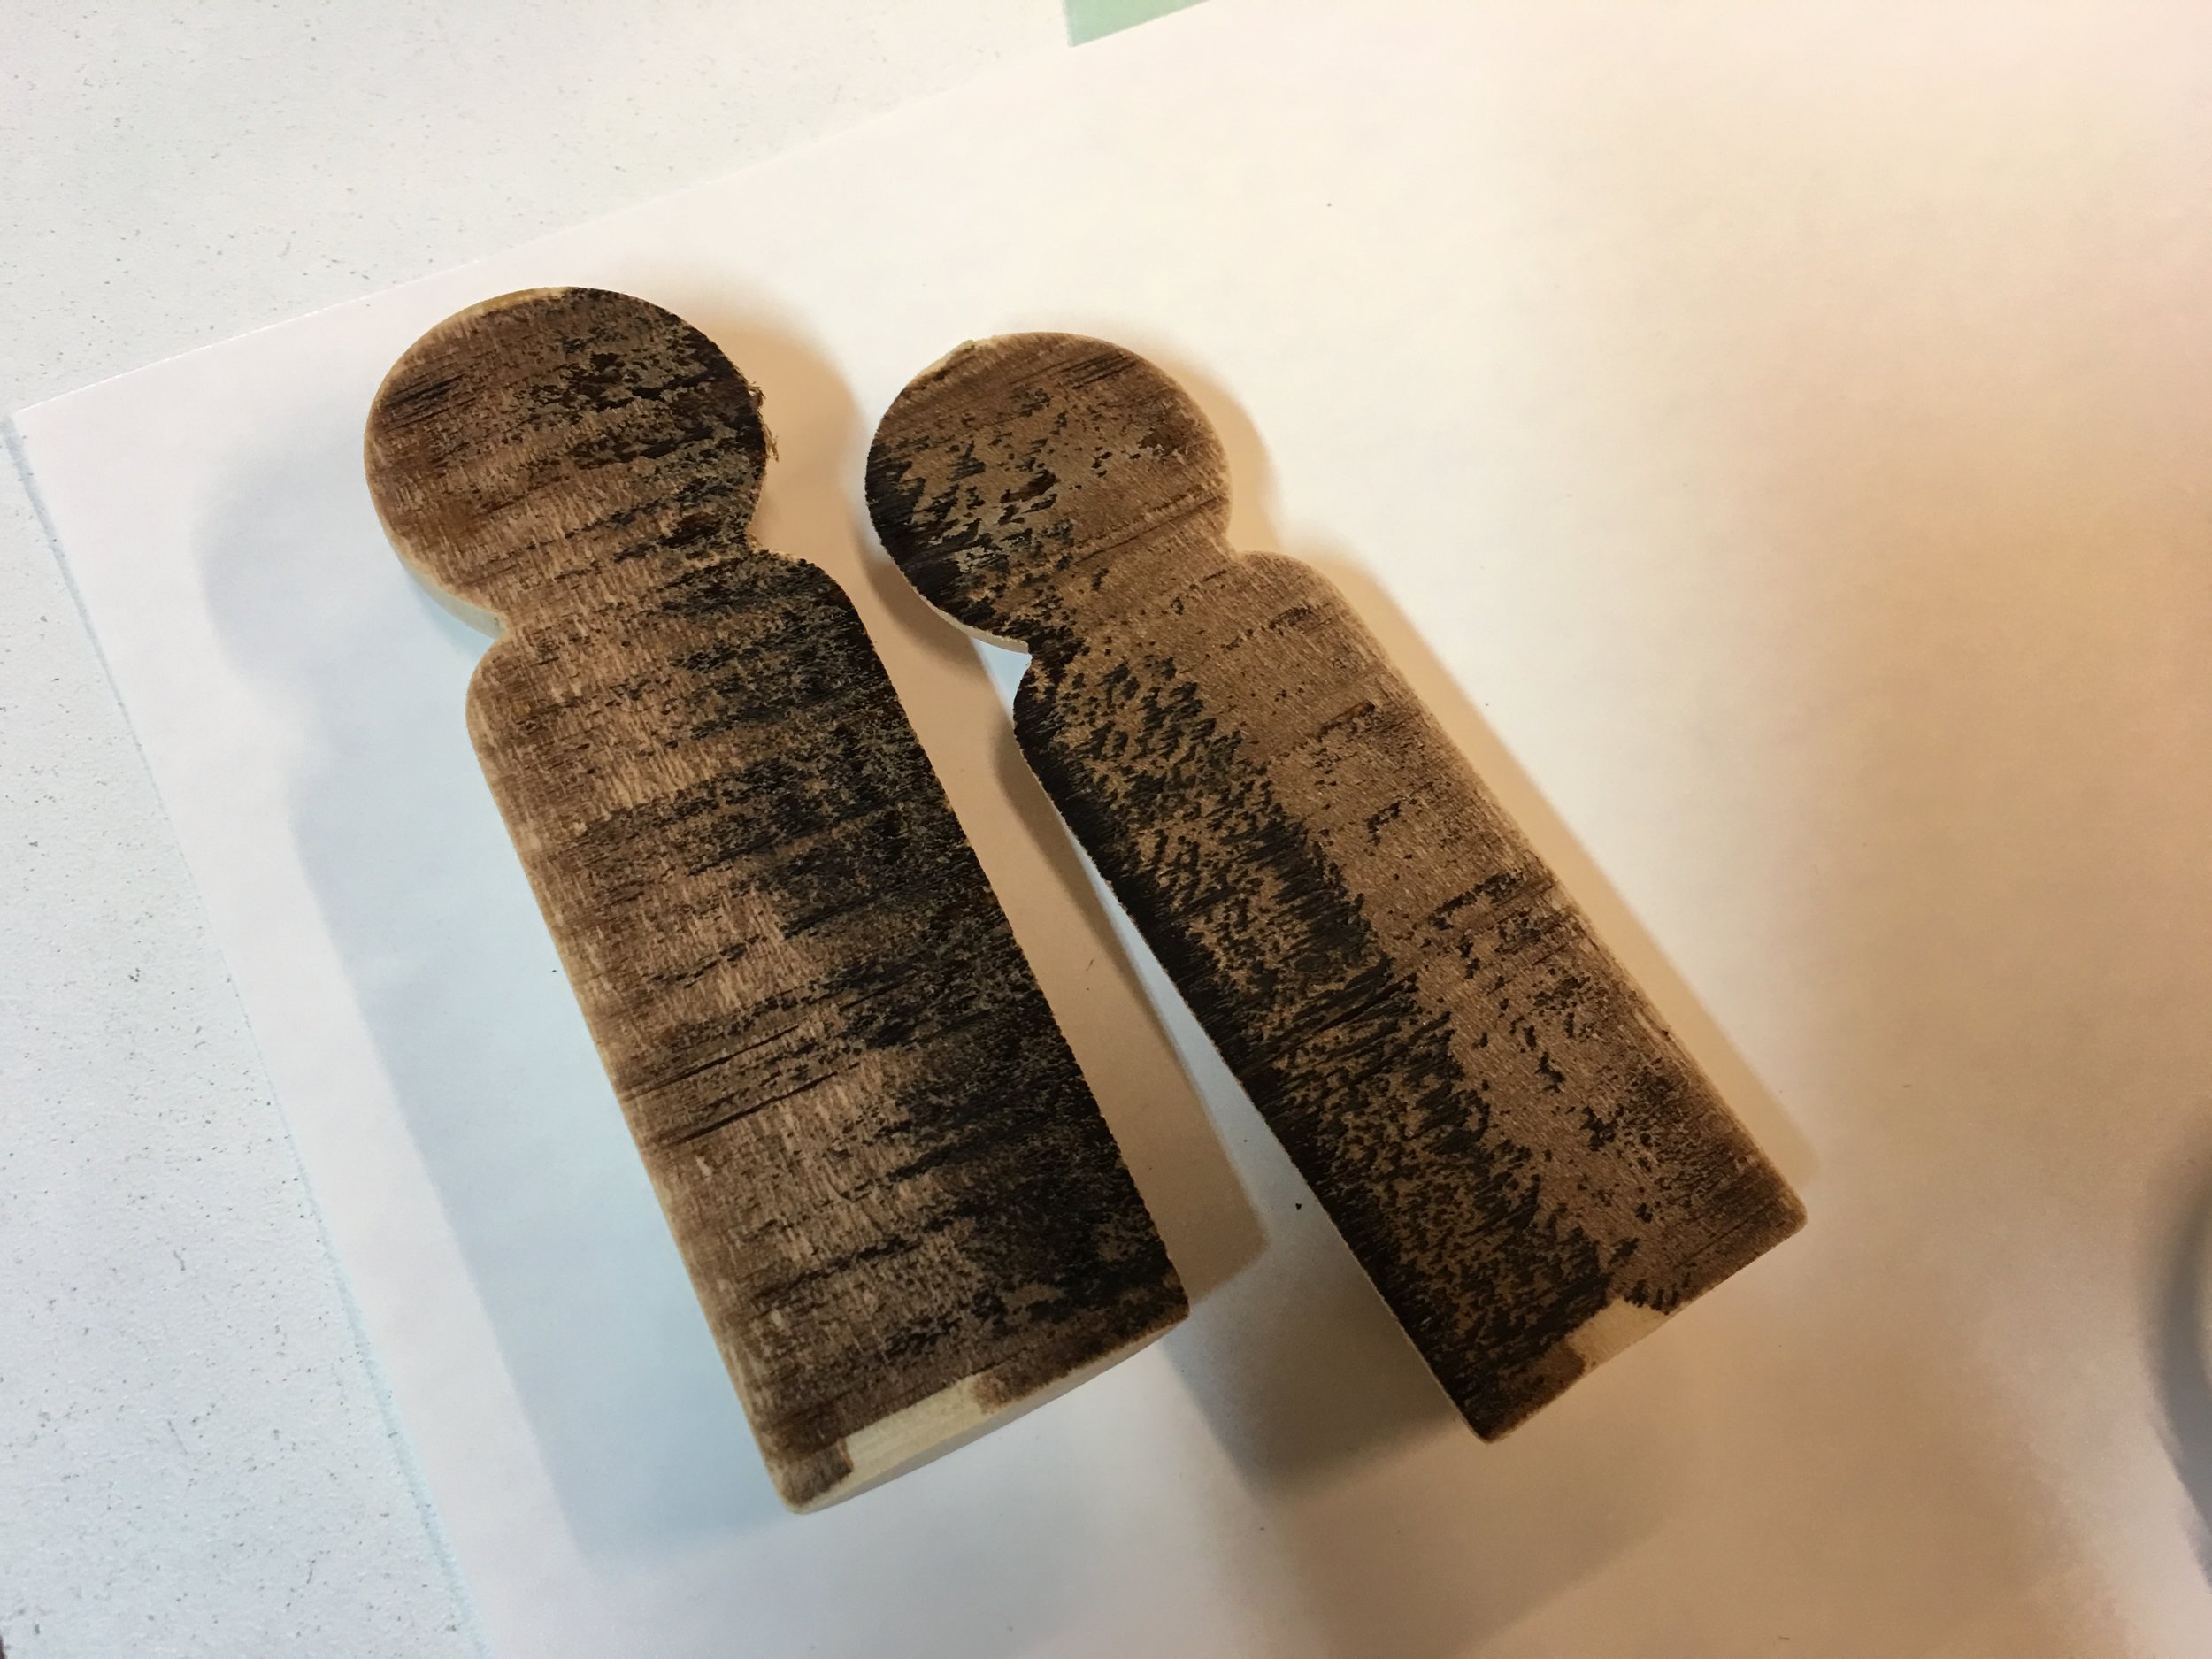
So just did it. Originally wanted to draw intestines on the surface but was recommended dig the flat surface and put some thread or yarn to add texture to the peg. (Also it is easier than drawing.)
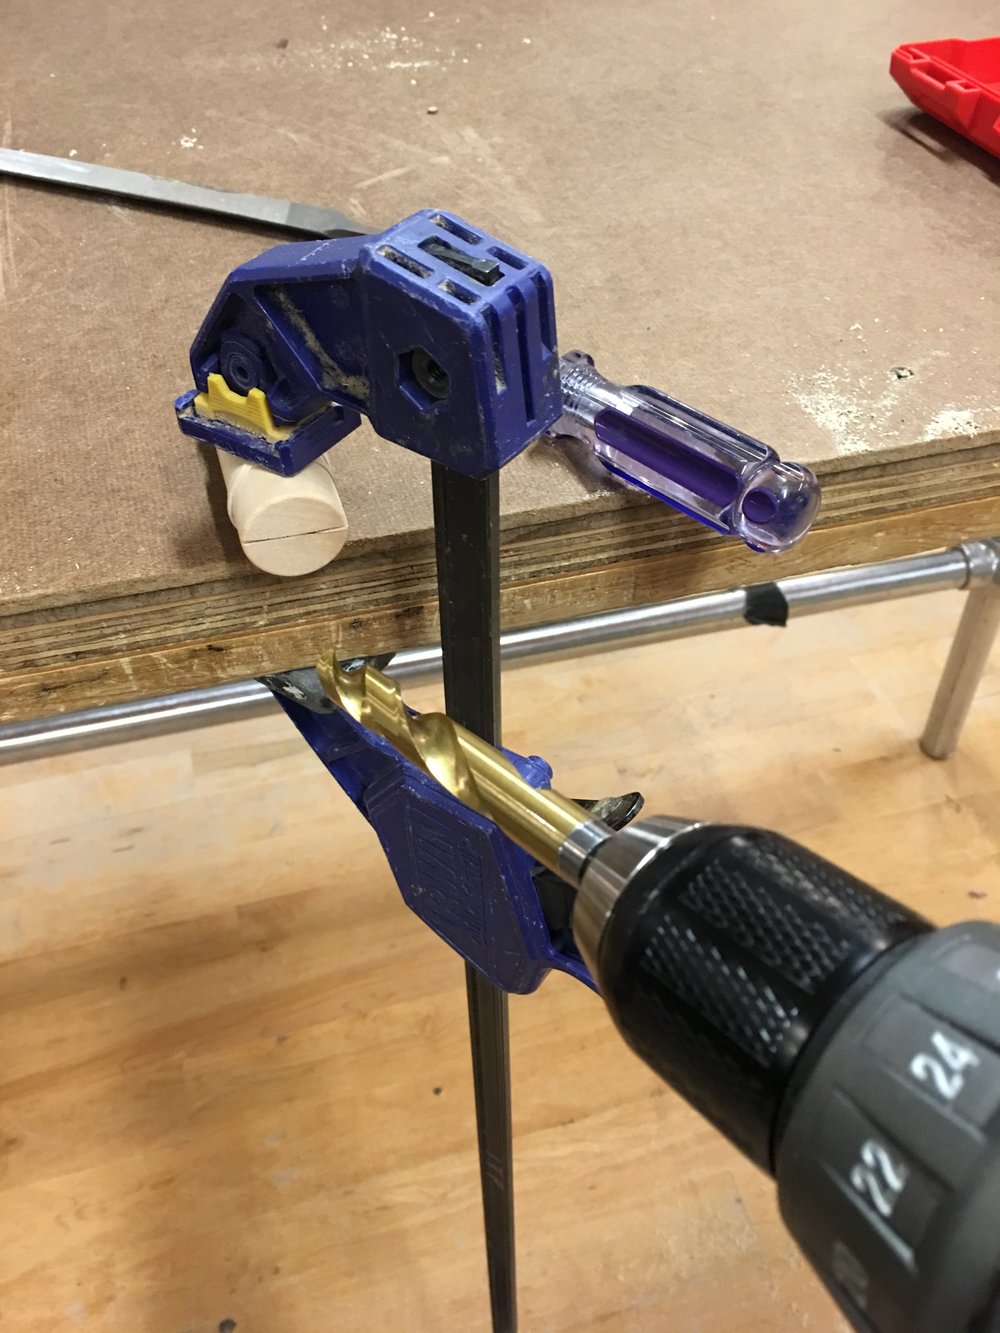
I tried to dig the surface. I didn’t have gravers but we had drop-drill(don’t remember the name). I needed to tie the halves with a rubber band and make a hole between them. I should have drilled a hole first and cut in half later.
I had a acrylic mirror sheet. My plan was to let people see the intestines through the mirror. I measured the size of the peg, and cut the acrylic with bandsaw, and sanded to curves.
Lastly, found yarns and wires and glues in the gut of the peg. I finished the toy by putting mirrors and the peg on the piece of wood.
Character Turnarounds
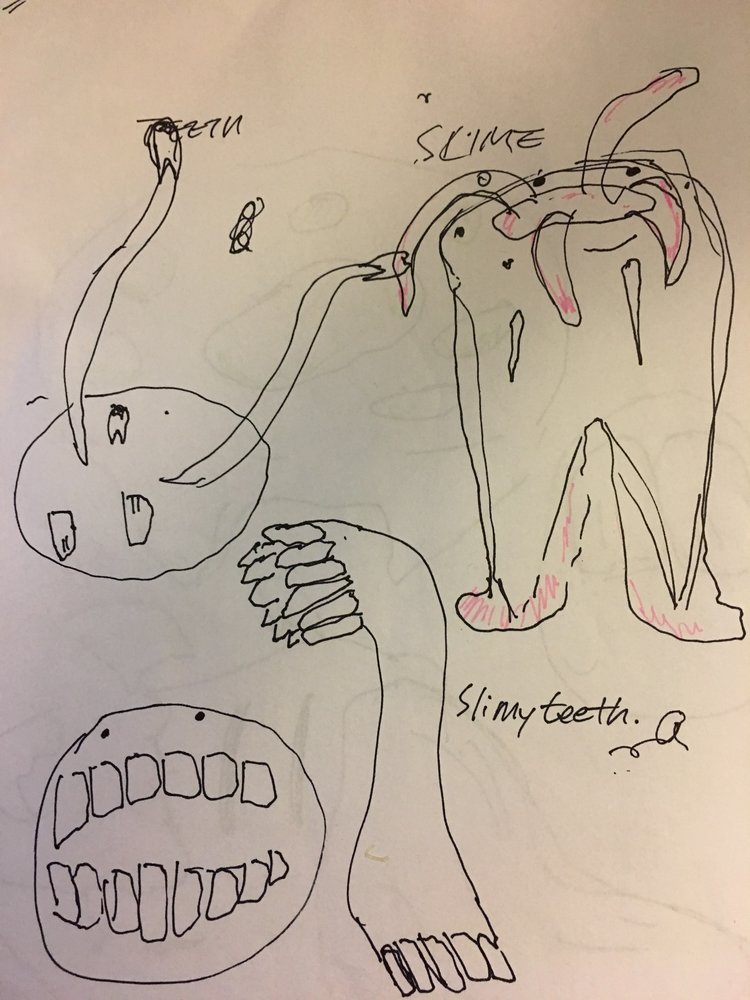
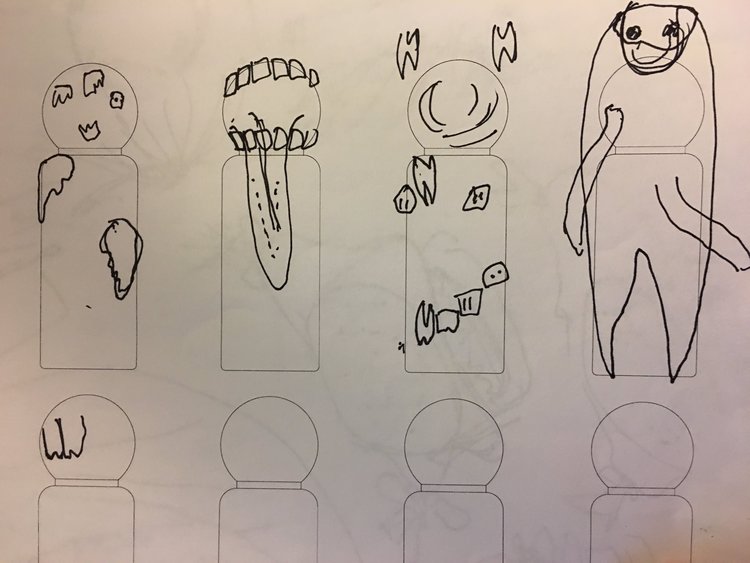
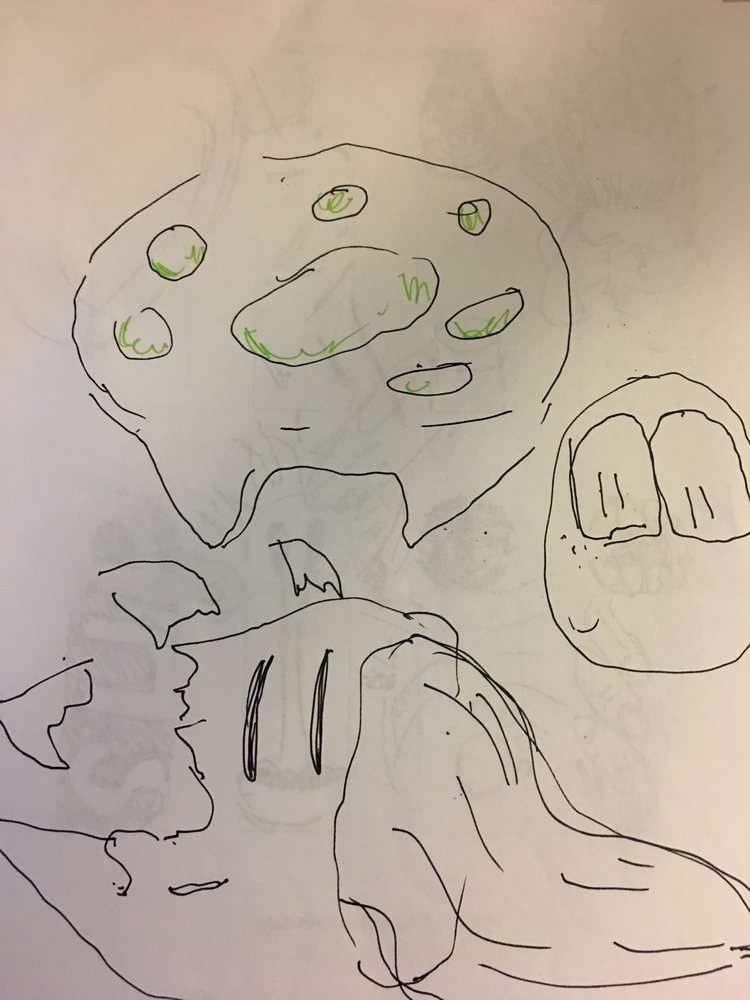
Based on them, I come up with a wisdom teeth character and drew a turnaround of it.
